In this unit’s exercises, I continued to delve deeper into the concept of fungi’s death and rebirth from the first unit. I extracted portions of fungi from existing high-resolution photos, omitting everything else except fungi. Most of the image sources were derived from Unit 1. I developed and extended my project through beautiful images found in Merlin Sheldrake’s book “Entangled Life”. I used drawing to show what is left after removing the cluttered background and to zoom in on the smallest things in my work to explore the life form of the fungus itself. On the other hand, I am also exploring my ability to draw, both in etching and lithography, while at the same time exploring the same subject matter in a slightly more abstract or free-form style, as well as exploring the scale of the image. In this unit, I particularly discovered my interest in lines and the direction of line forms. I embodied these lines in my images by making them entangled. The entanglement part is an important presence in my images, as Merlin Sheldrake conveys the idea that life grows and connects through entanglement.
- etching Practice -
Use etchings to explore mystery and depictions of images.
上一页
下一页
Reference
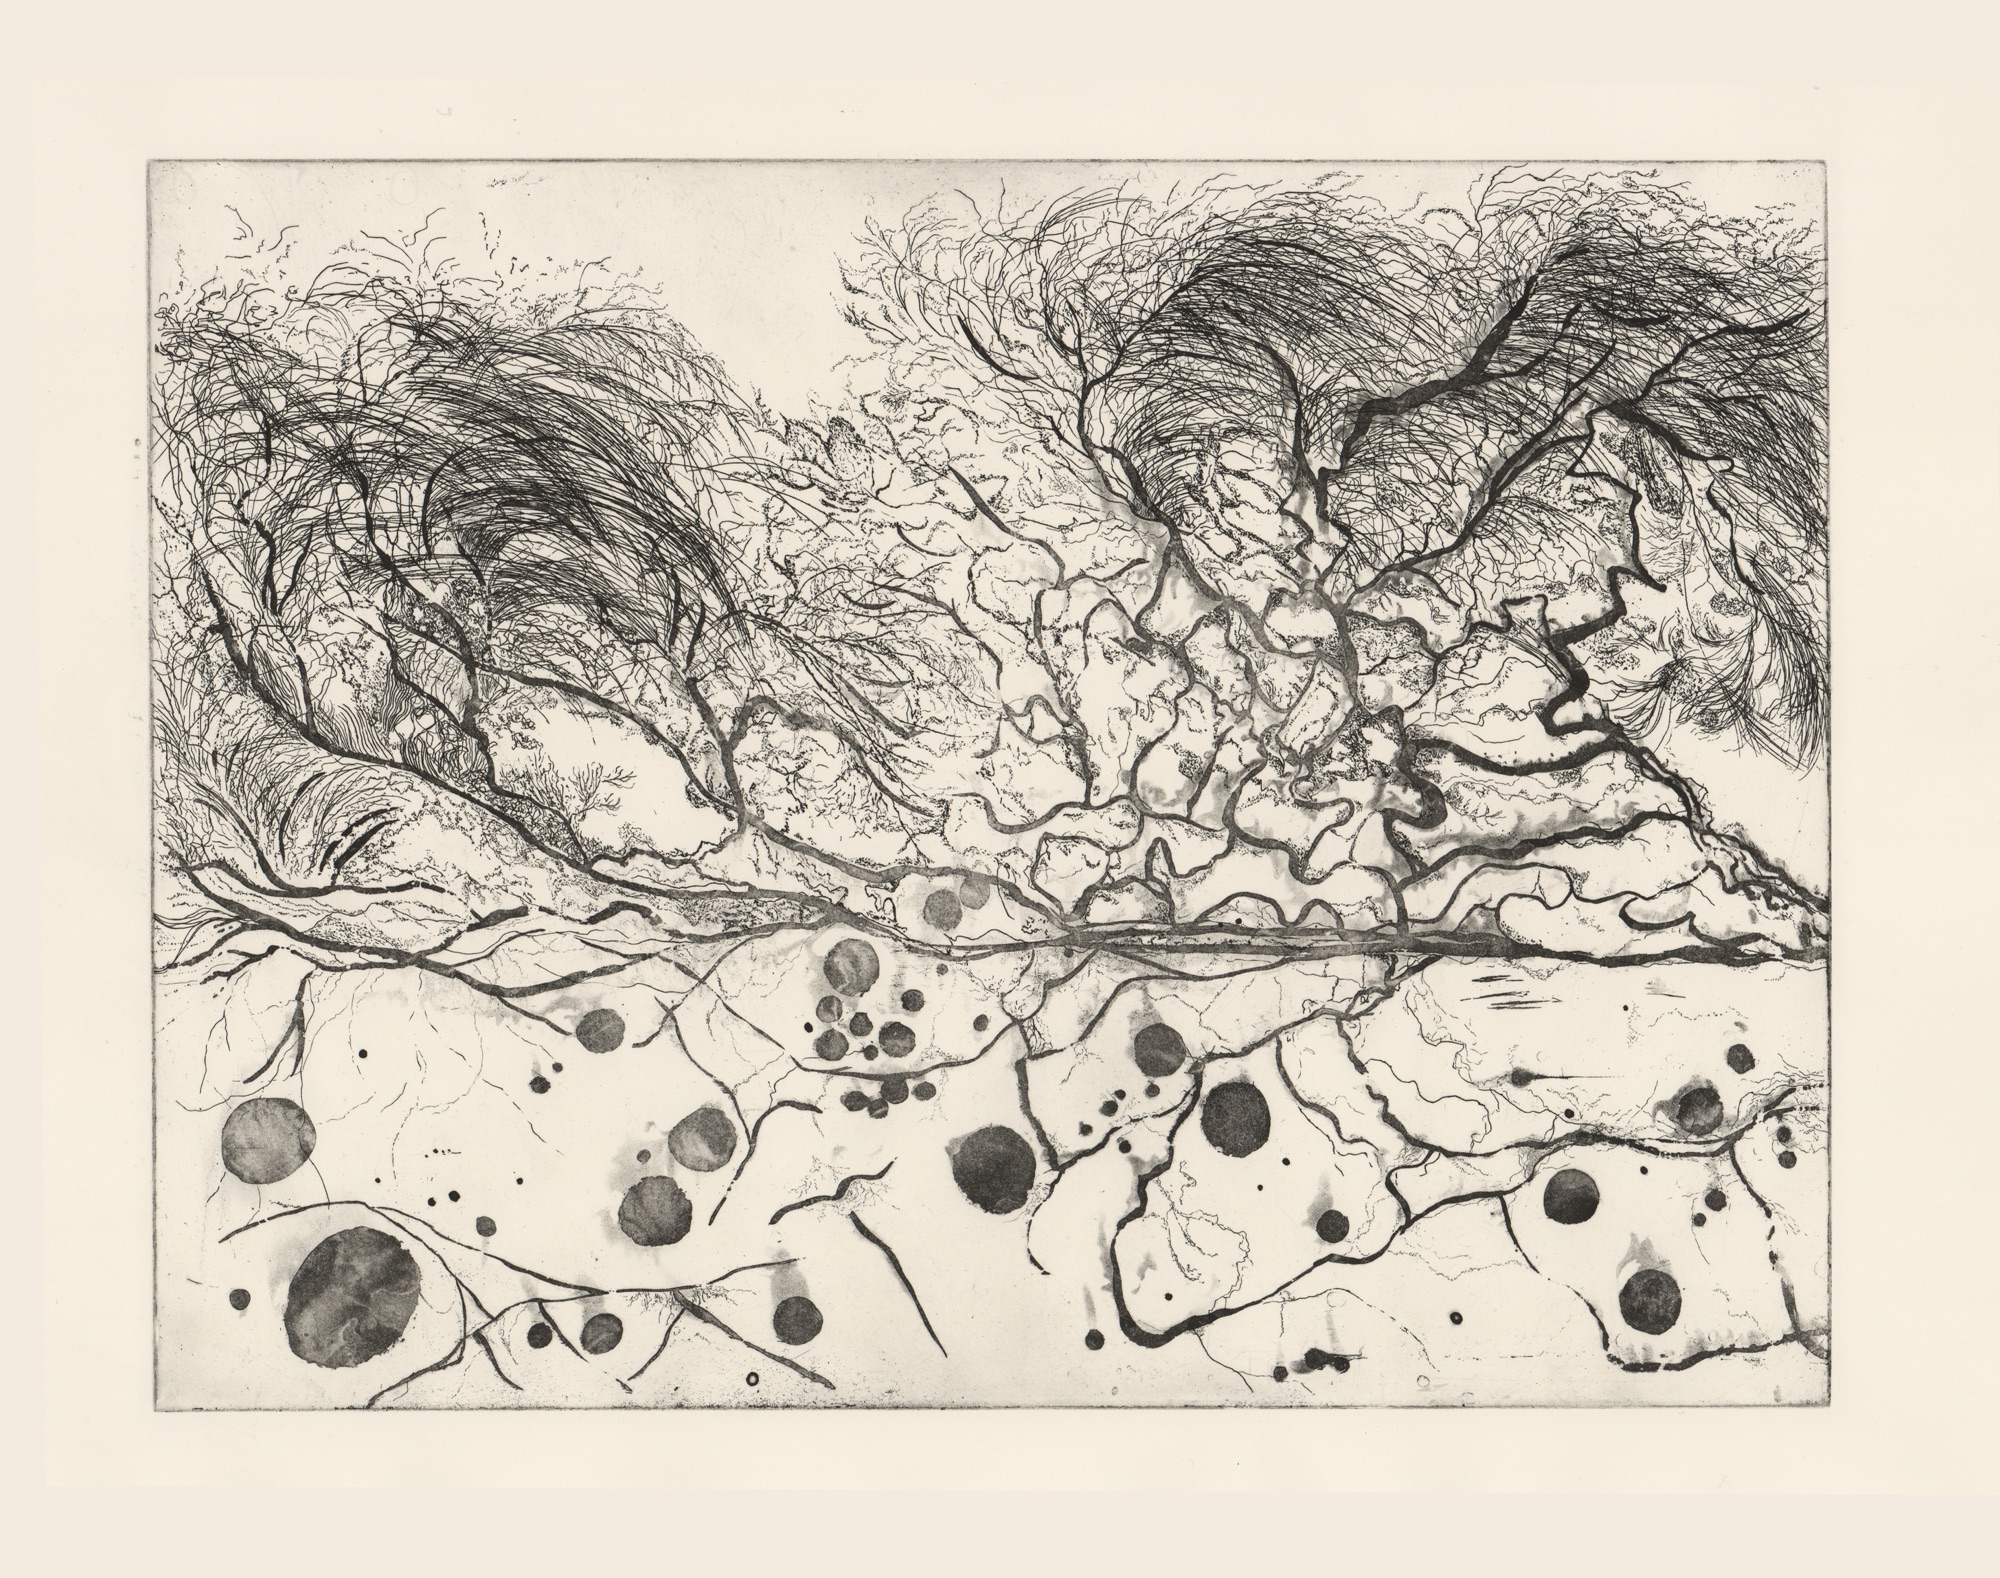
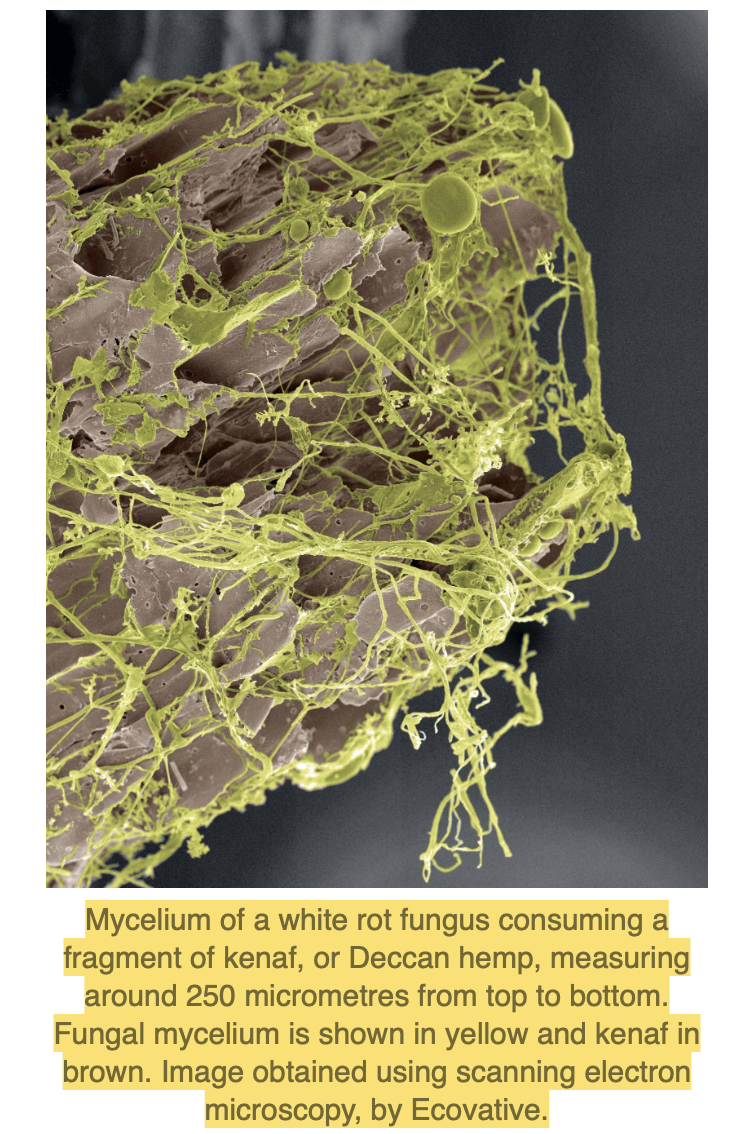
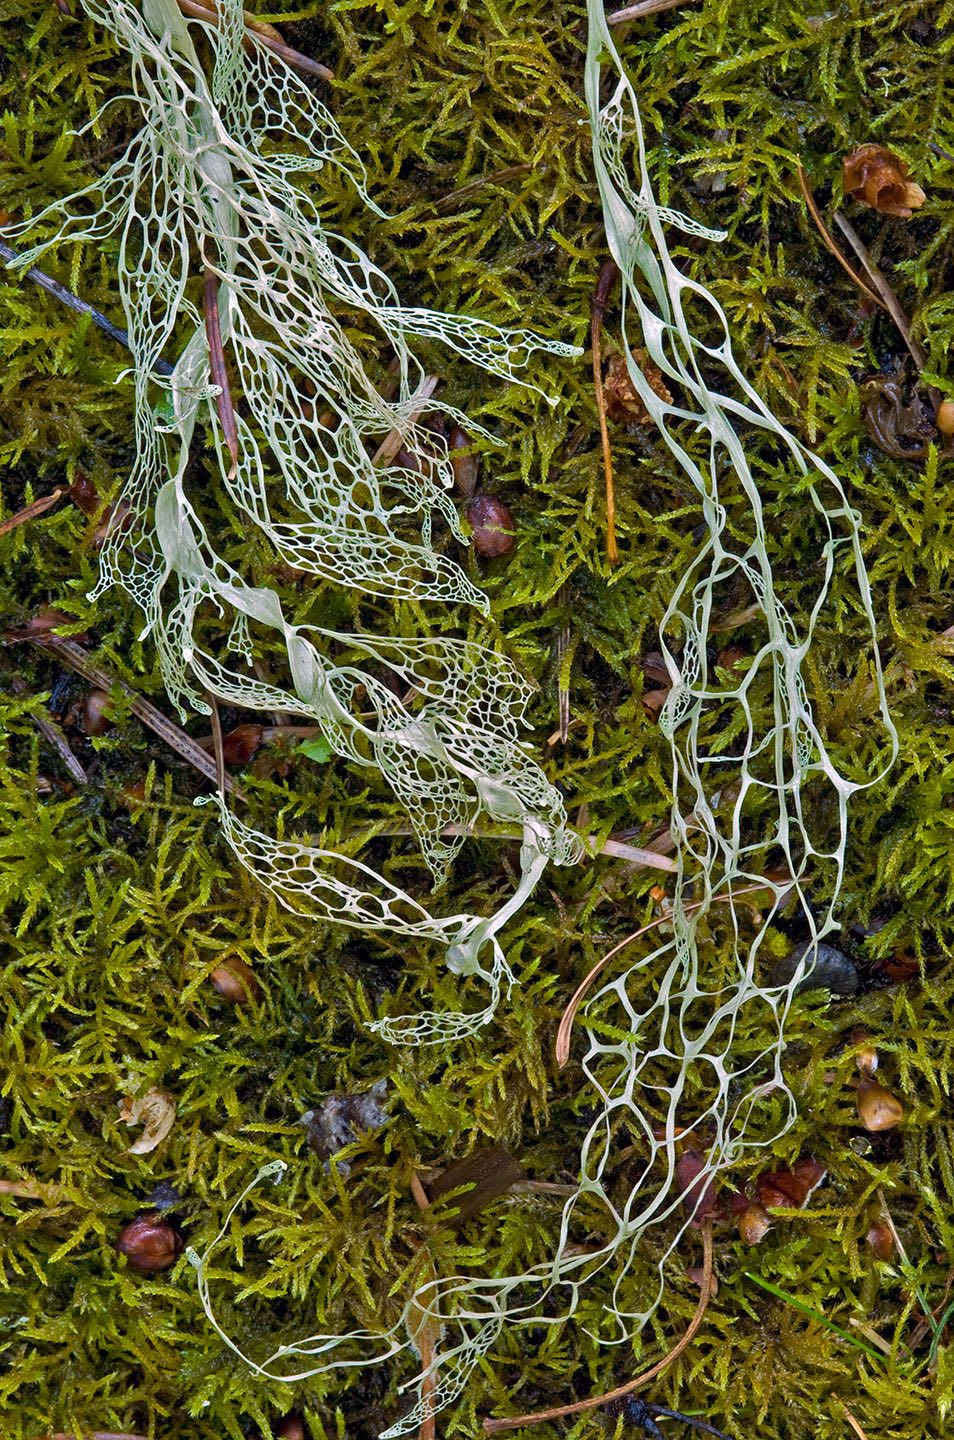
For this part of the etching exercise I chose this image of mycelium exploring a log, the image is from Merlin Sheldrake’s book Entangled Life. I chose this image because I found the similarity between the mycelium and the growth form of a tree branch when observed up close, and the entanglement of their forms interesting to me. The decaying log is like the soil from which the life grows. In this image, the mycelium and the log each occupy half of the image, like two worlds but at the same time dependent on each other.
The reason I chose to develop etching was that after analysing the image I found that the subtlety and complexity of the mycelium in the image were better represented through etching, which uses needles, rather than drawing directly on the stone lithograph. After analysing the image with Brian we decided to use a copper plate for the sugar lift to draw the ‘branches’ of the mycelium and then to use a hard ground to draw the delicate and intricate fine lines with the needle. The mushroom in the log was also drawn with sugar lift and spite bite. The log part was created with another plat of the same size. But later on, the actual operation was slightly different from what was initially planned.
Process and Experimentation:
Drawing with Sugar Lift.
After drawing Sugar Lift put varnish on top.
Poured boiling water over the tray and shook to get the sugar lift off. After the plate was aquatint and then etching it probably took about 10 minutes.
This step was a spit bite aquatint, the difference between what I’ve done in the past and what I’ve done in the past is that this time the spit bite was done on a wet plate and it took about 20 minutes. Spray the copper plate and then use a brush dipped in Ferric solution and spot to the copper plate. I love the effect of spit bite on a wet plate. It has a flowing feel like watercolour and is full of uncertainty. I will continue to experiment with using just spit bite on the plate.
From this step on, it was time to work on the detailing part of using the needle, and Brian shared with me a method of line etching. He showed me his own work and the timing of the etching test strips and told me that I could draw and etch the lines from darkest to lightest.
I needed to etch the whole plate every time I finished a part of it, so the lines at the beginning would be the darkest. Our original plan was to etch for an hour, with 6 etchings of 10 minutes each, but in the end, we changed the time to 4 etchings of 20 minutes each. After ten minutes, I need to take it out and wash it with water before continuing the etching for another ten minutes.
Put on HARD GROUND.
Use a needle to start drawing lines.
The effect of etching lines under the magnifying glass.
The last layer of drawing, in the process of drawing can be felt not as smooth as the first layer of drawing. When drawing intersecting lines, I can feel the hindrance from the previous etched lines.
After cleaning the hard ground copper plate.
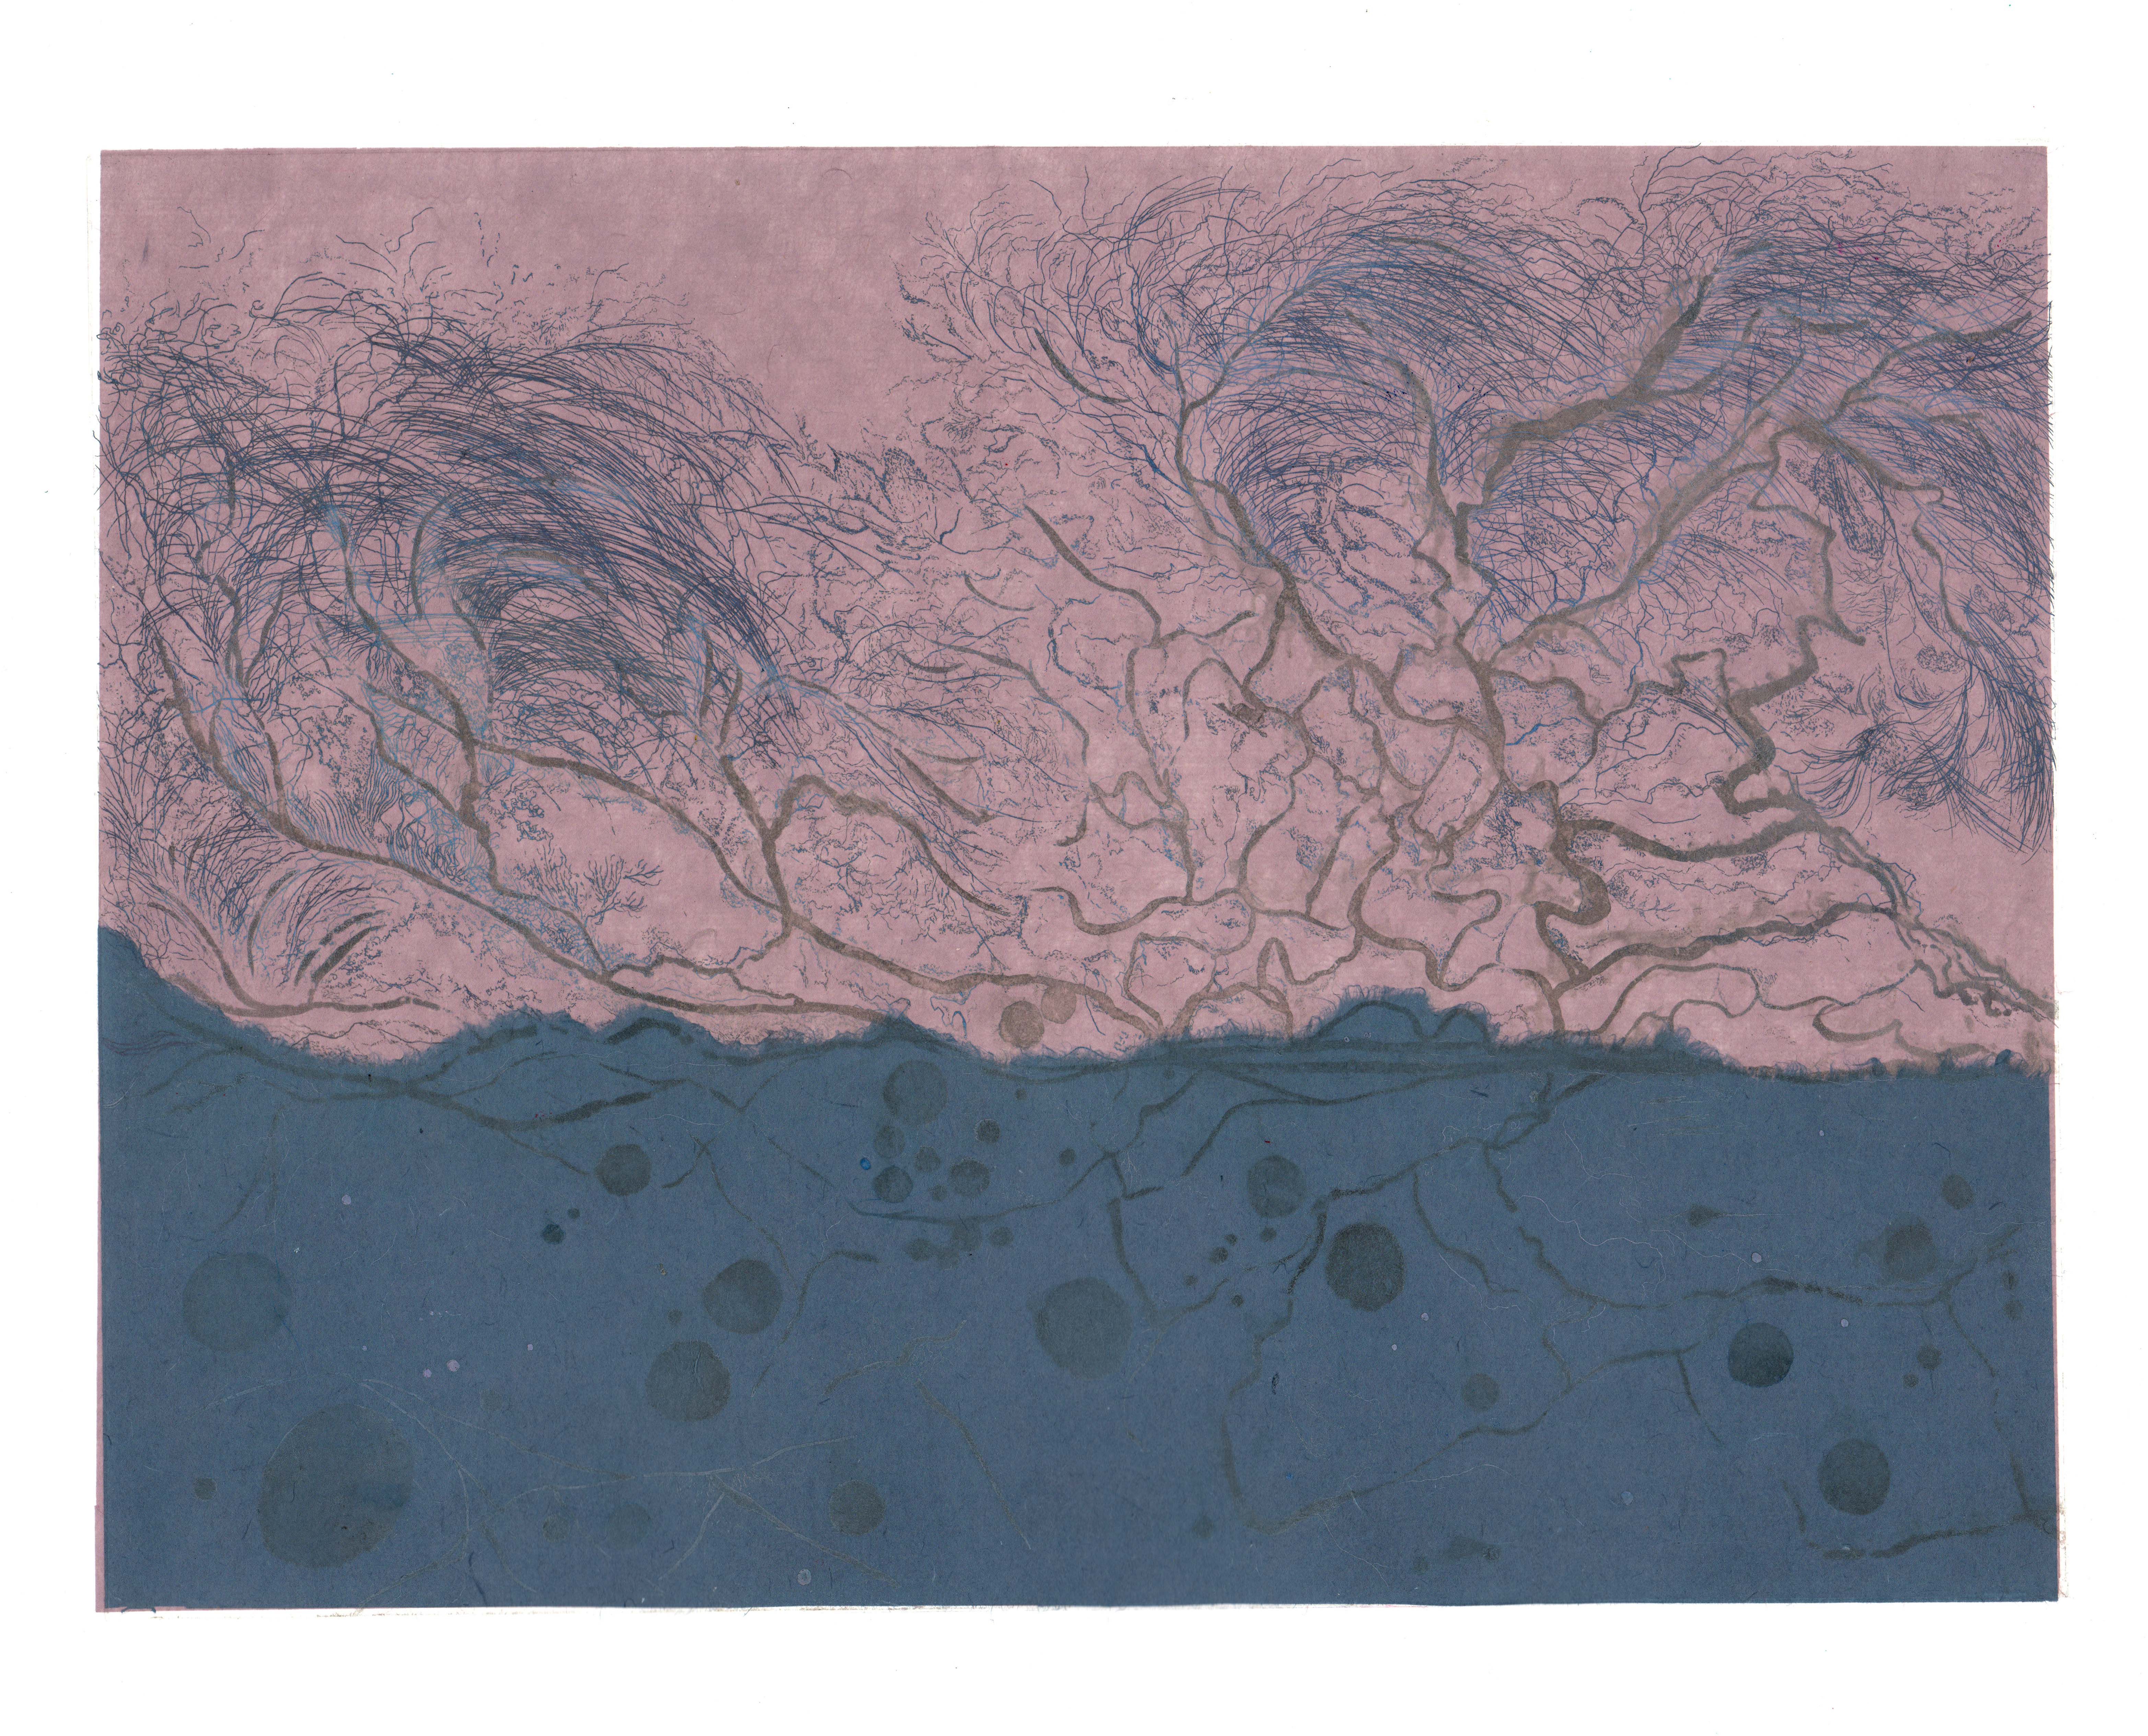
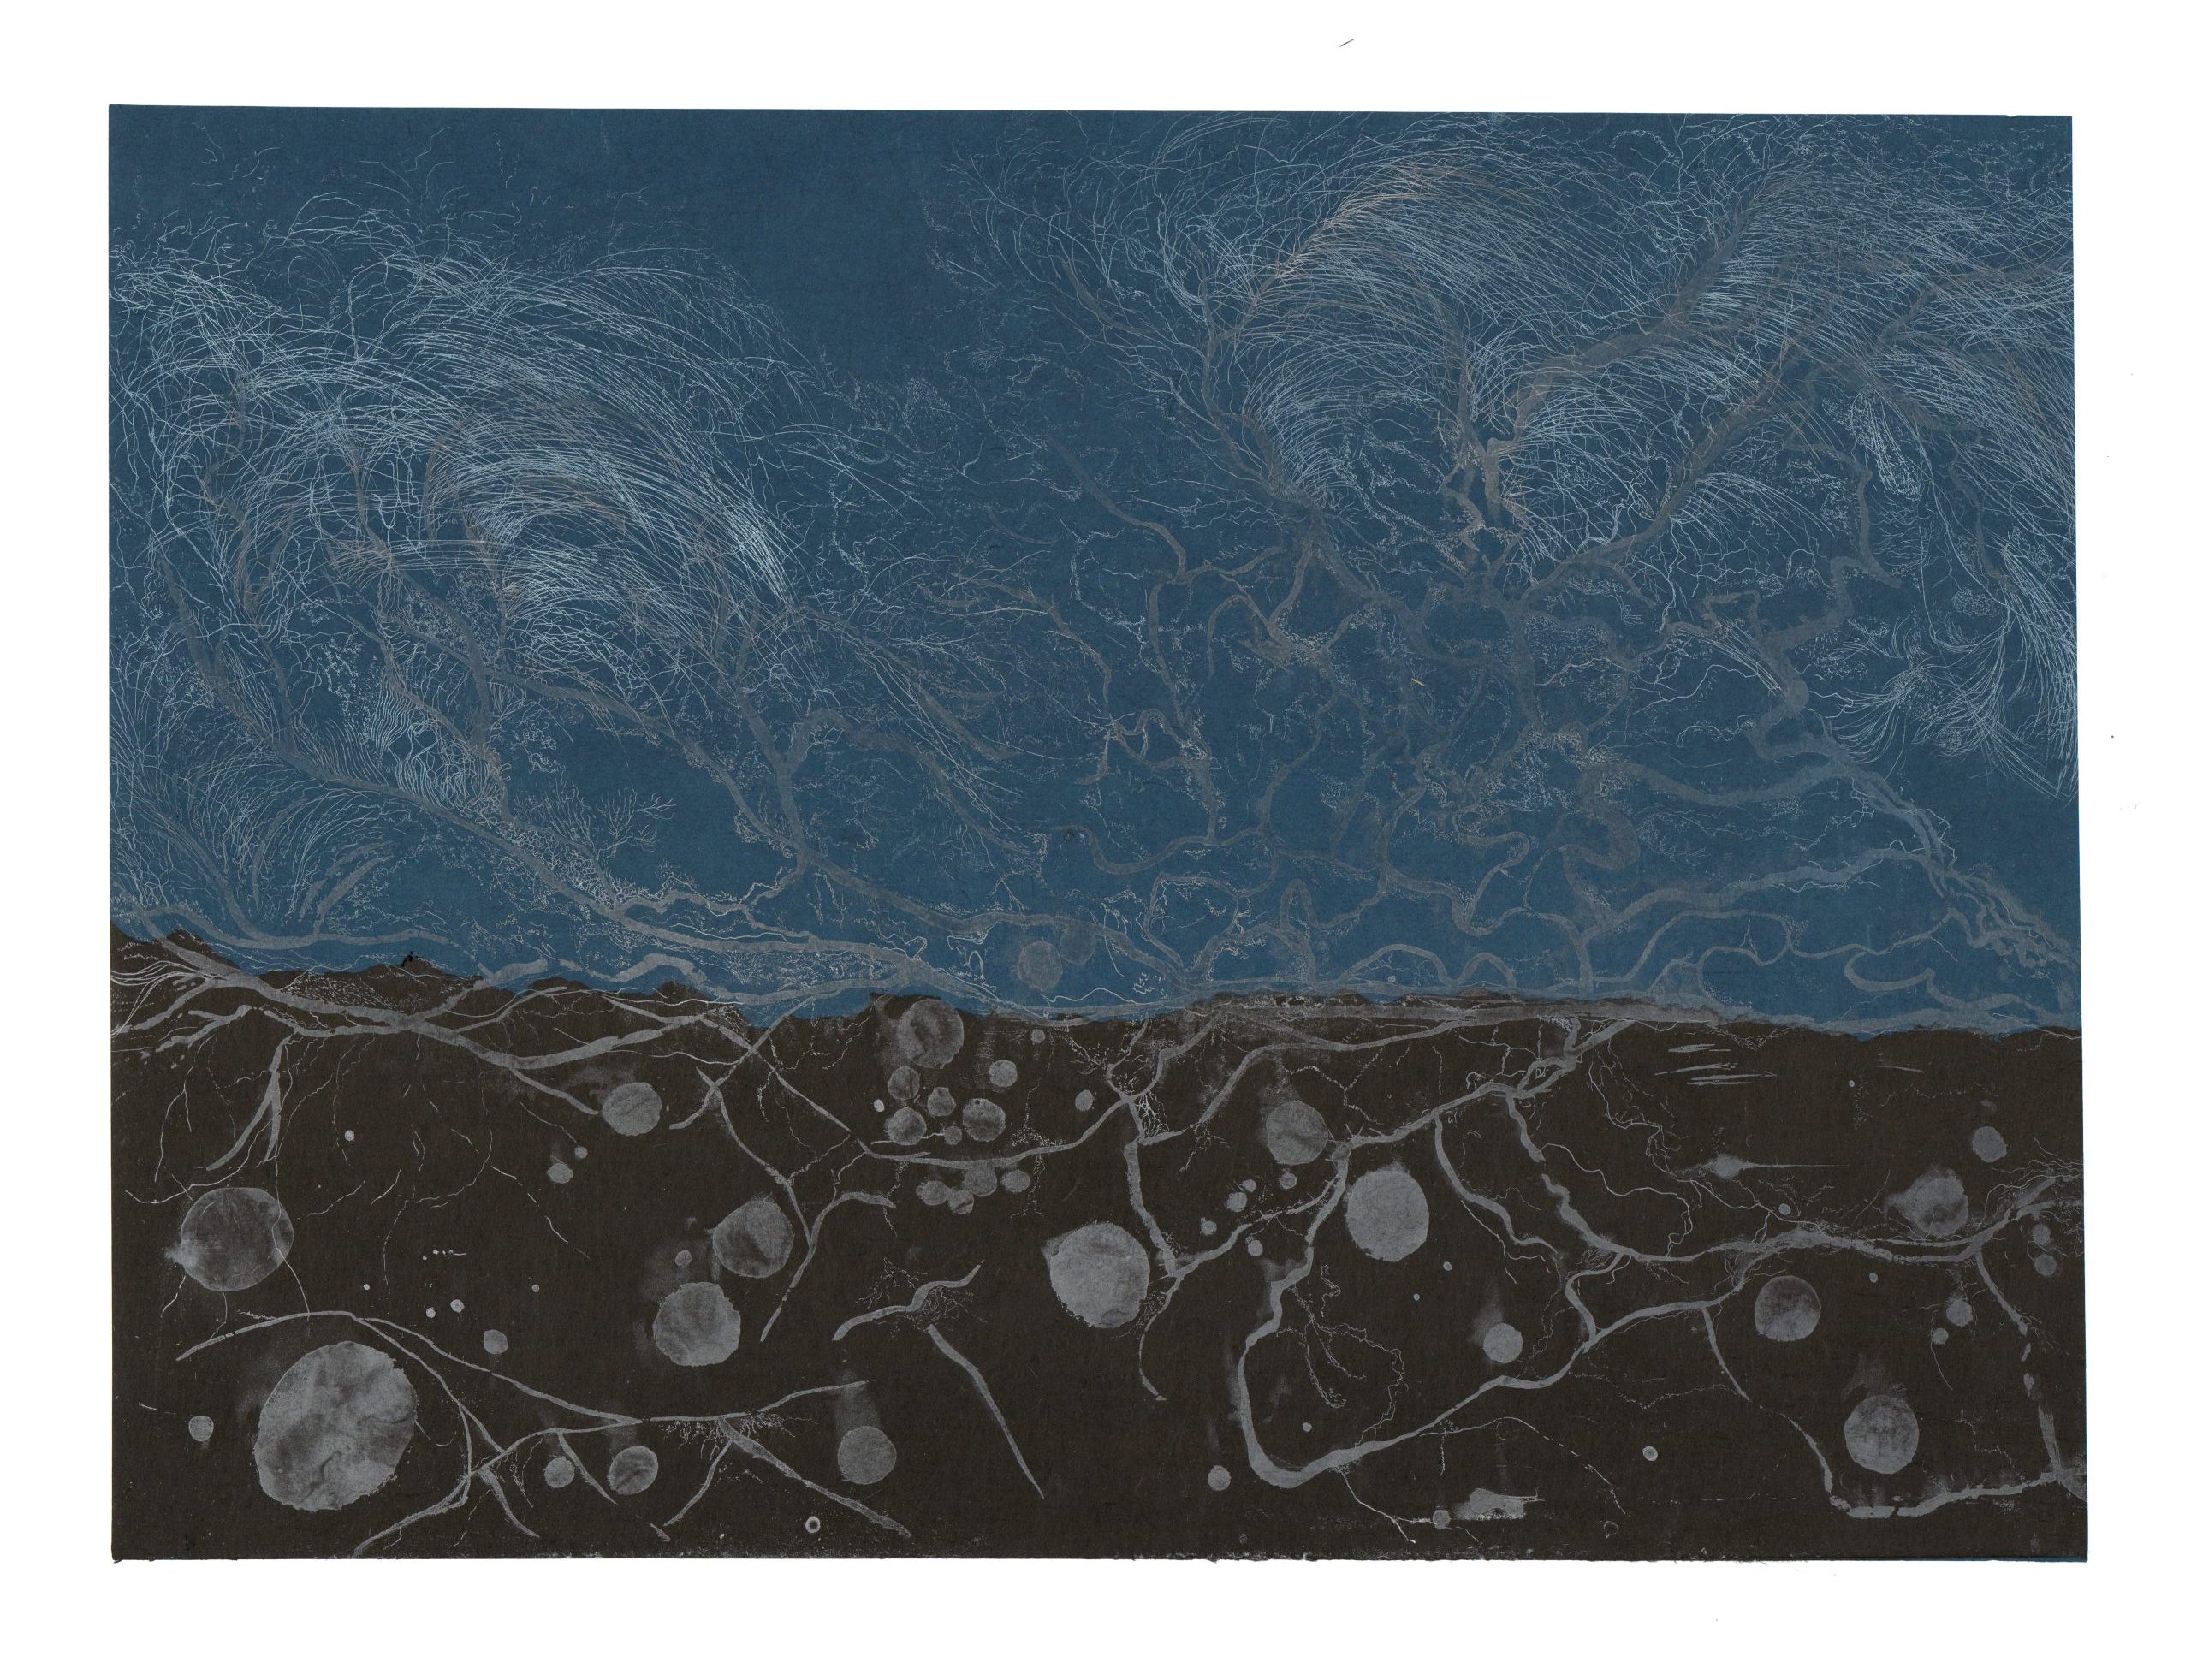
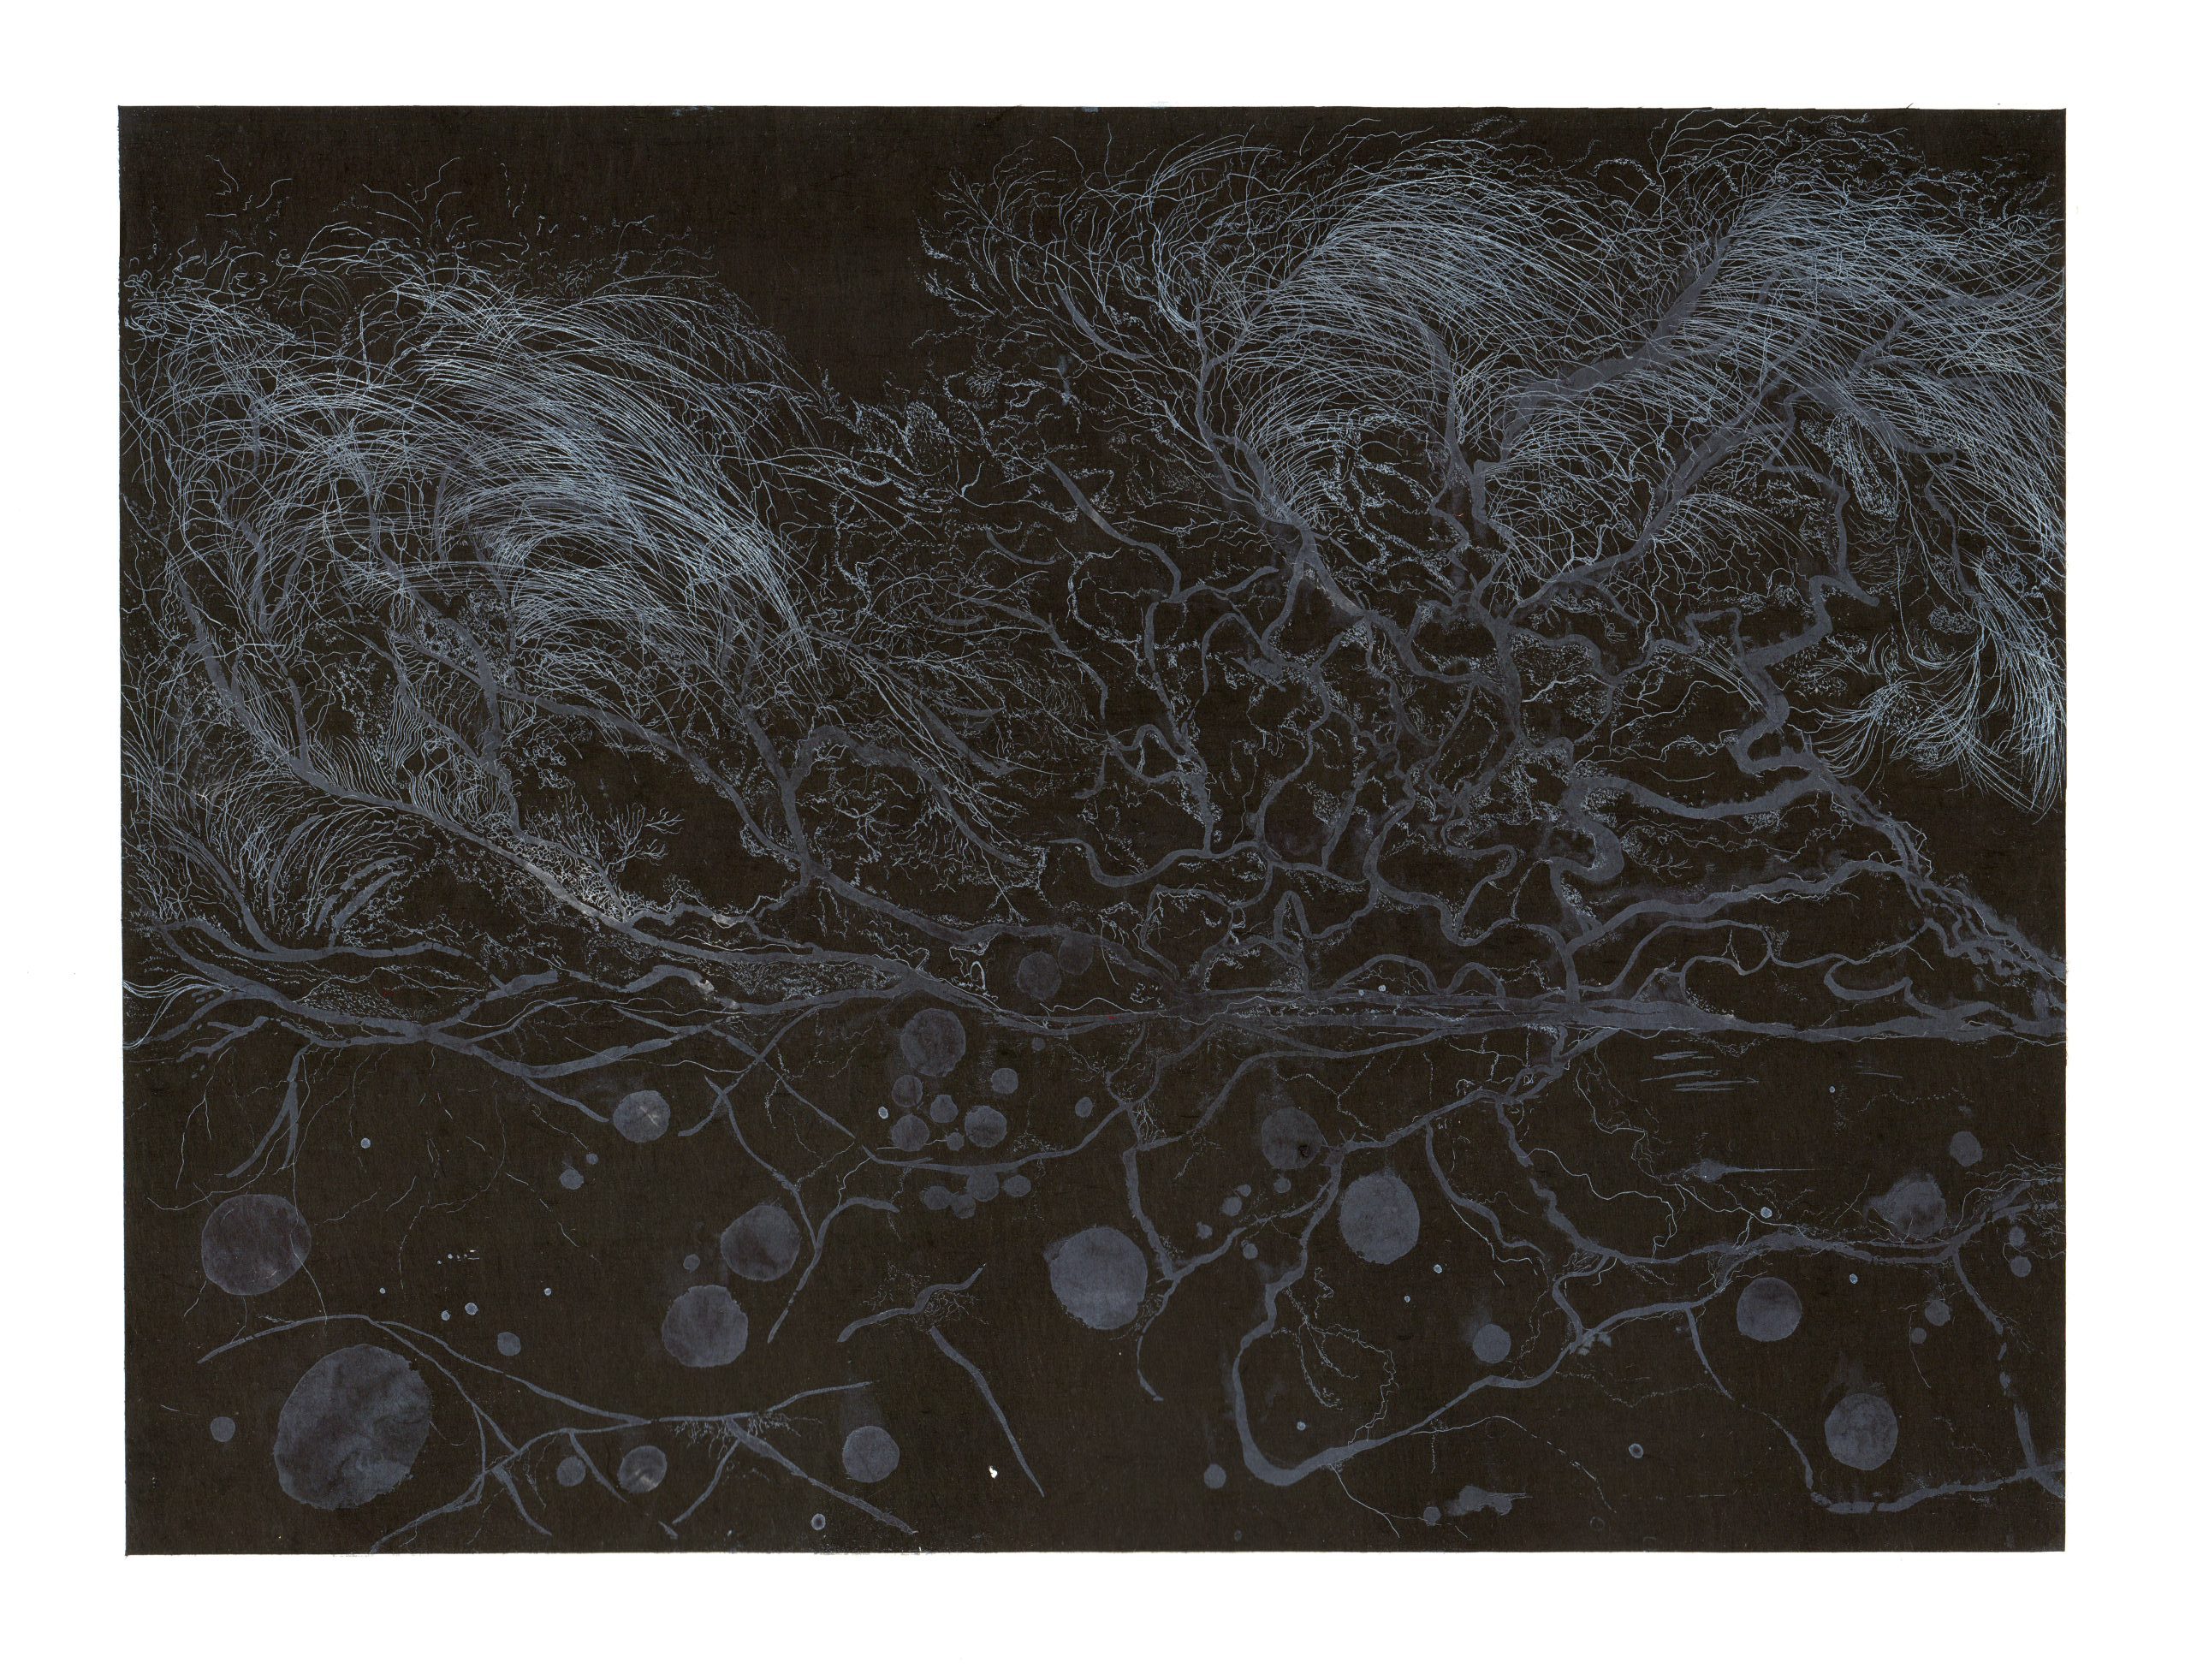
After printing the image onto paper, Brian and I analysed how the image could develop. Looking back at my work Mushrooms at Night from Unit 1, it gave a sense of mystery, so I wanted to continue this feeling by replacing the black ink with white and printing it on black paper, Brian gave me the advice to buy black somerset paper and I replaced the paper with Korean paper for the Chine Collé.
Because when I went to research the paper I found that Chine Collé would have more possibilities than printing it in somerset, for example in the choice of colours and the combination.
First print on paper
Development:
I bought different colours of Korean paper and tried printing on pure black paper and colour blocking respectively.
The glue used is YAMATO sticking paste.
Use the card to spread the sticking paste smoothly and evenly onto the Korean paper.
Printed on pure black Korean paper. Because I added some silver to my paints, the print came out beautifully with a light blue colour in the sunlight.
The collage is printed in two colours, using a hand-tear method to blend the shapes into the image. This brings the collage closer to the NATURE effect.
Detail
Different versions of Chine Collé’s prints:
上一页
下一页
Through my Chine Collé etching work, I realised that in my images, because I had made the mushroom part of the abstract into a circle, printed on white ink on black Korean paper it seems that the bottom part of the image is a starry sky and the Milky Way, like the universe.
Then an idea was born to me – the form of fungi in the universe.💡
Analysis:
Artist:Massimo Danielis
I saw this set of prints at the London original print fair in 2024. I immediately fell in love with those prints at that time. I love the abstraction and the colours and lines in his prints. I even saw something in his work that I could develop in my own prints. Like I said before I would like to experiment with spit bite later on, however in his prints, I see the effects I was looking for. Even the composition in the top right corner looks very similar to this print I’m working on now. In his lines, I remembered Pollock’s drip paintings.
Artist:Rachel Whiteread
In these prints by Massimo Danielis, I also see his use of Chine Collé in his prints. The difference with me is that his choice of Chine Collé colours is very pale, close to white colours.
Another Chine Collé work, when we visited the paupers press, I saw Rachel Whiteread’s photo etching. What these two artists have in common is their subtle use and choice of paper colours. I should work more on my paper choices and colour combinations.
Collagraphy experiment:
Collagraphy is an attempt to add a haptic aspect to the print by using carborundum and glue on the plate, this is just a small test of the process, I first tried using a brush to paint. In the first few attempts, the proportion of Collagraphy to glue was not right, and it took me several attempts to add more carborundum to the glue to solve the problem of sparse particles.
However, the brush I was using was too large for the plate and I found it easier to control the plate by painting with a stick. After painting it needs to be left for at least a day for the glue and carborundum to dry on the plate.
During the printing process, the carborundum is too convex, causing the paper to stick to the plate, which can destroy the paper.
After that I decided to just keep the texture without the ink, in order not to continue to hurt the paper the solution is to put tissue paper in the middle of the paper and plate, this will not hurt the paper and can also get the texture that I want.
However, this attempt didn’t go any further because I didn’t have a specific idea of how it would work with my images. The idea was suspended for now.
Front and back of paper without ink only texture.
The effect of inks and no inks on the same paper.
- Stone Lithography Practice -
The practice of lithography is an exploration of the life forms of fungi through the method of drawing.
When I finished my first stone litho I started to think about how I could develop my work deeper, I started by exploring the drawing from Unit1, turning only half of the image into a complete shape, using Photoshop to overlap them and combine them to give a mysterious glowing image of the night. Then I continued with my Unit 1 “Mushrooms at Night” etching work with a collage combination of my drawings, wanting to explore the feeling of rebirth and hope at night.
Also, I use Photoshop for the development of stone lithography. Collages of images from my drawings are combined into new life forms. The colours are combined digitally using my monoprints.
This mono print is what I used in Photoshop.
Drawing Process Stone Lithography 2 :
Drawing Process Stone Lithography 3 :
Problem Solving :
first print
second print
The print after scraping off
When I was working on my third stone I noticed a mark on the stone, but not realising that it was slowly going away as I ground the stone I assumed it was a natural mark on the stone. But after the first Gum for Print, I found that the circle on the stone could darken after being Ink-rolled.
On the first print I took a fluke and the circles didn’t show up. But when the second printing was done, as the ink got progressively darker and darker on the stone, the image printed on the paper was already visible as a light circle. So I stopped inking and used a blades to scrape off the circle area.
Printmaking proved to be a discipline that requires patience and careful attention. The circle then disappeared in my next print, the print is shown on the upper right. However, the details in the remaining parts of the image were too dark and I scraped out the details again with a blade. I also had problems printing the first stone as my stone was not flat, causing the middle part of my image to print out very lightly, after many attempts the solution was to cut a round piece of blanket placing it in the middle area of my stone.
Reflection:
Drawing delicate images is a new attempt for me, before this I had always felt that I couldn’t keep quiet to draw very detailed images as well as spending a long time in one image. Until my first attempt at drawing tree branches in the first unit made me realise my potential. In all three lithographs, there was no sketching, no purposeful drawing based on a reference image, and I didn’t plan the final outcome of the image as I drew, I just followed the direction of the image and stopped when I felt that the image didn’t need to be worked on any more. I follow the direction of the image and stop when I feel that it is no longer necessary. Every time I draw, I look forward to the final form of life that will emerge. Overall the process of stone lithography is full of unknowns and expectations.
However, during the process of painting, sometimes doubtful ideas would suddenly come to me, for example, I would think whether my drawing is too simple or not. In the process of drawing, sometimes the thought that I might have to continue to draw many similar stones would make me feel a bit bored in advance. Because of the repetition, the repetition of drawing the same microscopic fungi, the repetition of the same printing process, the waiting and grinding of the stones and the various accidents encountered in the printing process. This reminds me of Sisyphus, as Camus (1942) said, “The struggle to climb to the top of the mountain is enough to fill a person’s heart with fulfillment.”
- laser cut -
The idea of using laser cutting was to extract the texture from nature, exploring the texture and the feeling of tactility.
Images used by laser cutting.
The effect of laser cutting images onto a wooden board.
The effect of printing onto paper.
Research:
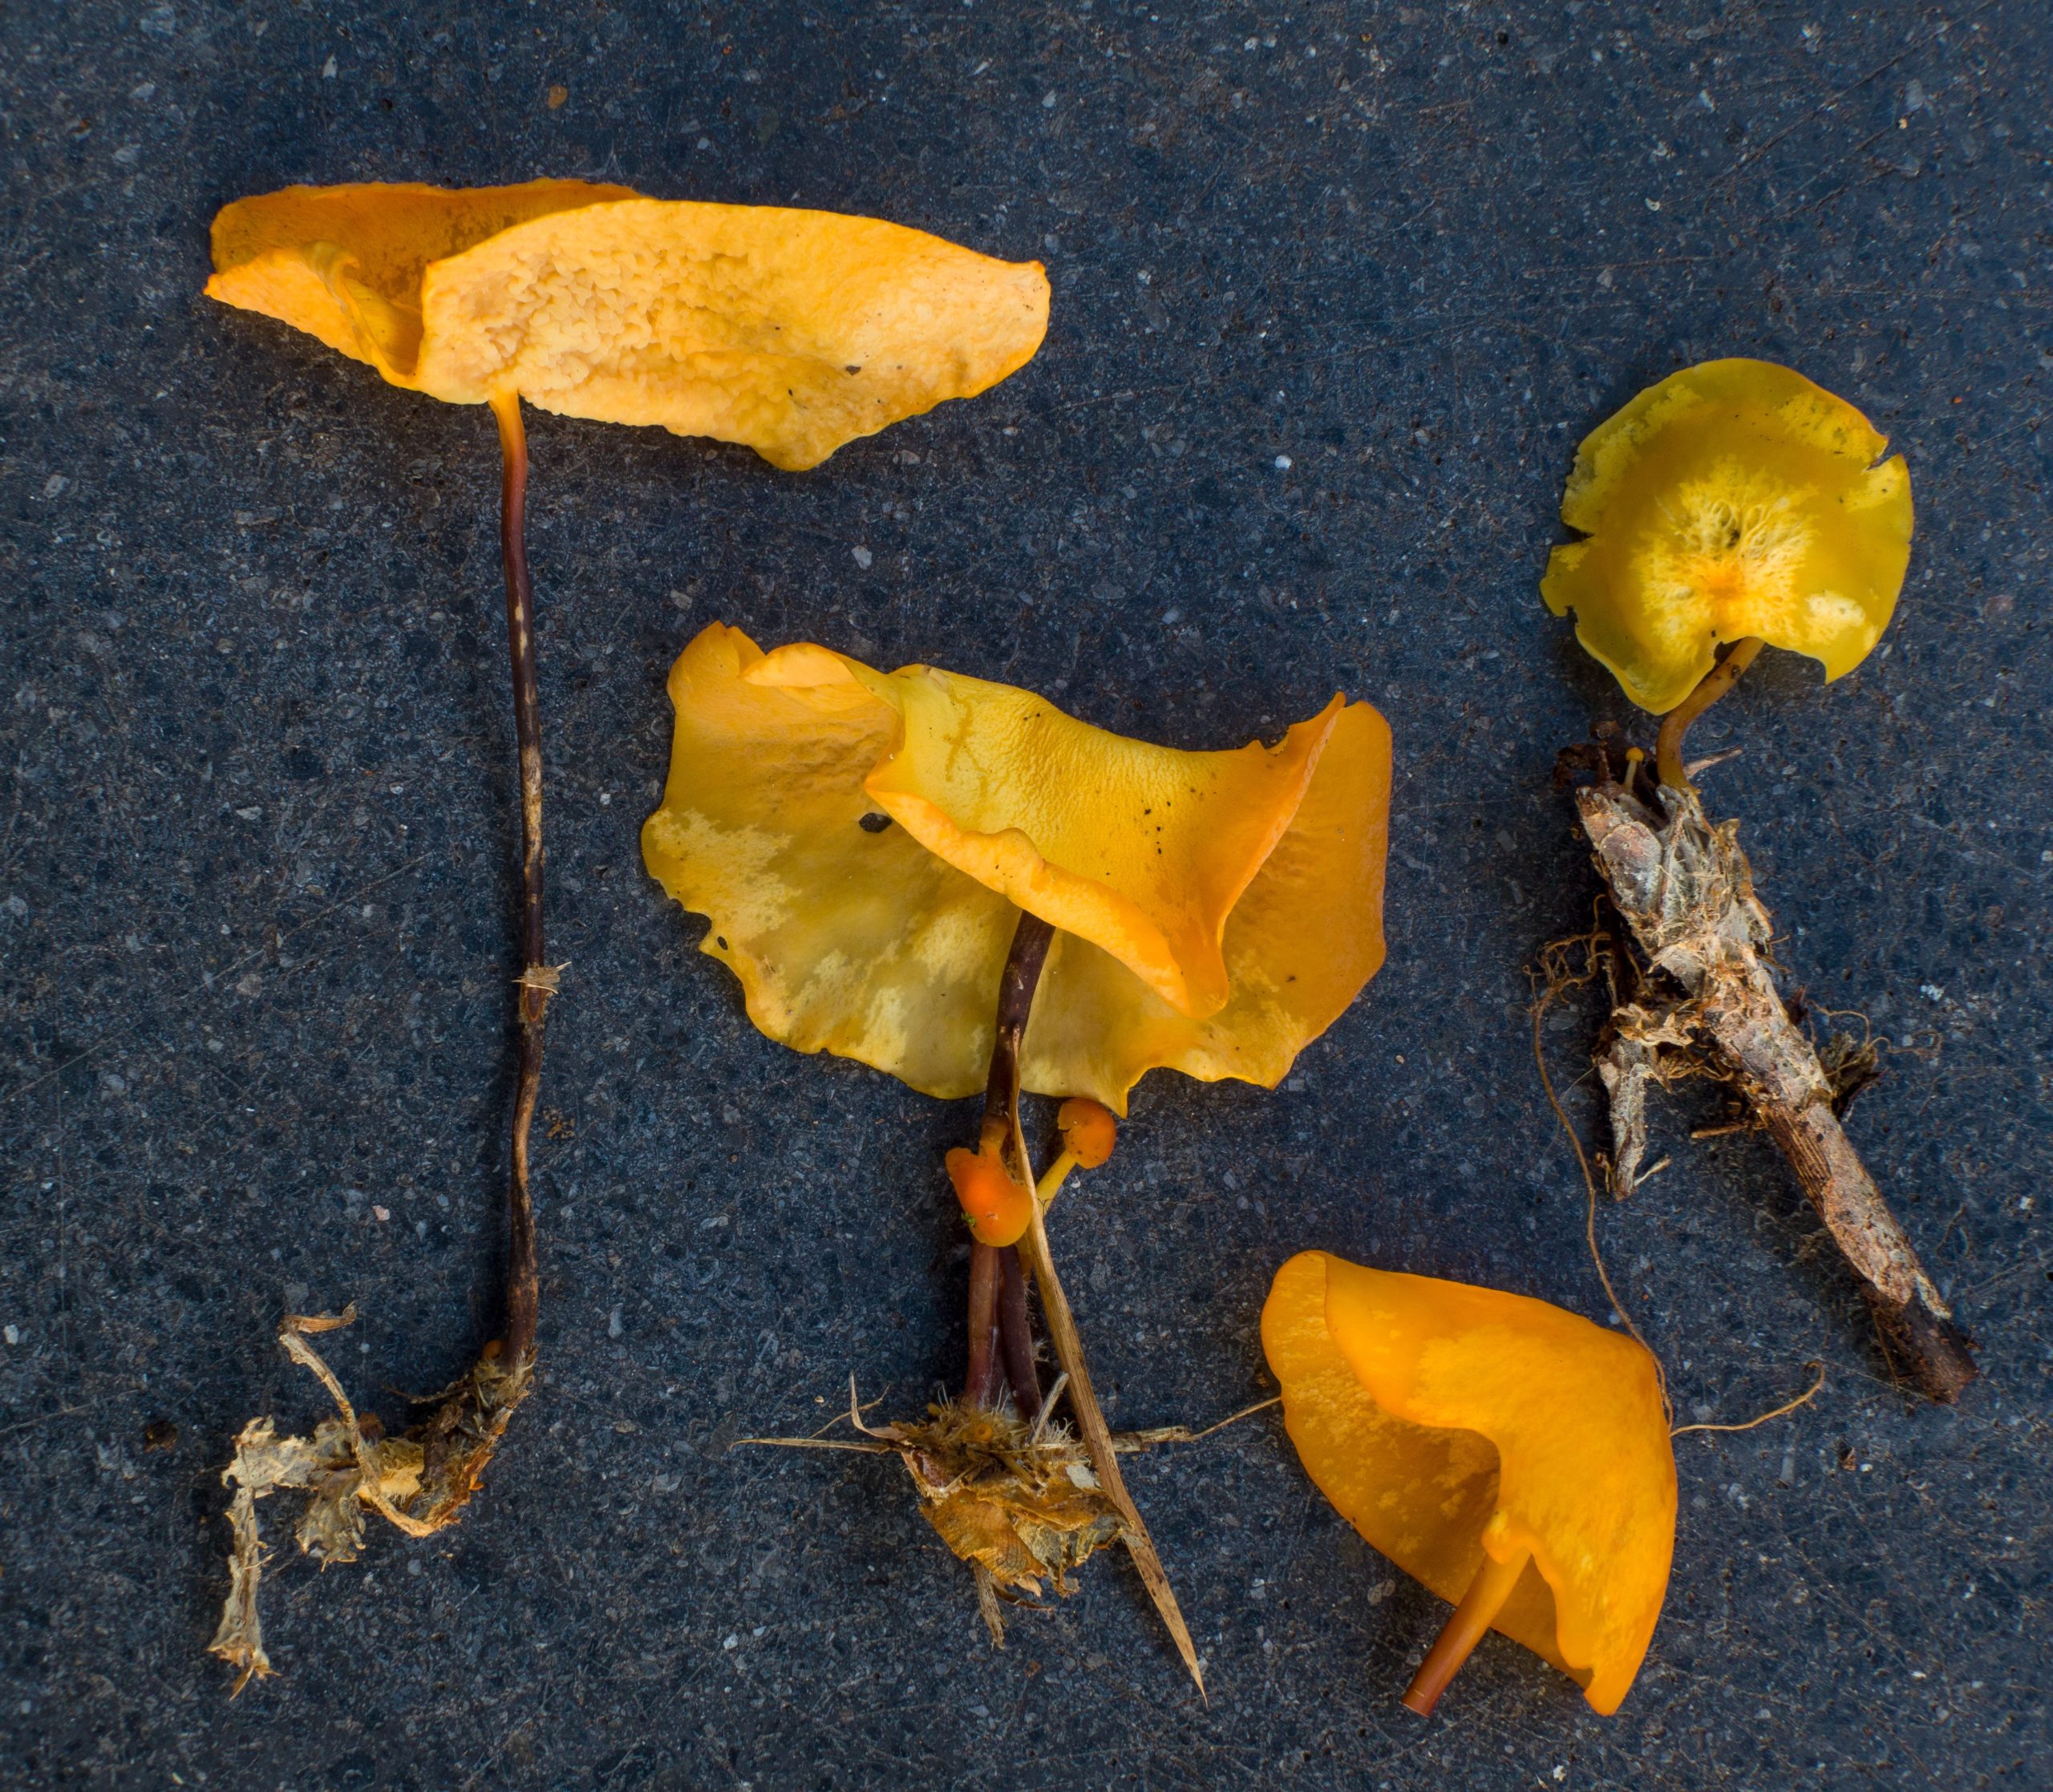
References used for laser cutting, the photos were taken by me with my camera in Nottingham and London respectively.
Development:
Then I put the photos into Photoshop to explore. I started experimenting when adjusting the black and white modes and selecting areas of the images and found interesting picture effects as I played around. Looking back at what came before I realised that after U2 I could continue to explore the elements of my existing pictures.
Because of the thinness of the board I used, the remaining pattern on the board after the laser cut needed to be protected by glue to make the image on the board stronger and less likely to break.
Using a traditional relief press I found it almost impossible to get results on paper, after trying a hydraulic press I got results I was happy with, firstly when I touched the paper there was a noticeable bumpiness to the image and secondly I found that after printing again and again with the colours on, without having to ink up in the meantime, I would get a very soft image in terms of colours.
I scanned my favourite one and in a later practice, I will use this image in photo transfer to combine with my other images.
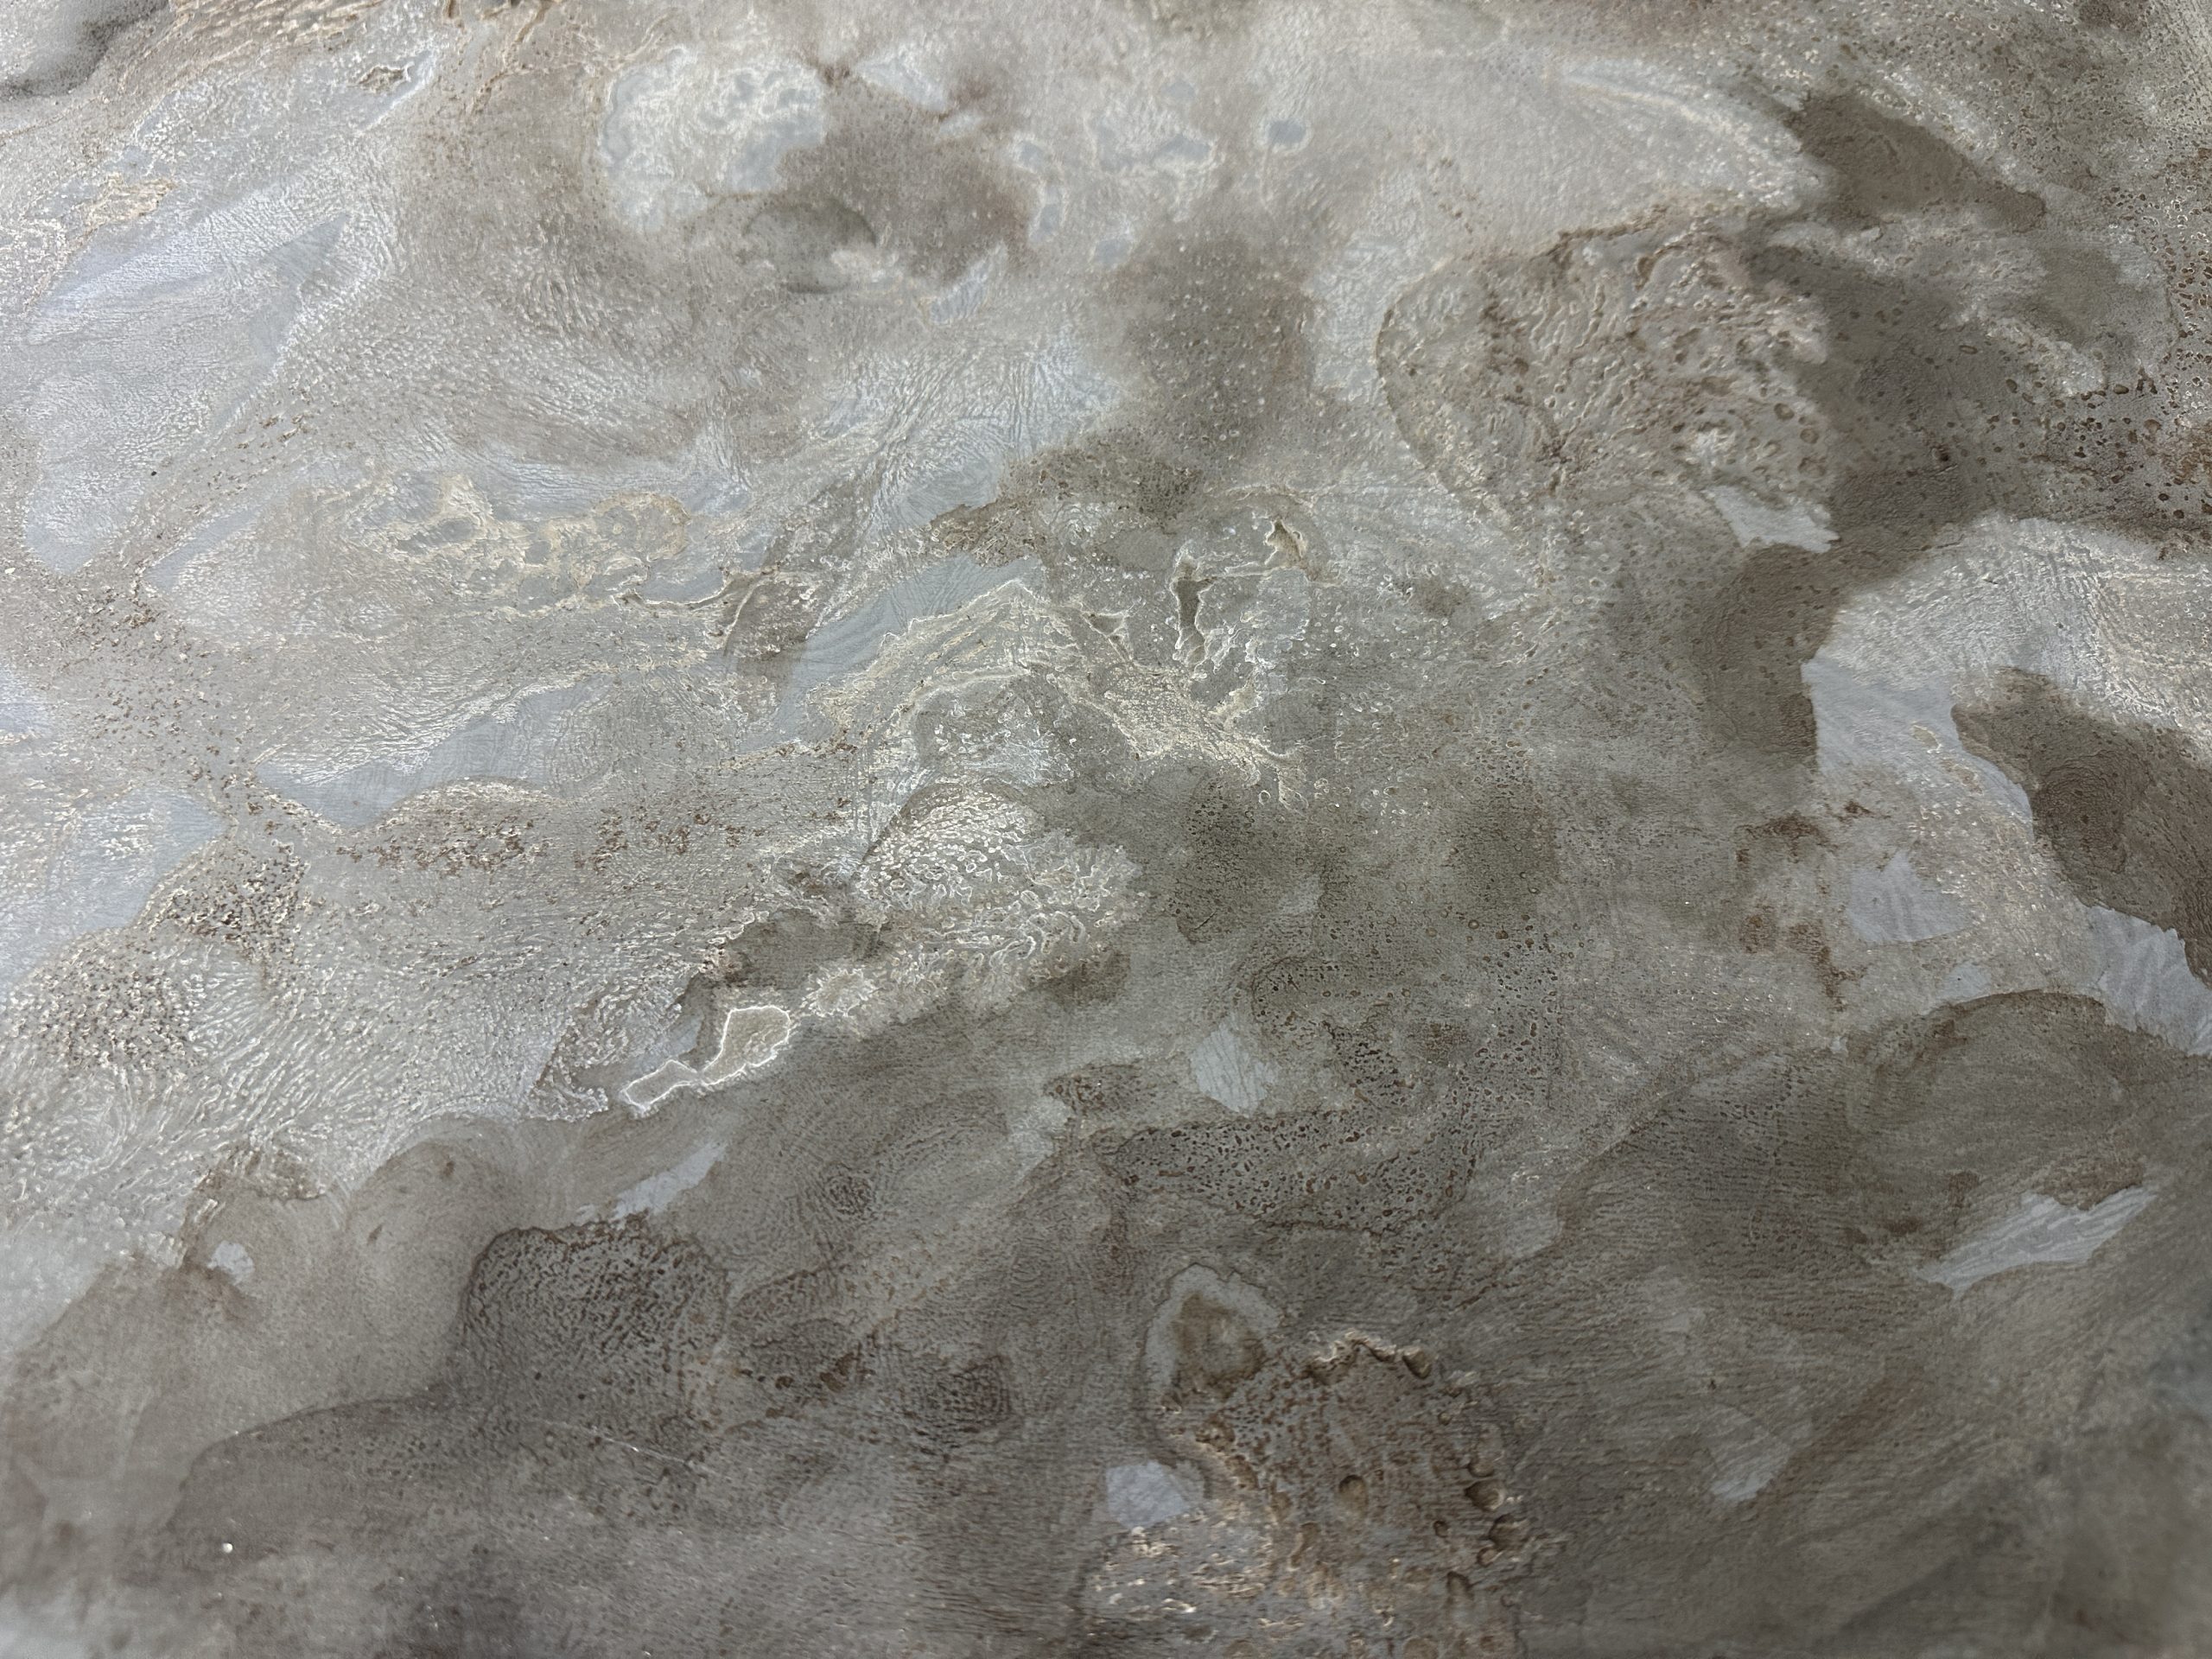
- zinc Lithography Practice -
In the zinc lithography practice, I’m experimenting with different printmaking techniques to render fungi, as well as exploring size and texture.
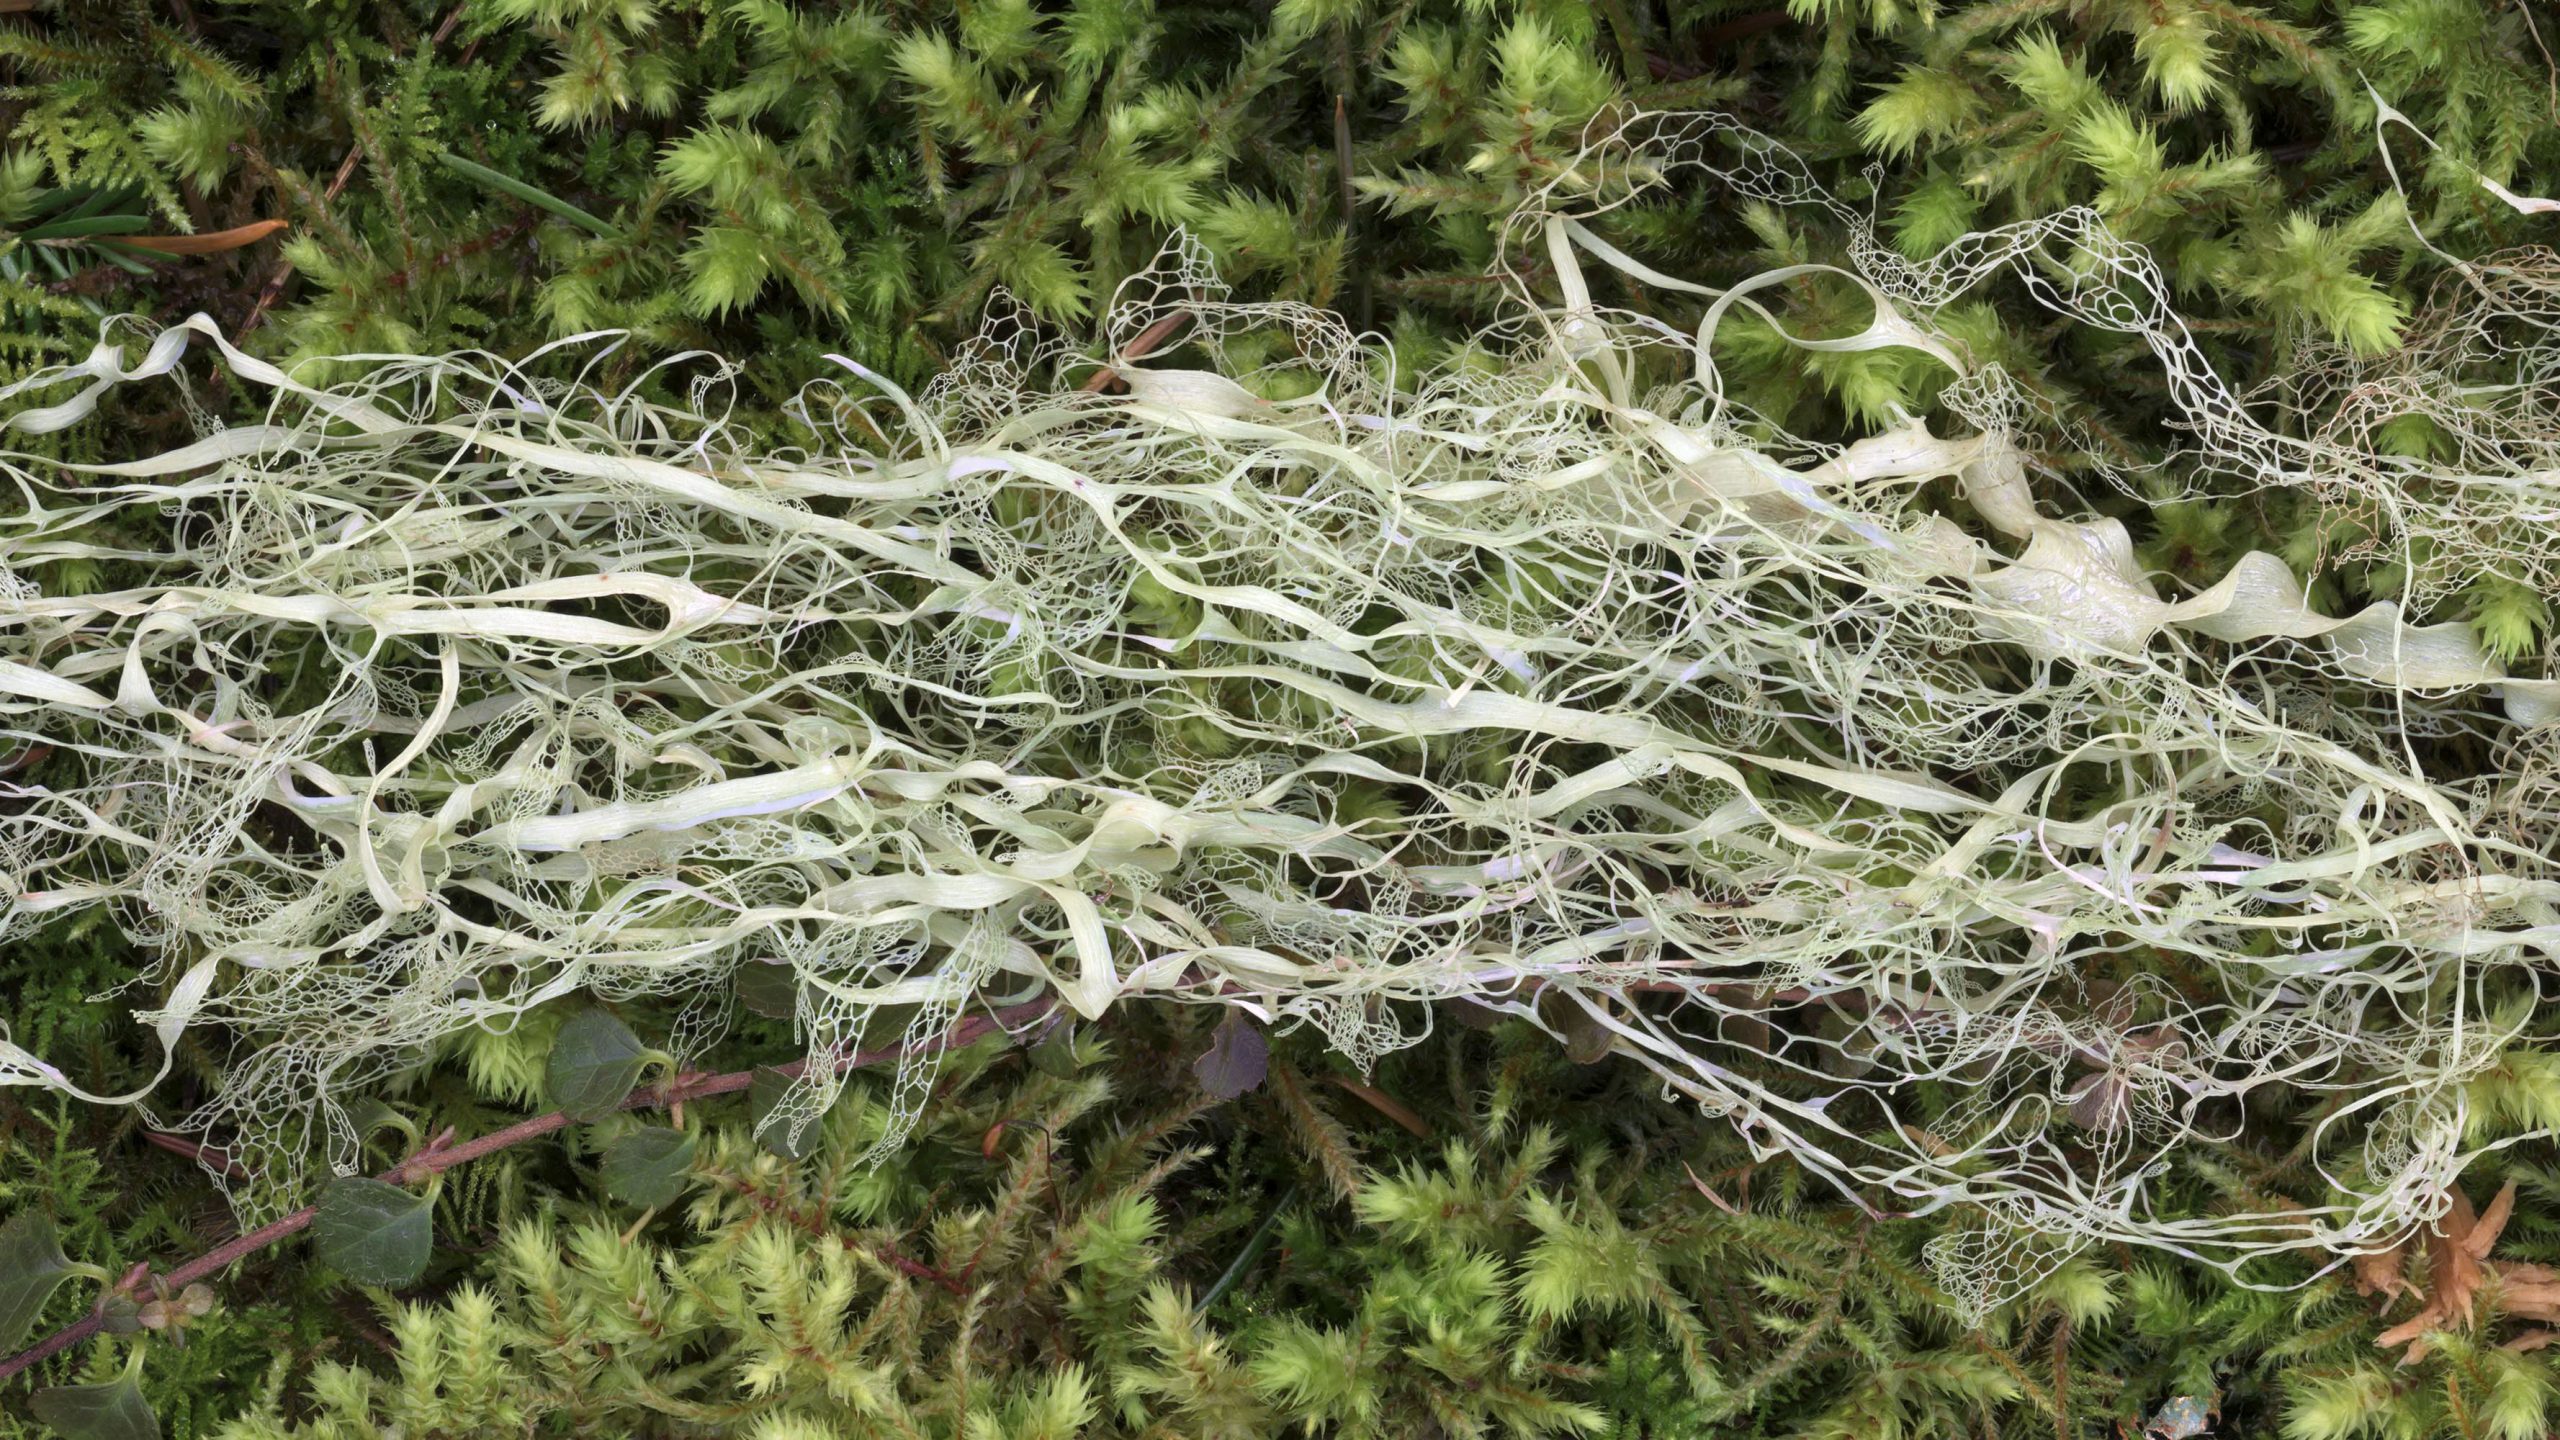
‘Lichen I’, Lithography, 99.5cm ×70cm, 2024.
The print on the left, ‘Lichen I’, is a combination of two zinc plates combined to create one large format print.
The materials used were wooden sticks brought back to London from Nottingham and two bottles of litho drawing ink from the ‘materials’ image. It was a very enjoyable experience and I was completely immersed in the fluidity of the ink.
Reference
Drawing with sticks was an attempt to try and draw in a playful way, as the development from Unit 1 started in Nottingham, so using sticks picked up from that area was used as a continuation. ( Using things from nature to draw nature.)
Process and Experimentation:
Materials
Drawing Process
Drawing Process
Cleaning asphalt ready for printing
Printed texture details
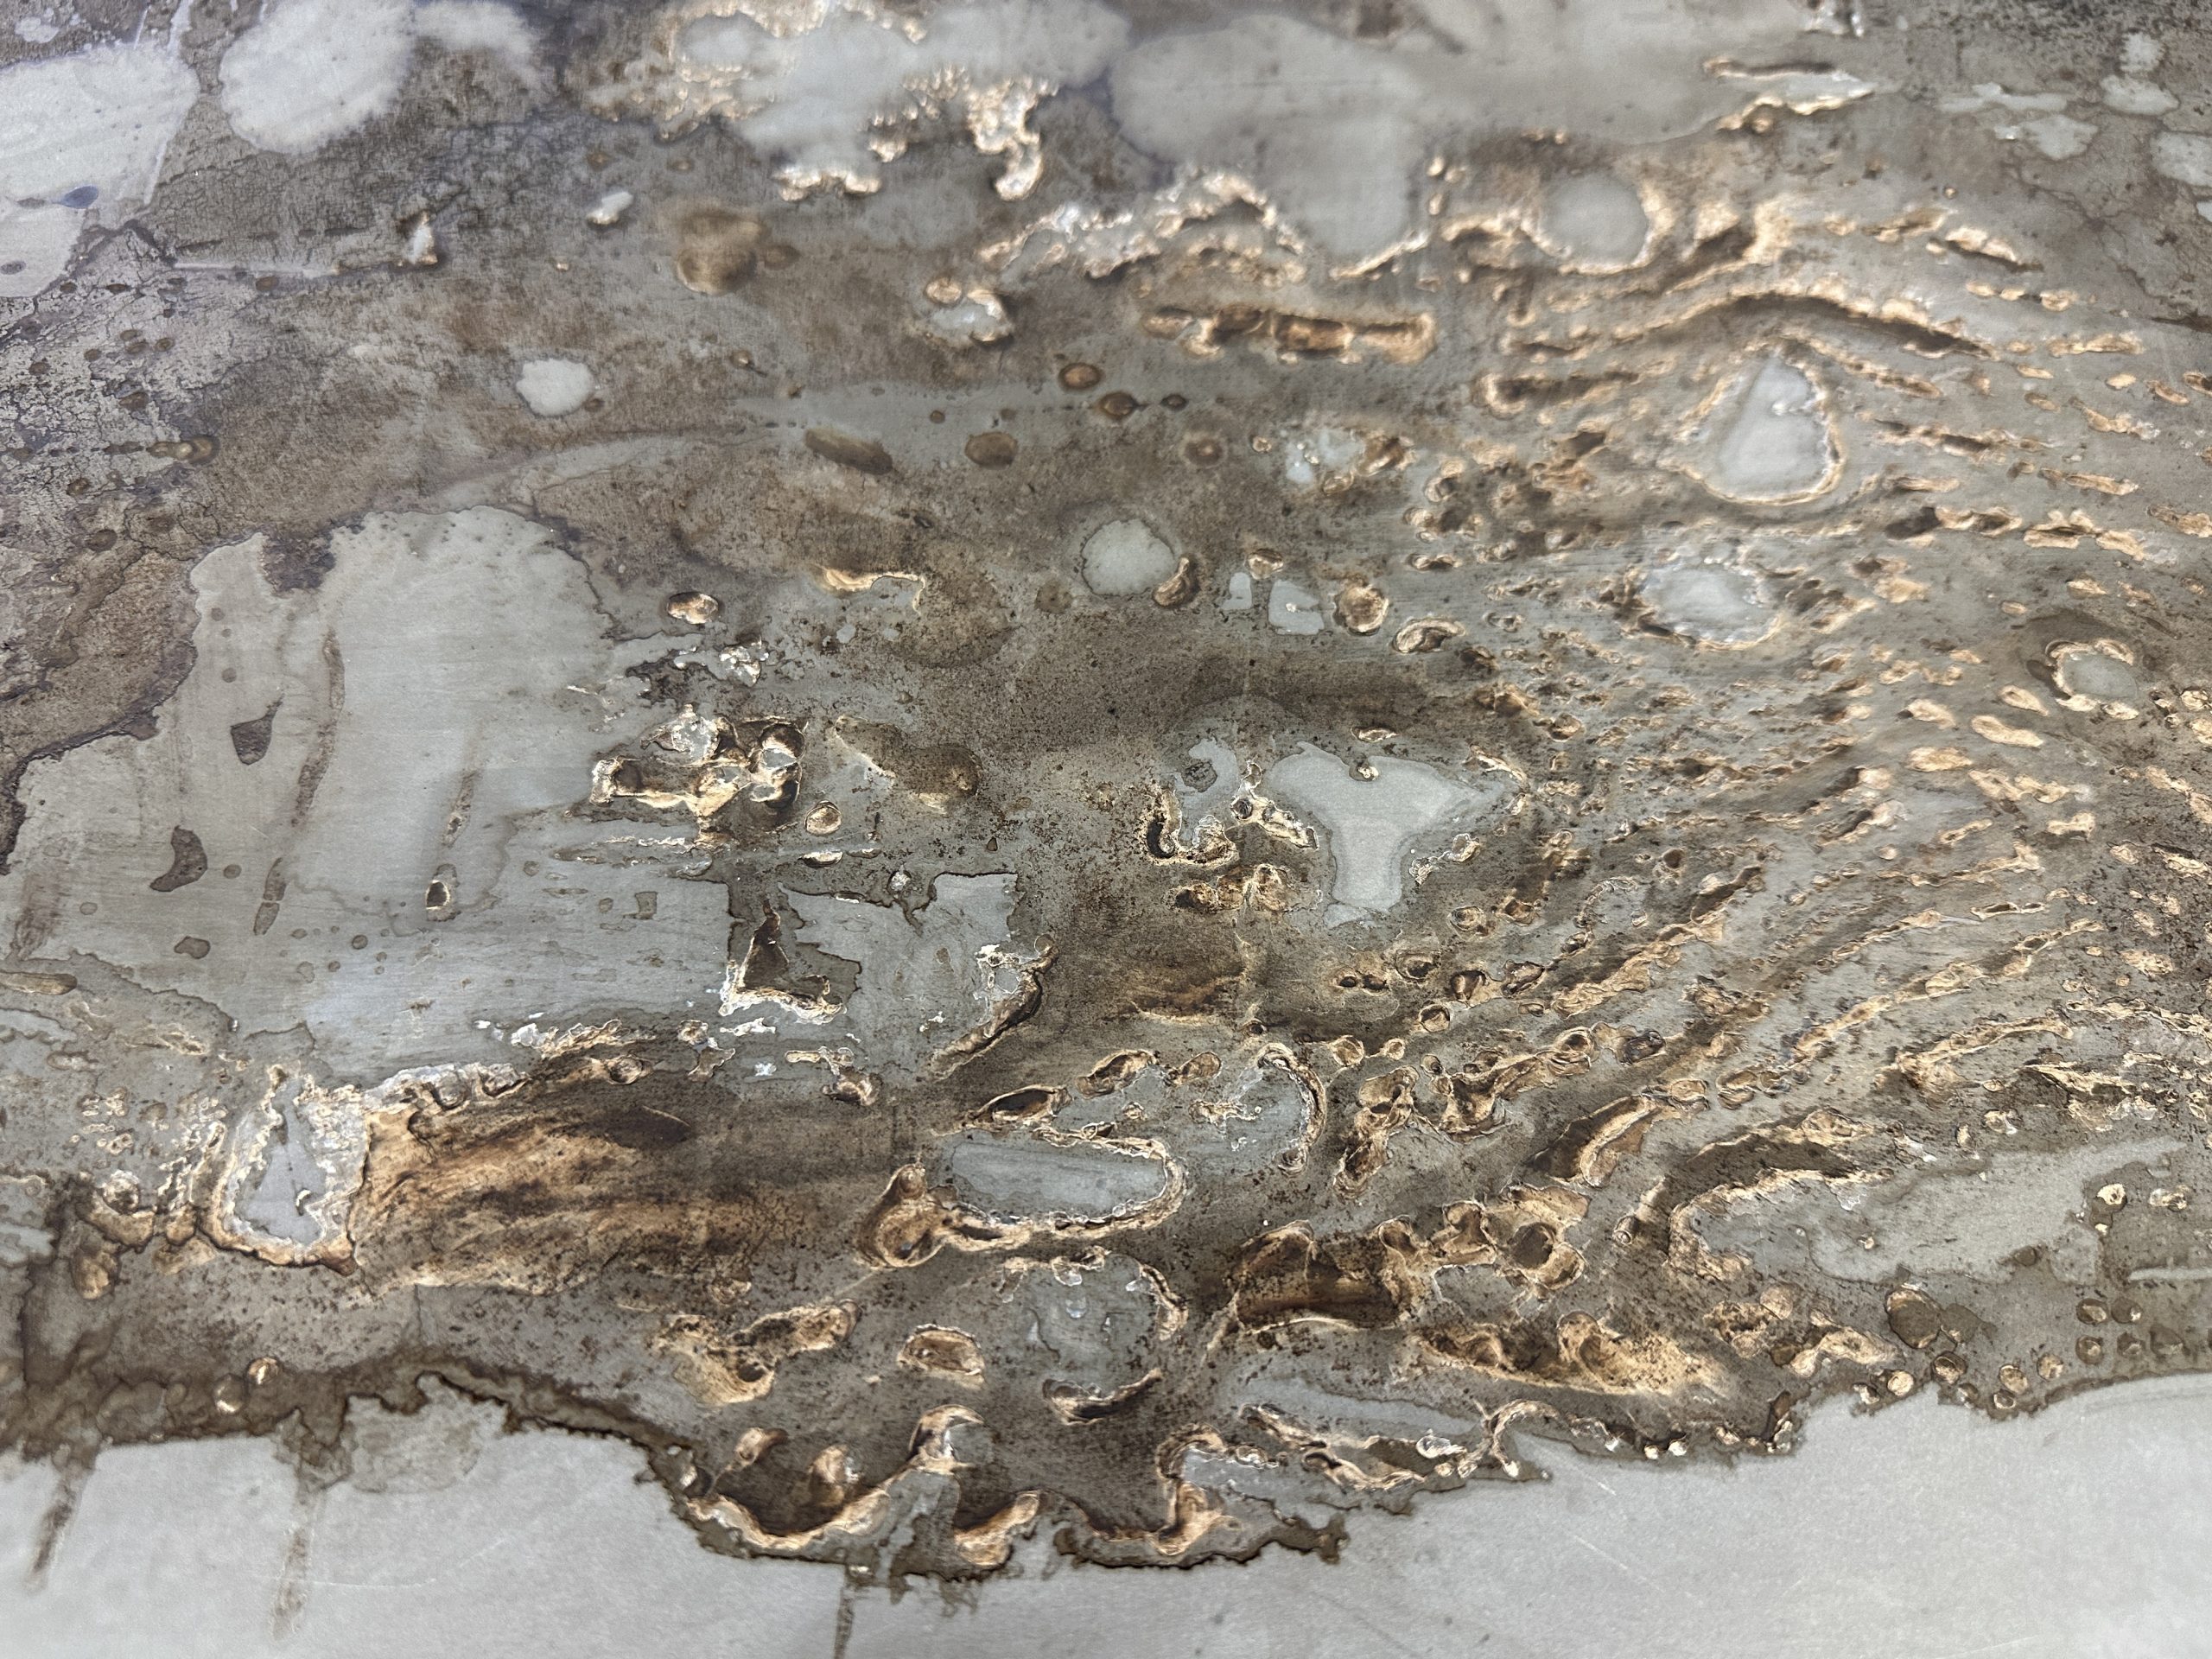
Drawing Method: I started by sketching out the rough shape on the plate with a brush dipped in water, this had the effect that when I used the stick to draw with later on, the lines drawn with ink would be blurred by the water to form an effect that was not under my control. But the bottom part of the branch is where I used a lot of water and a bit of ink on the brush, so I didn’t know that the light area would print before the plate printed.
However, during the printing process, I was pleasantly surprised by the texture I accidentally made, so I got the idea of using a zinc plate to explore the texture of the drawing universe, which could later be used to make a background for stone litho.
Problem Solving:
The problem encountered during the inking process is that it is difficult to control the number of times and the depth of the ink on both plates to get the same level of colour. As well as printing two plates together, sometimes the texture part of the ink is not enough to print out the effect. After about six attempts, only one image was relatively perfect. The details of the zinc plate will slowly disappear after printing more times. Maybe I didn’t master the technique of printing zinc plate, like stone litho, I should stop and put on the gum when printing a certain number of times. zinc litho is more convenient for me compared to stone litho. For me, zinc litho is more convenient compared to stone litho. It is a fast way of printing, it is suitable for getting the picture quickly and when doing texture effect.
If I want to continue to print this image later the solution I can think of is photo litho.
Printed result
Experimenting with the effect of different litho ink on the plate and how ink meets water and white spirit to produce the effect. The picture was made without any plan. However, I was surprised to find that the printed image and shapes could be linked to the ‘Lichen I’ image nicely. (see image below)
Printed result
Printing process
Printing on fabric
The result of printing on fabric
I went on to try printing the prints on fabric, trying to get my images on the flowing, soft material, to see if the images had a different effect.
Development and Experimentation:
I combined the prints from my zinc plate with monoprint to try and add colour into the image. But the colours I used were not soft, however, I found that combining a lot of transparent colours with a bit of ink kept the image from being covered by the monoprint paint. I got some transparent texture overlay effects. In the further monoprints I did, because I mixed the colours first and then added the transparencies, my image was covered by the mono colours.
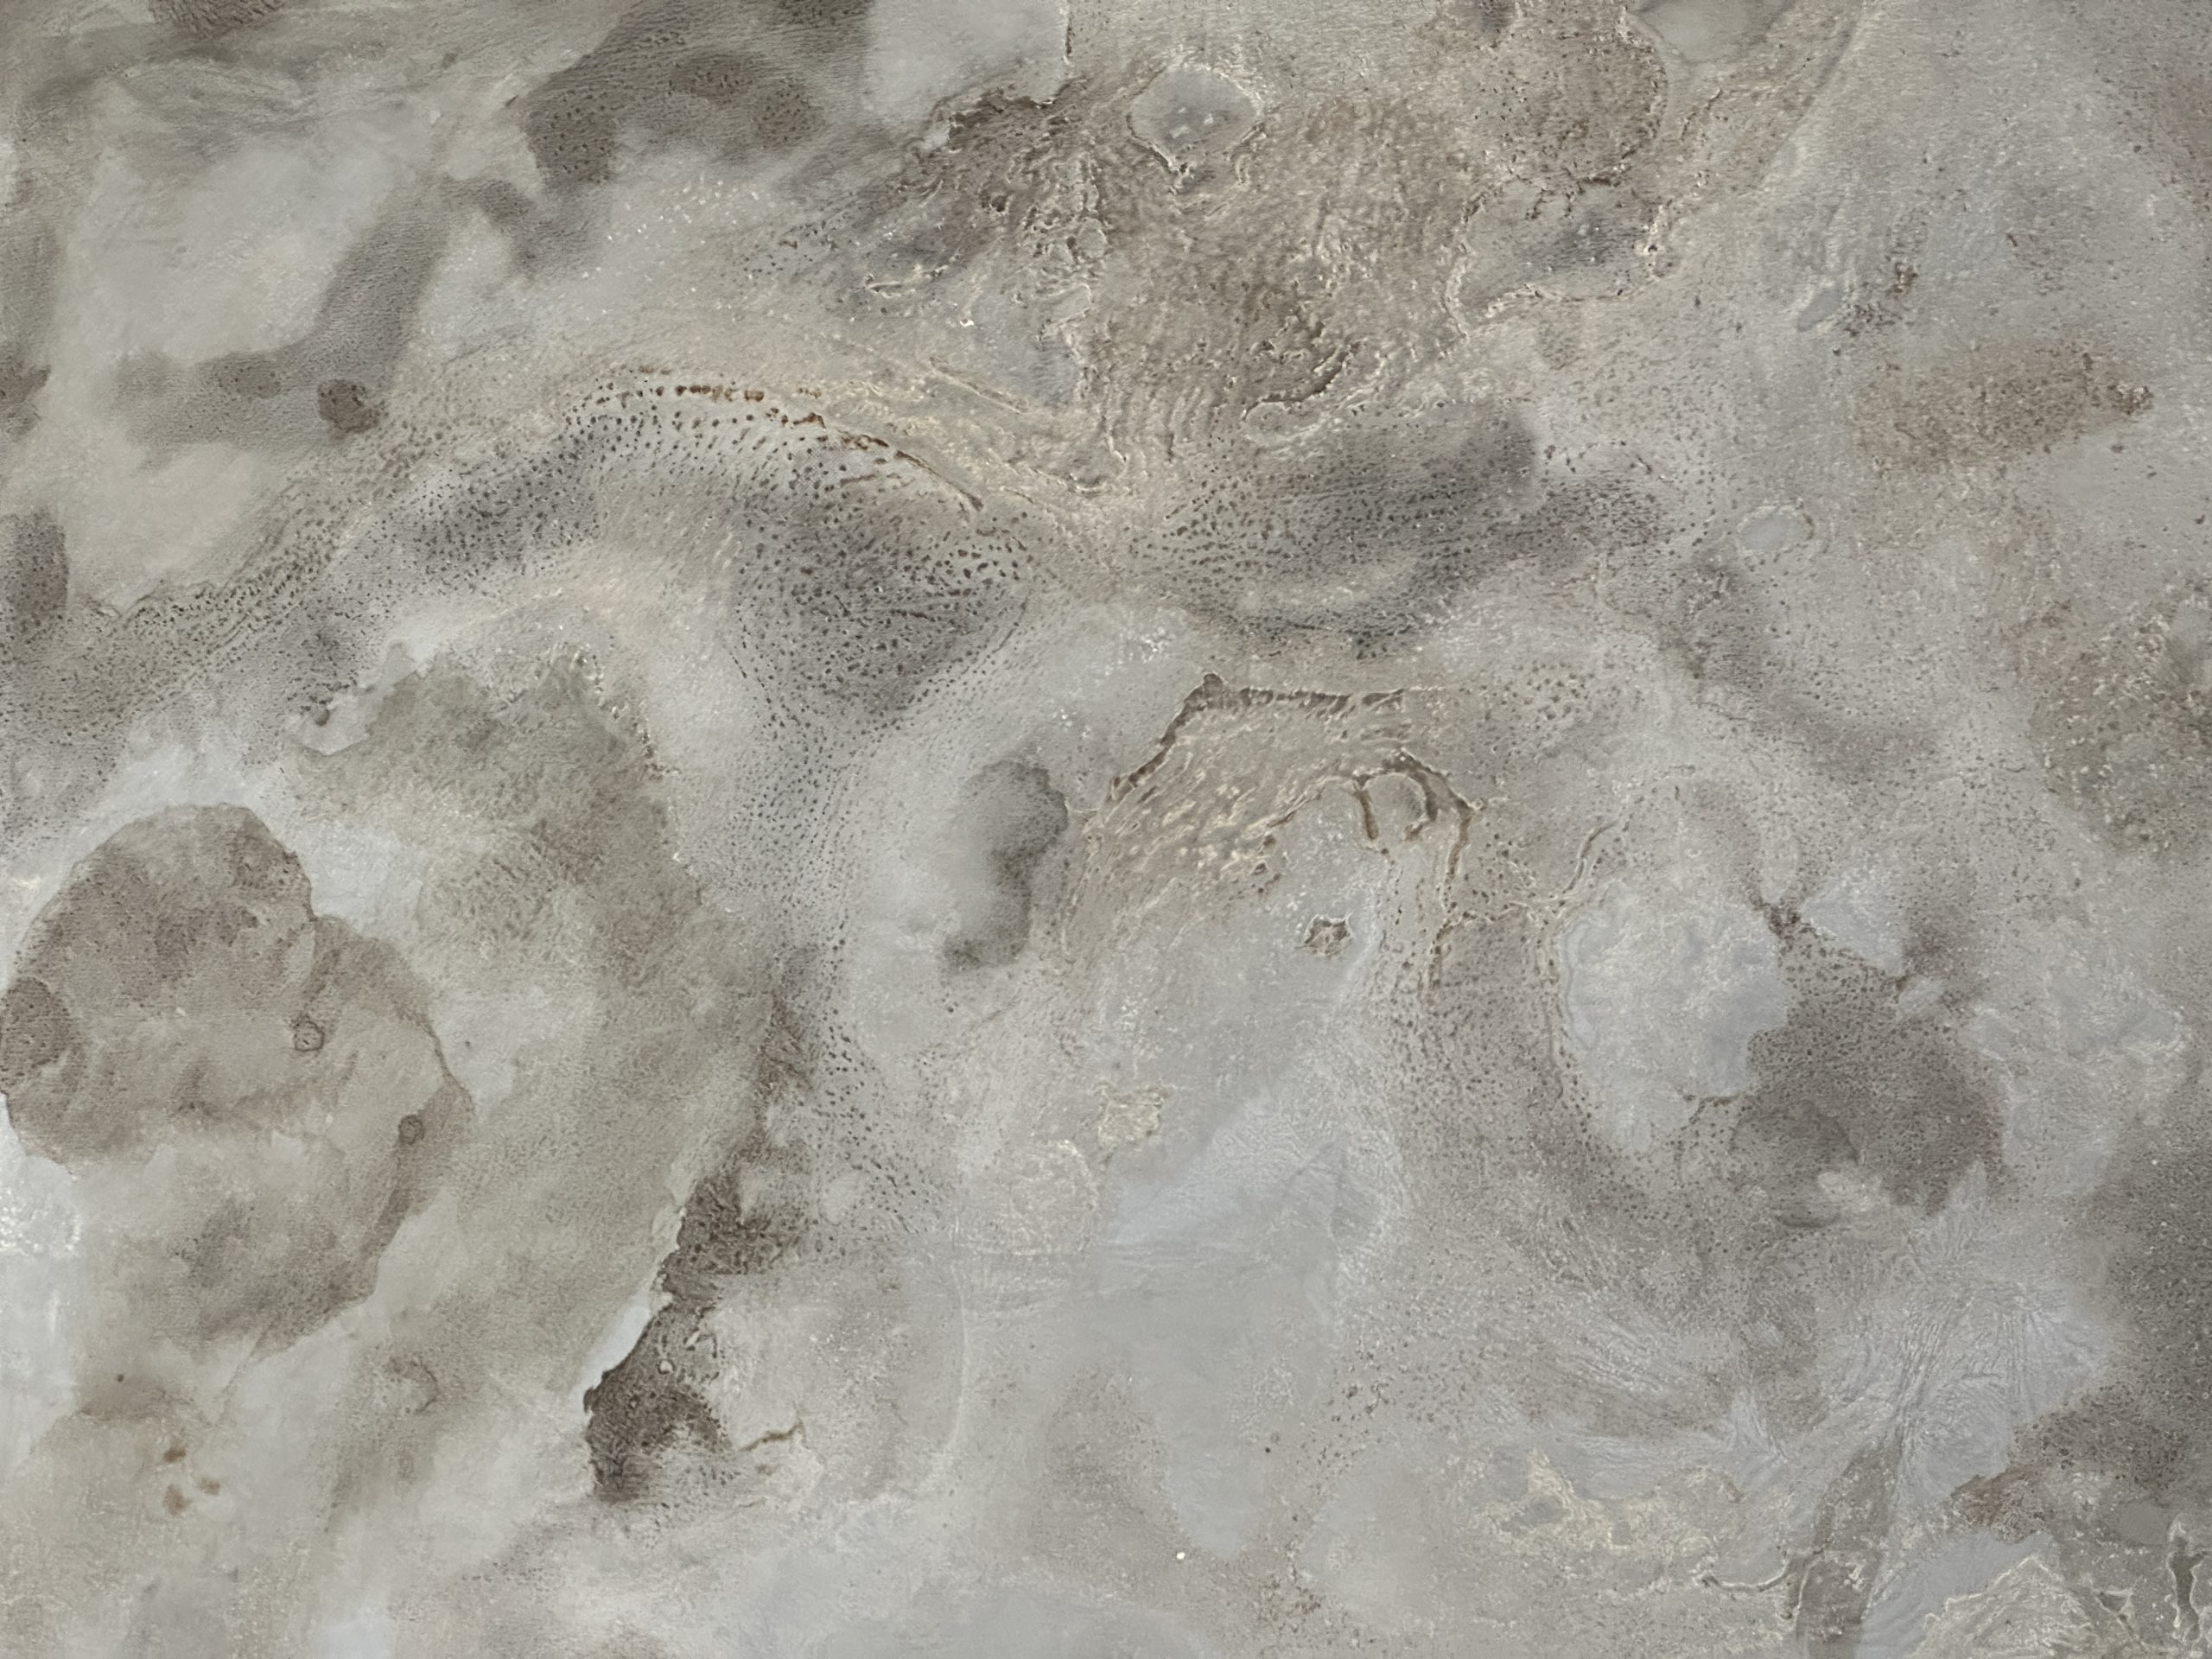
Texture Making Development:
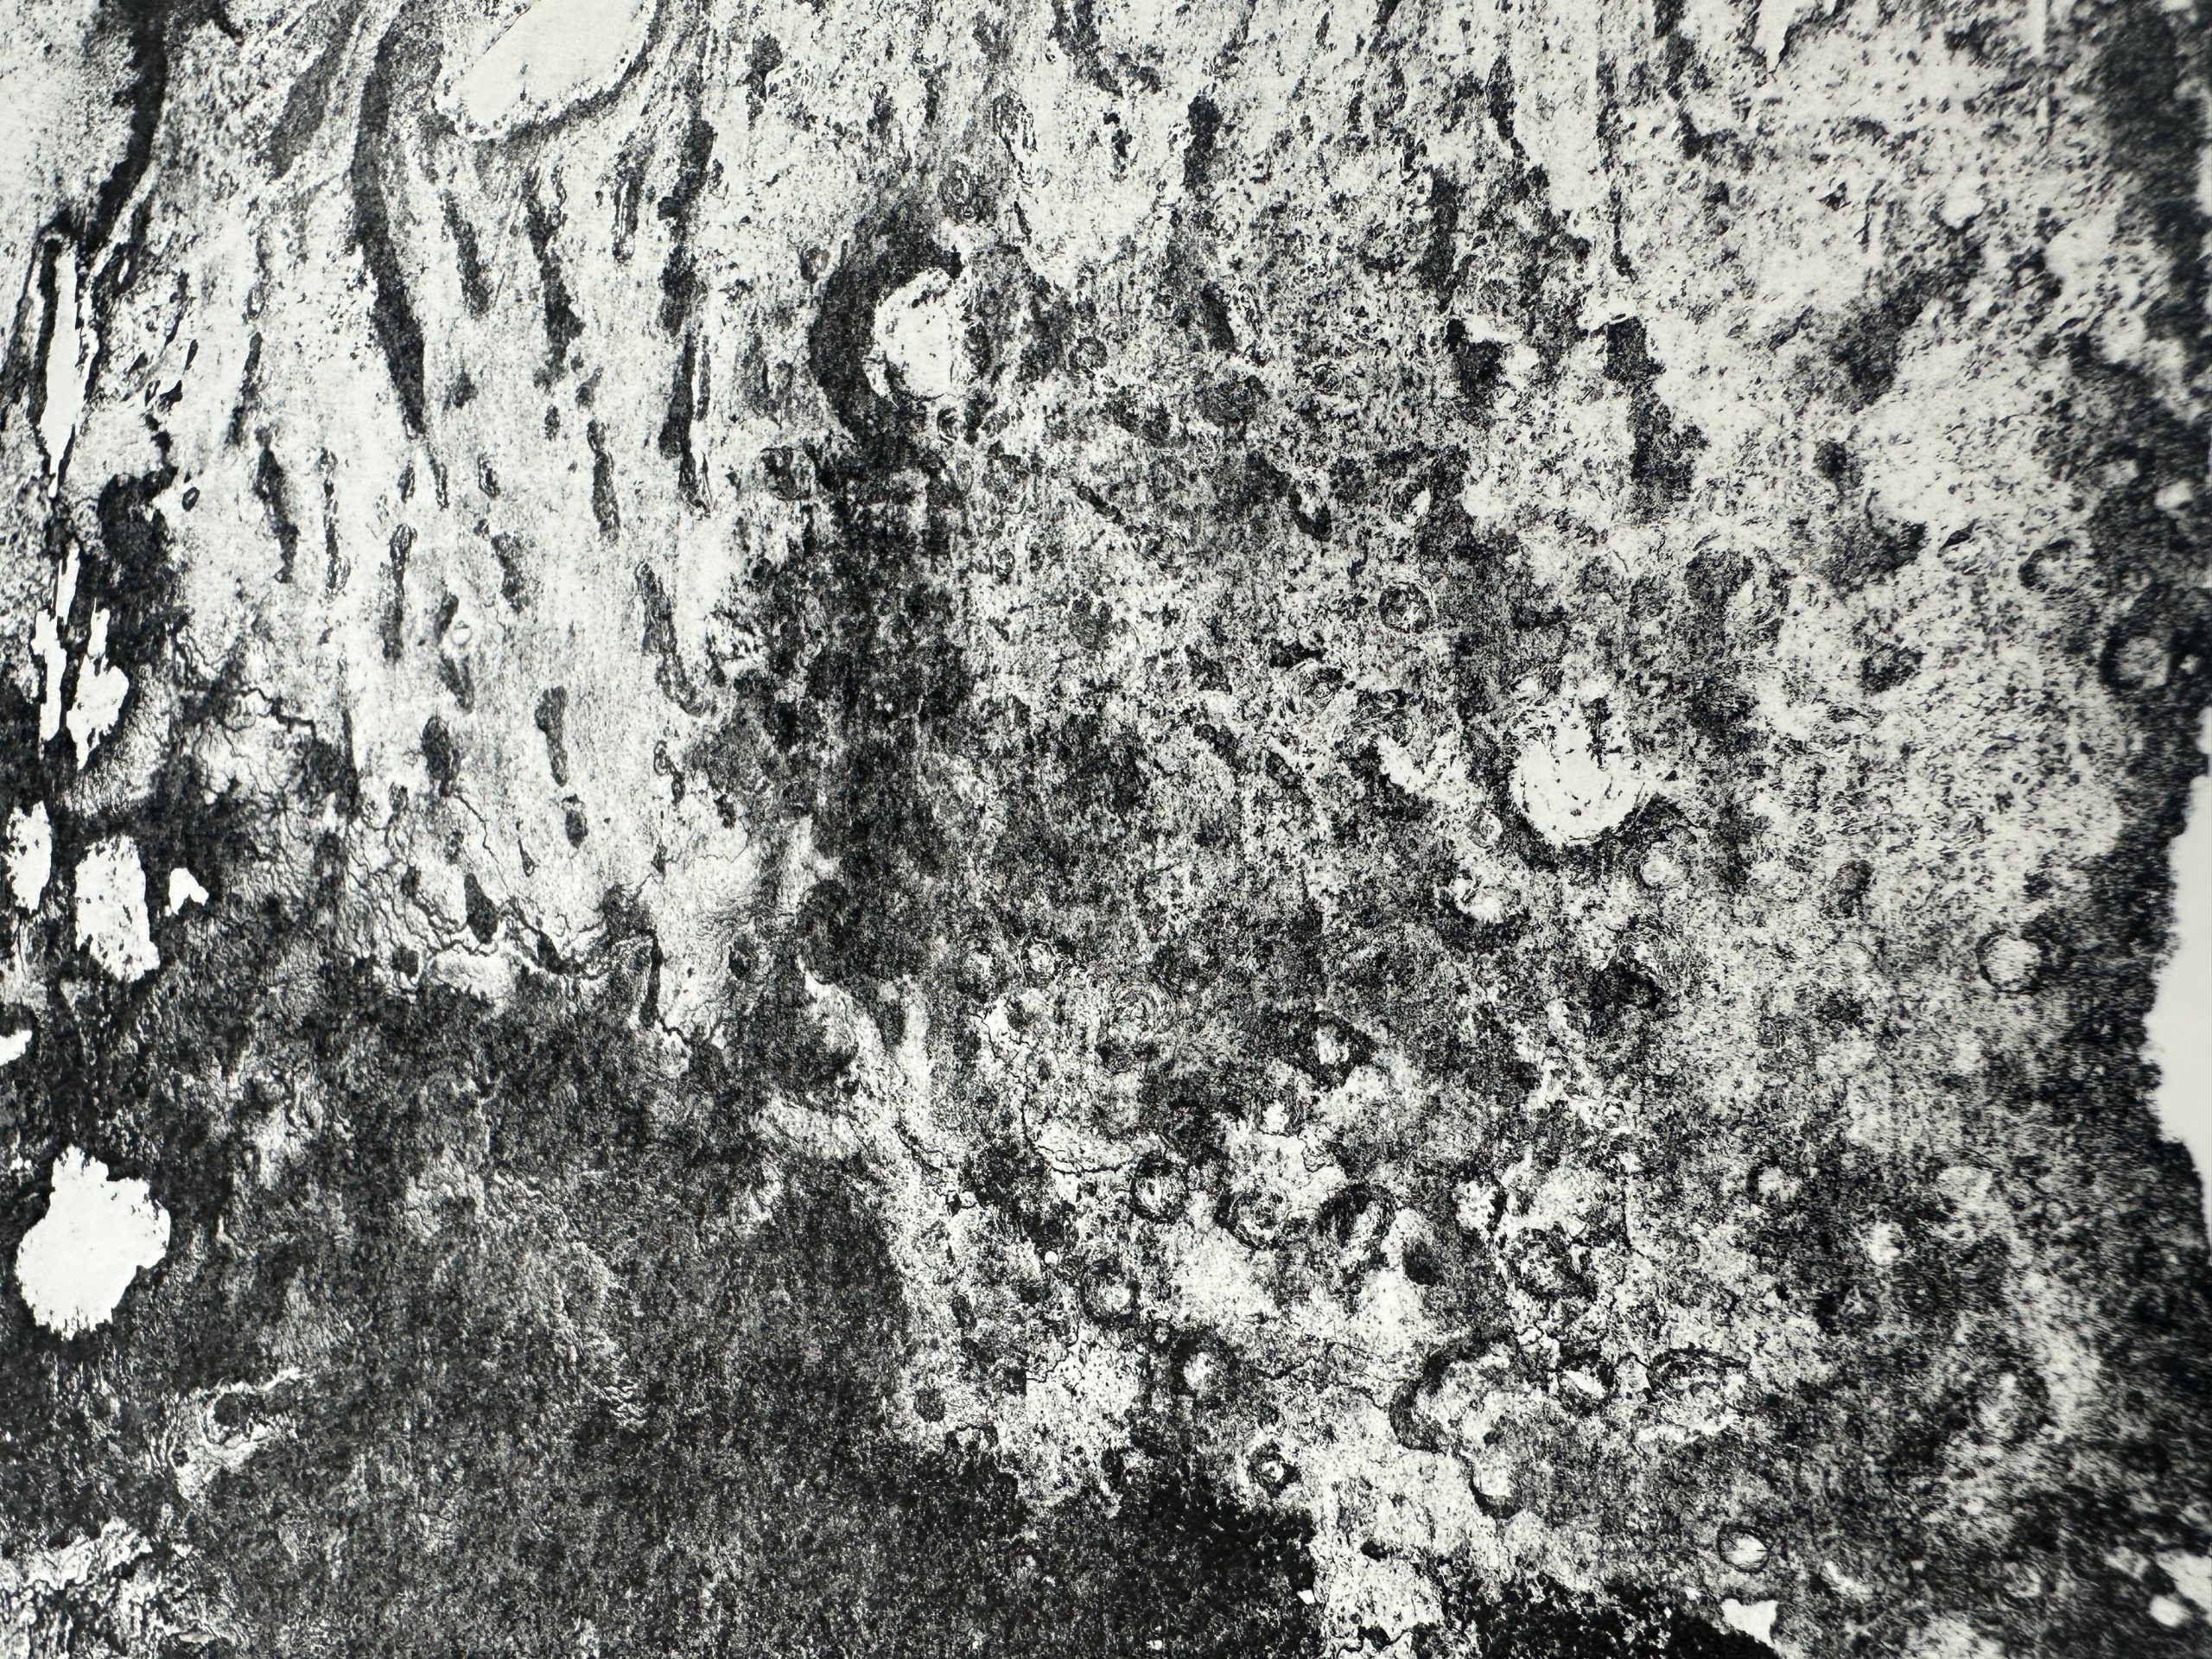
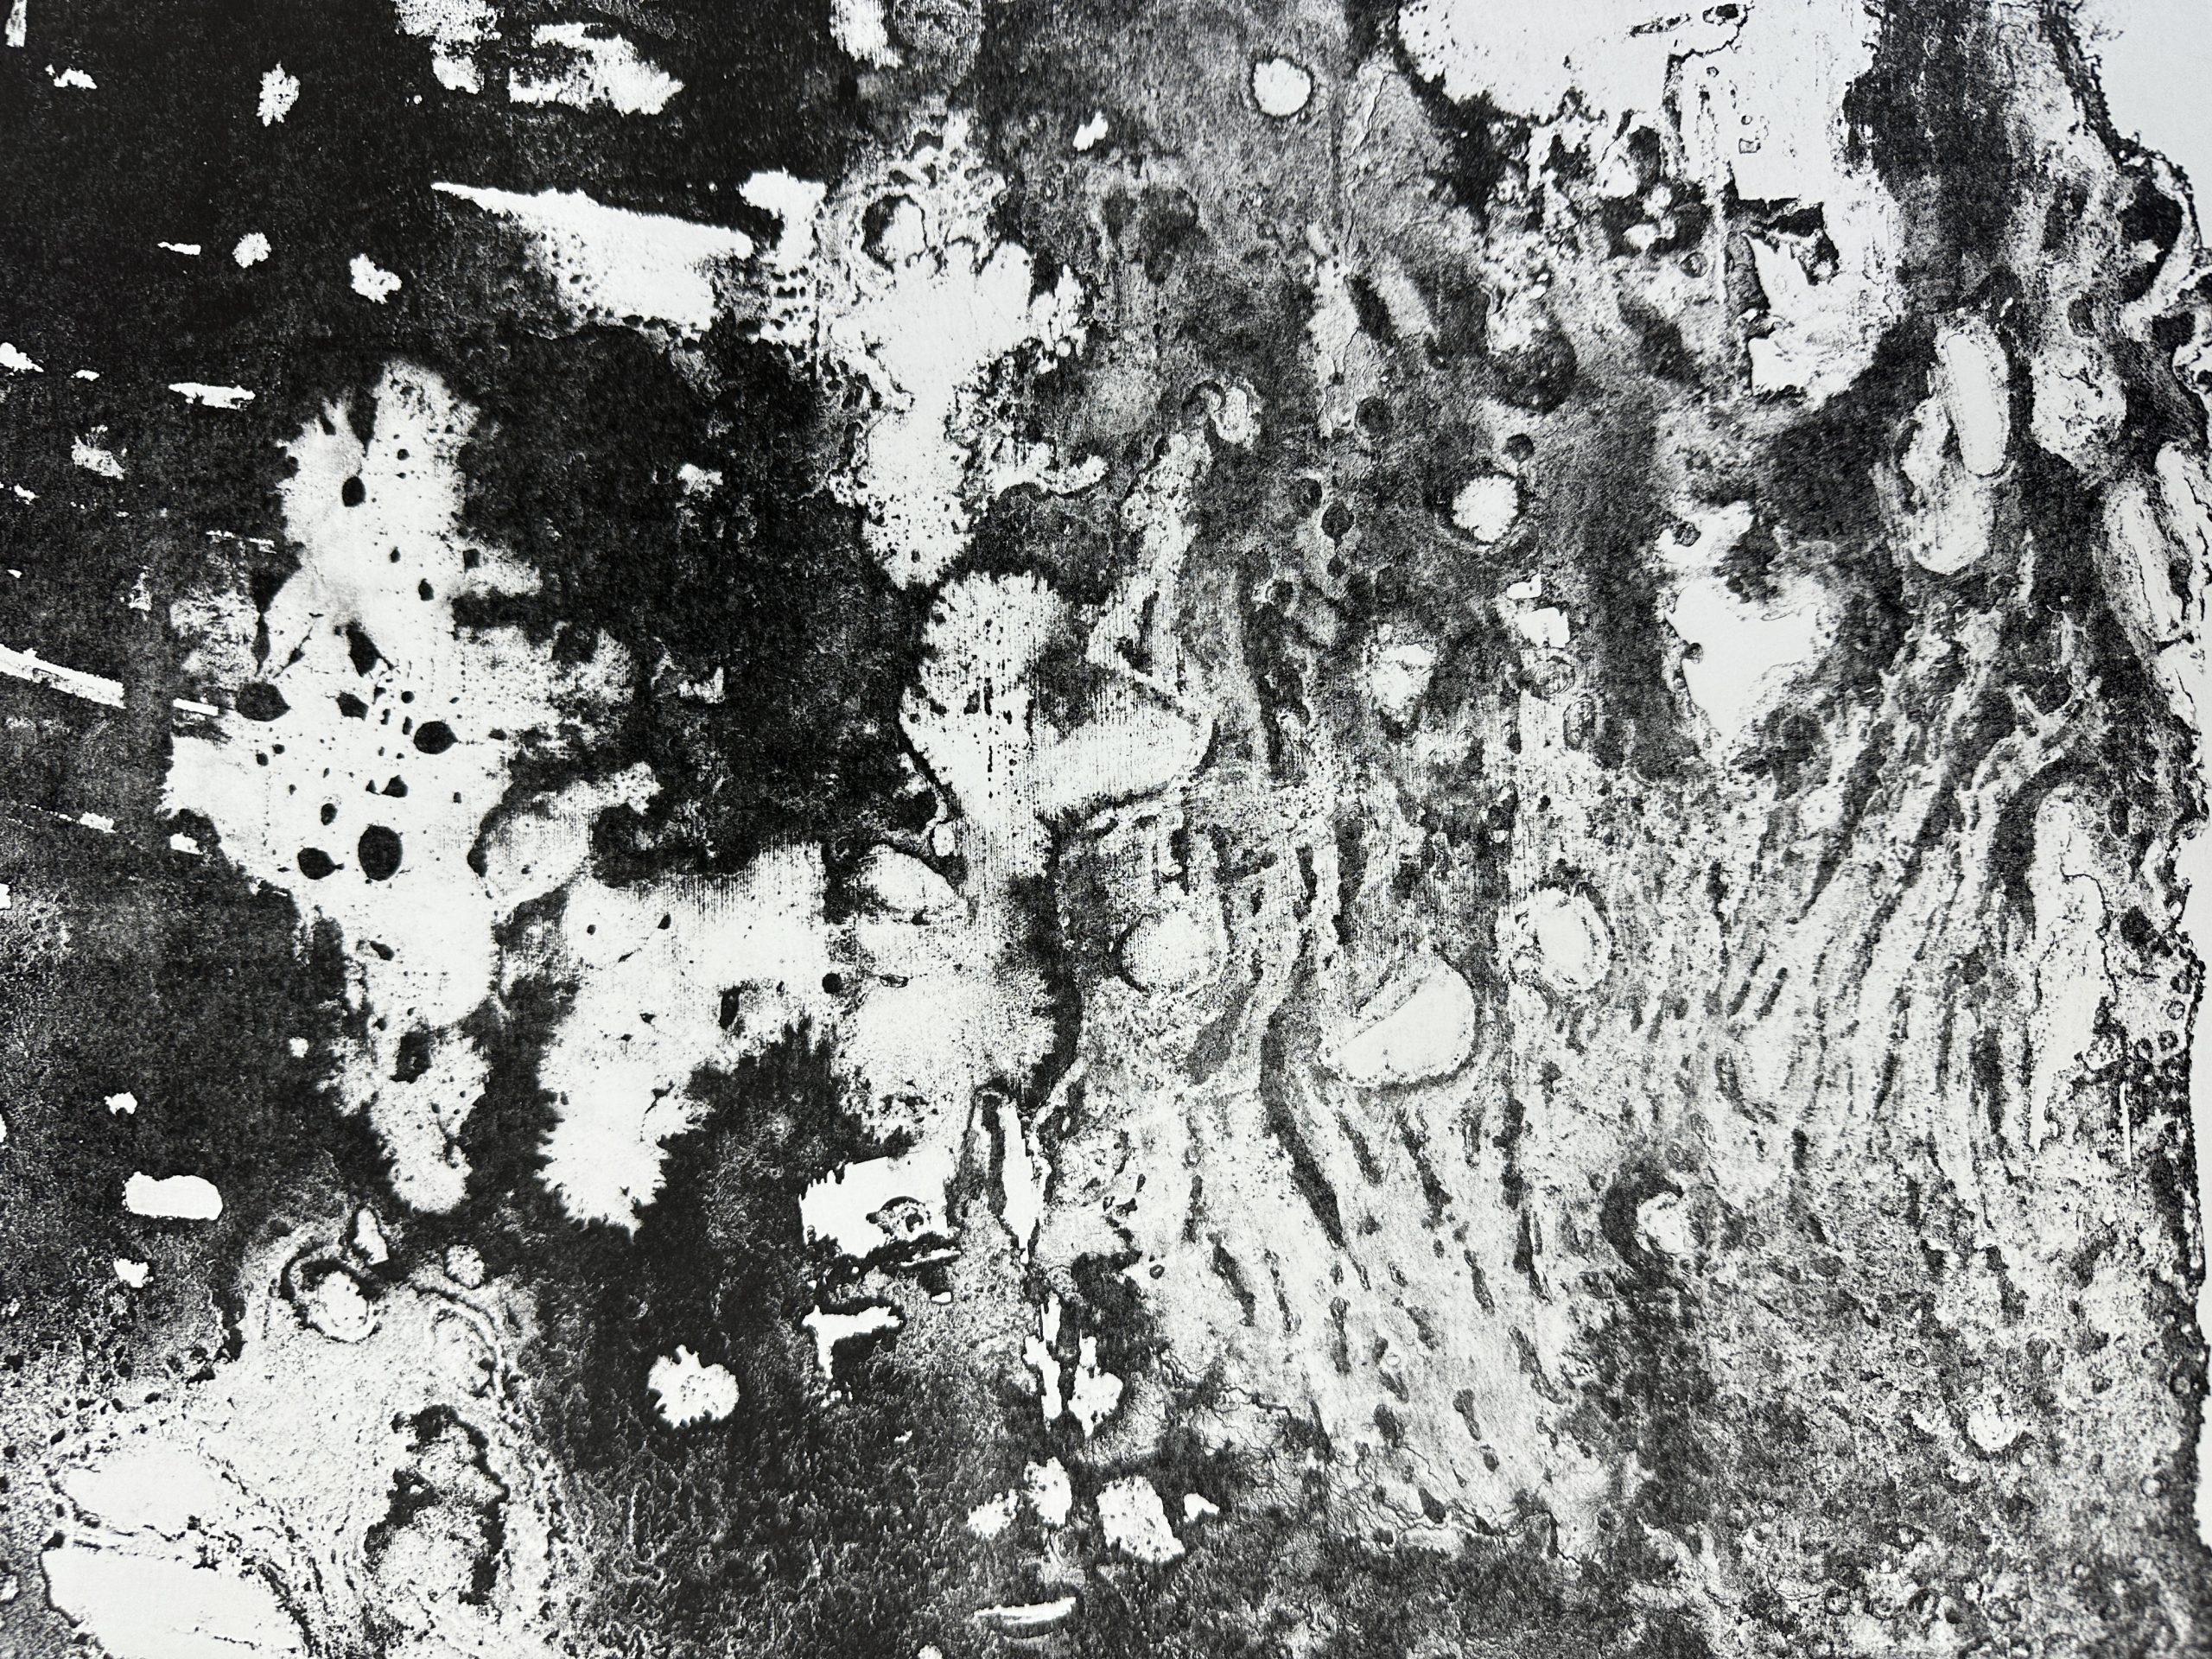
This is partly based on NASA’s official website where I searched for images of the high definition universe as seen through the telescope.
Two texture-based backgrounds that I created with zinc plates based on references. It is used to combine with the elements of my lithographs.
I did the compositing of the picture effects after scanning the images as it was quicker and easier. However, in a subsequent photo transfer, I combined these textural elements with lithographic drawing elements printed out to generate new images and space for development.
Reference
Reference
Drawing methods:
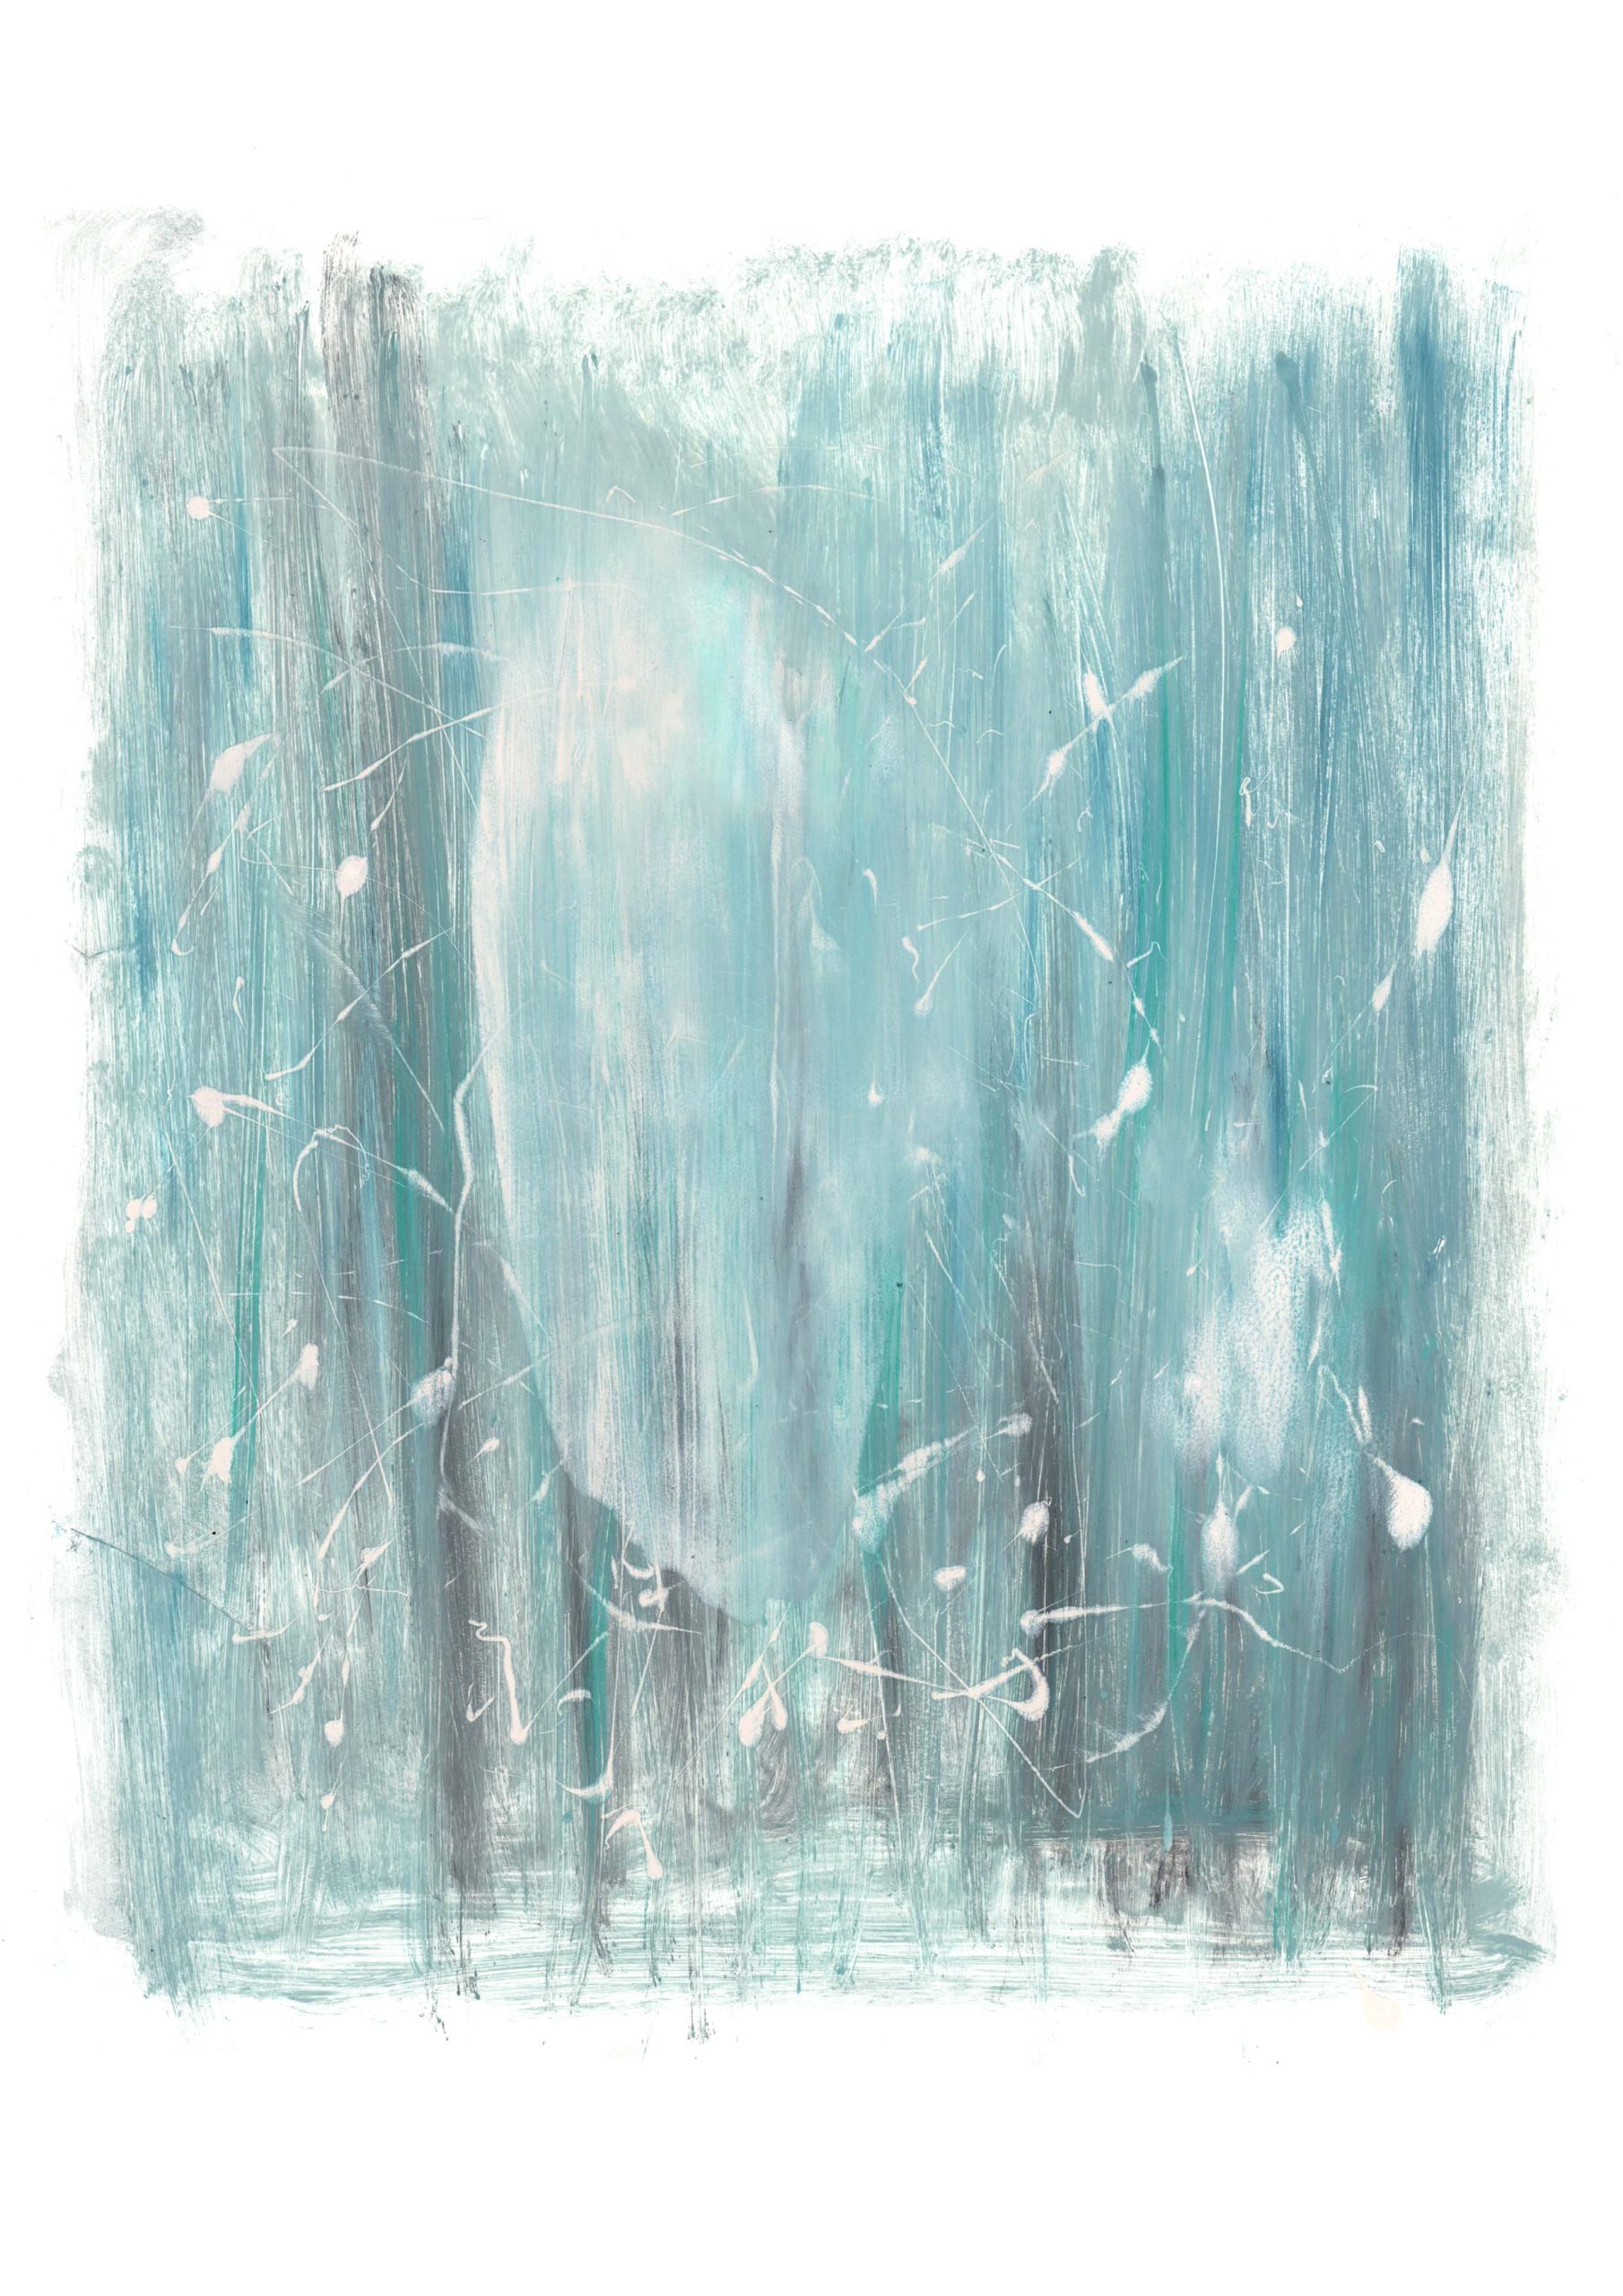
This print is a lot of water on the brush with just a little ink added to draw, inspired by the effect of drawing a tree branch by accident.
Drawing methods:
The drawing method uses the principle that water and oil repel each other. The black dots on the screen were not deliberately drawn with a brush. Instead, I put water all over the plate, and then I dip the brush in white spirit and move the brush in a circle on the surface of the plate to get the dots.
This one is just an experiment in texture.
Using Photoshop to combine elements of my lithographs and zinc plates.
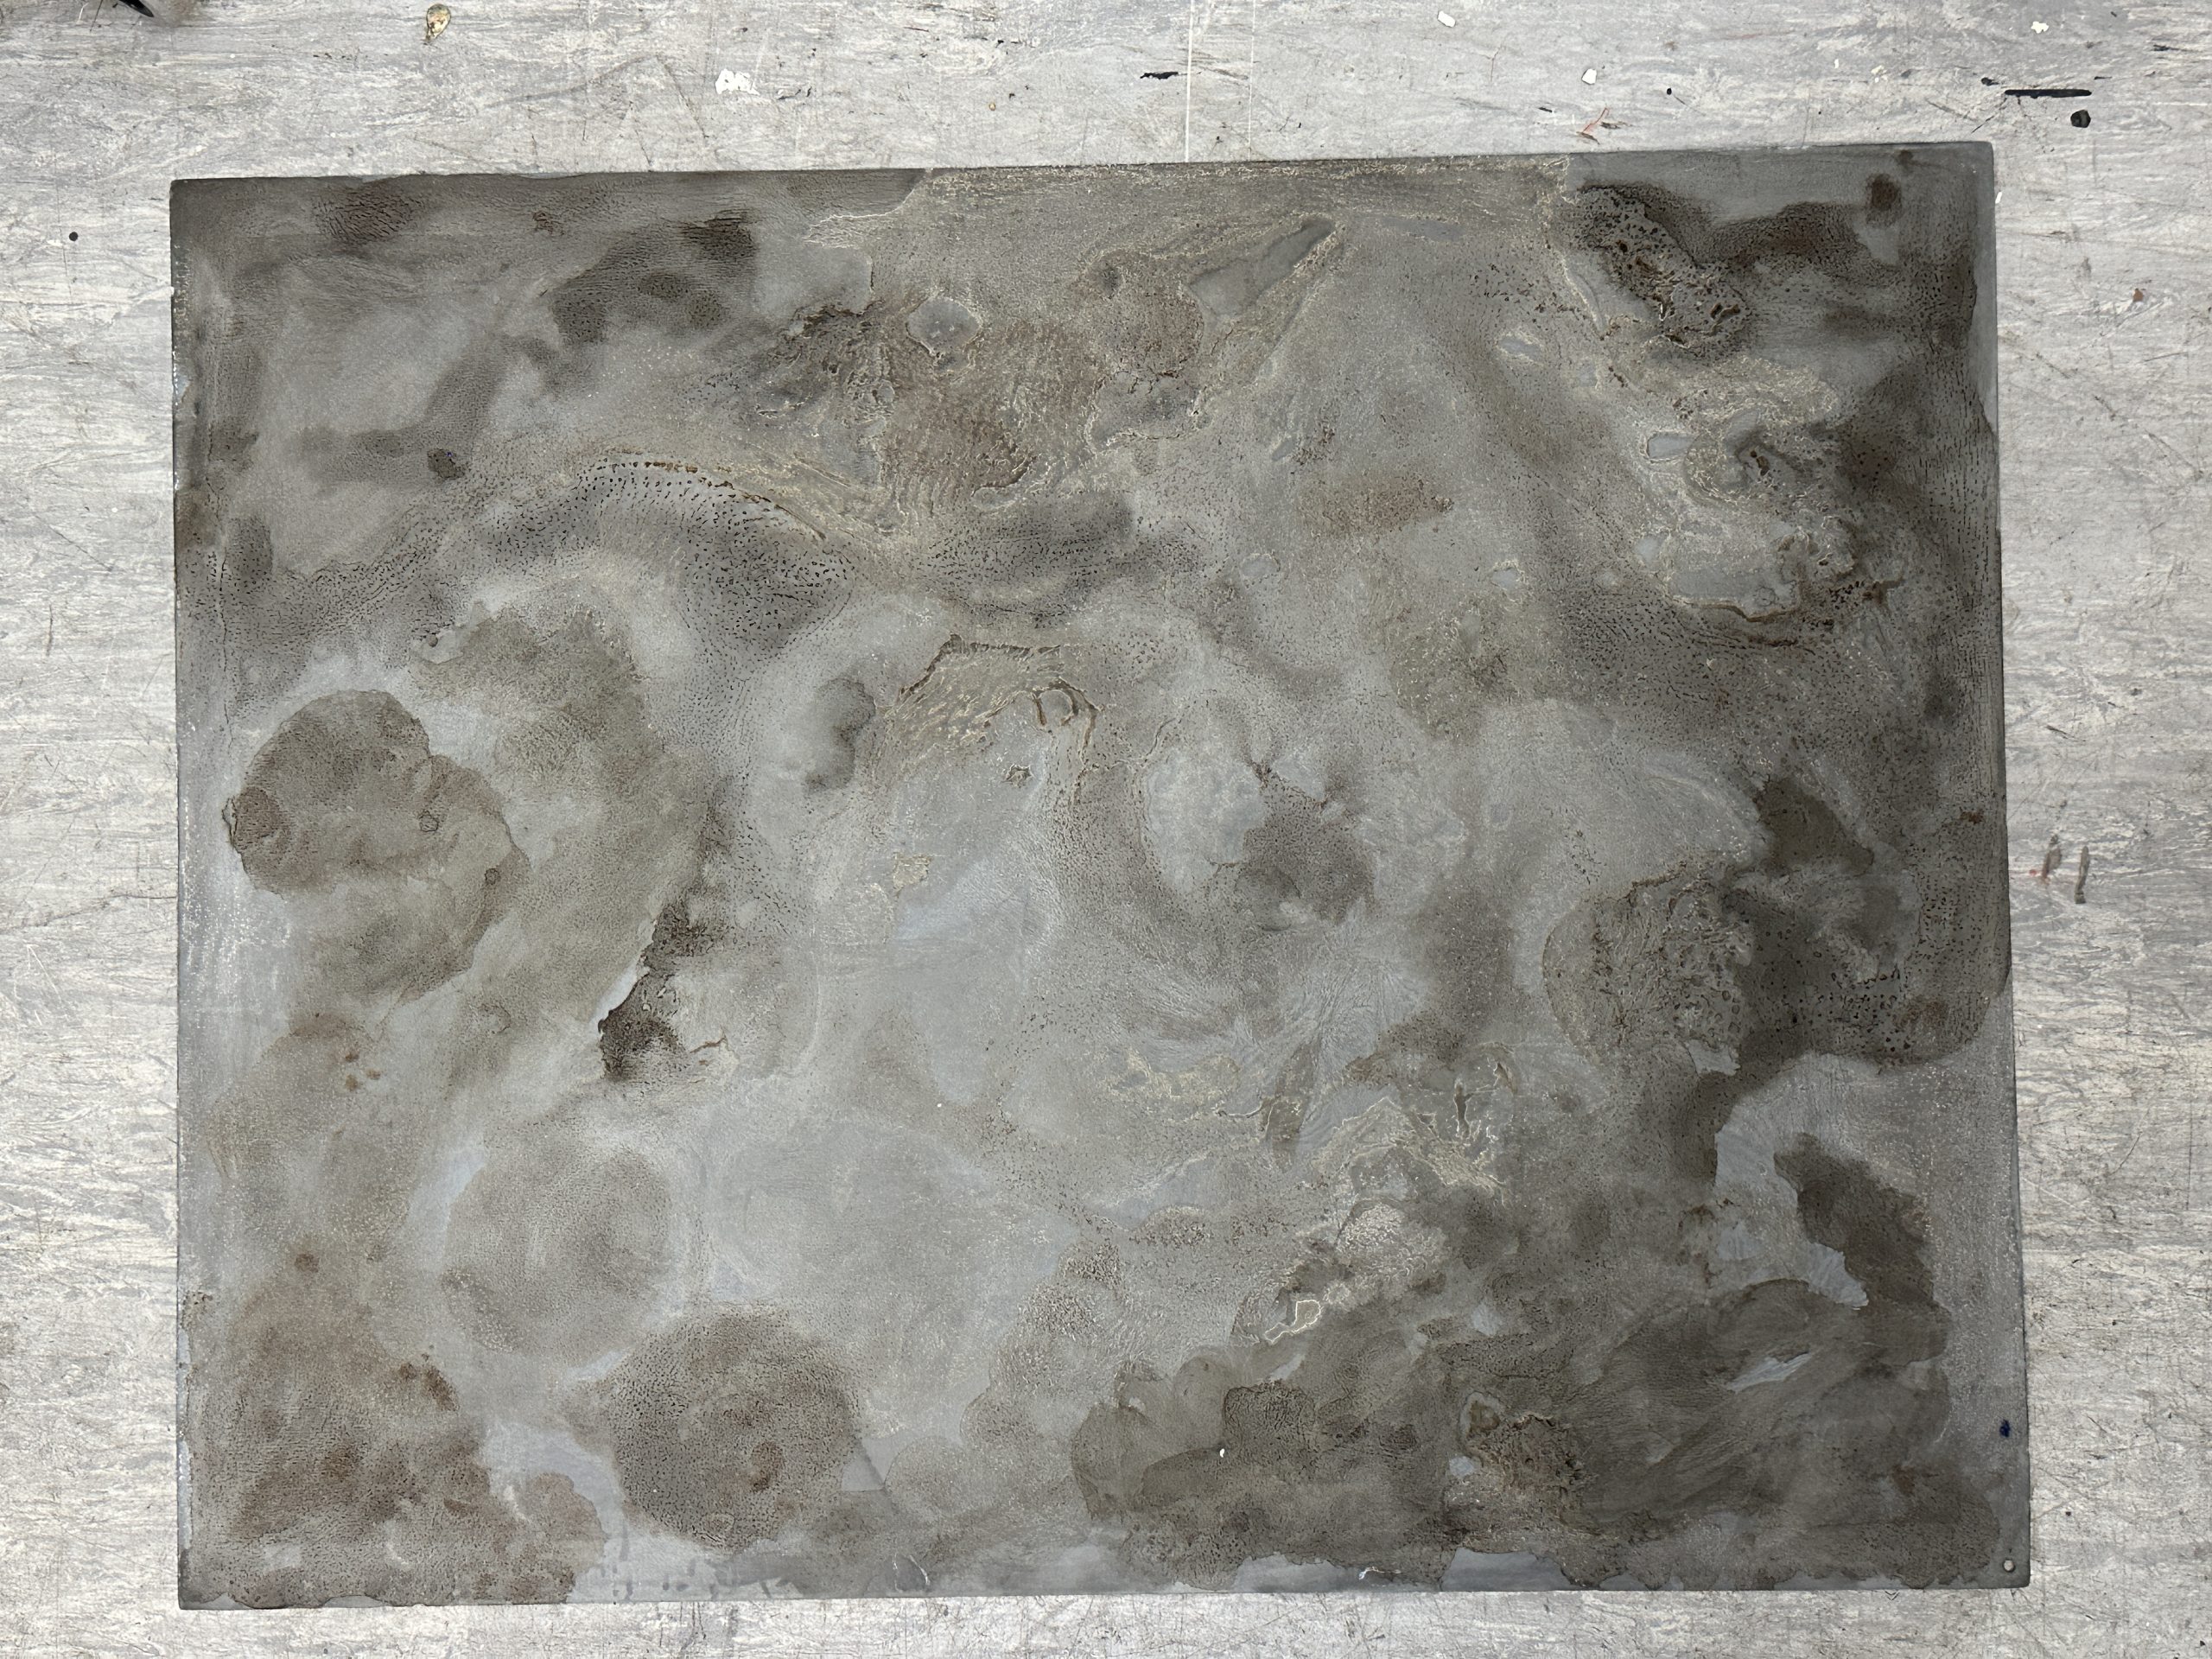
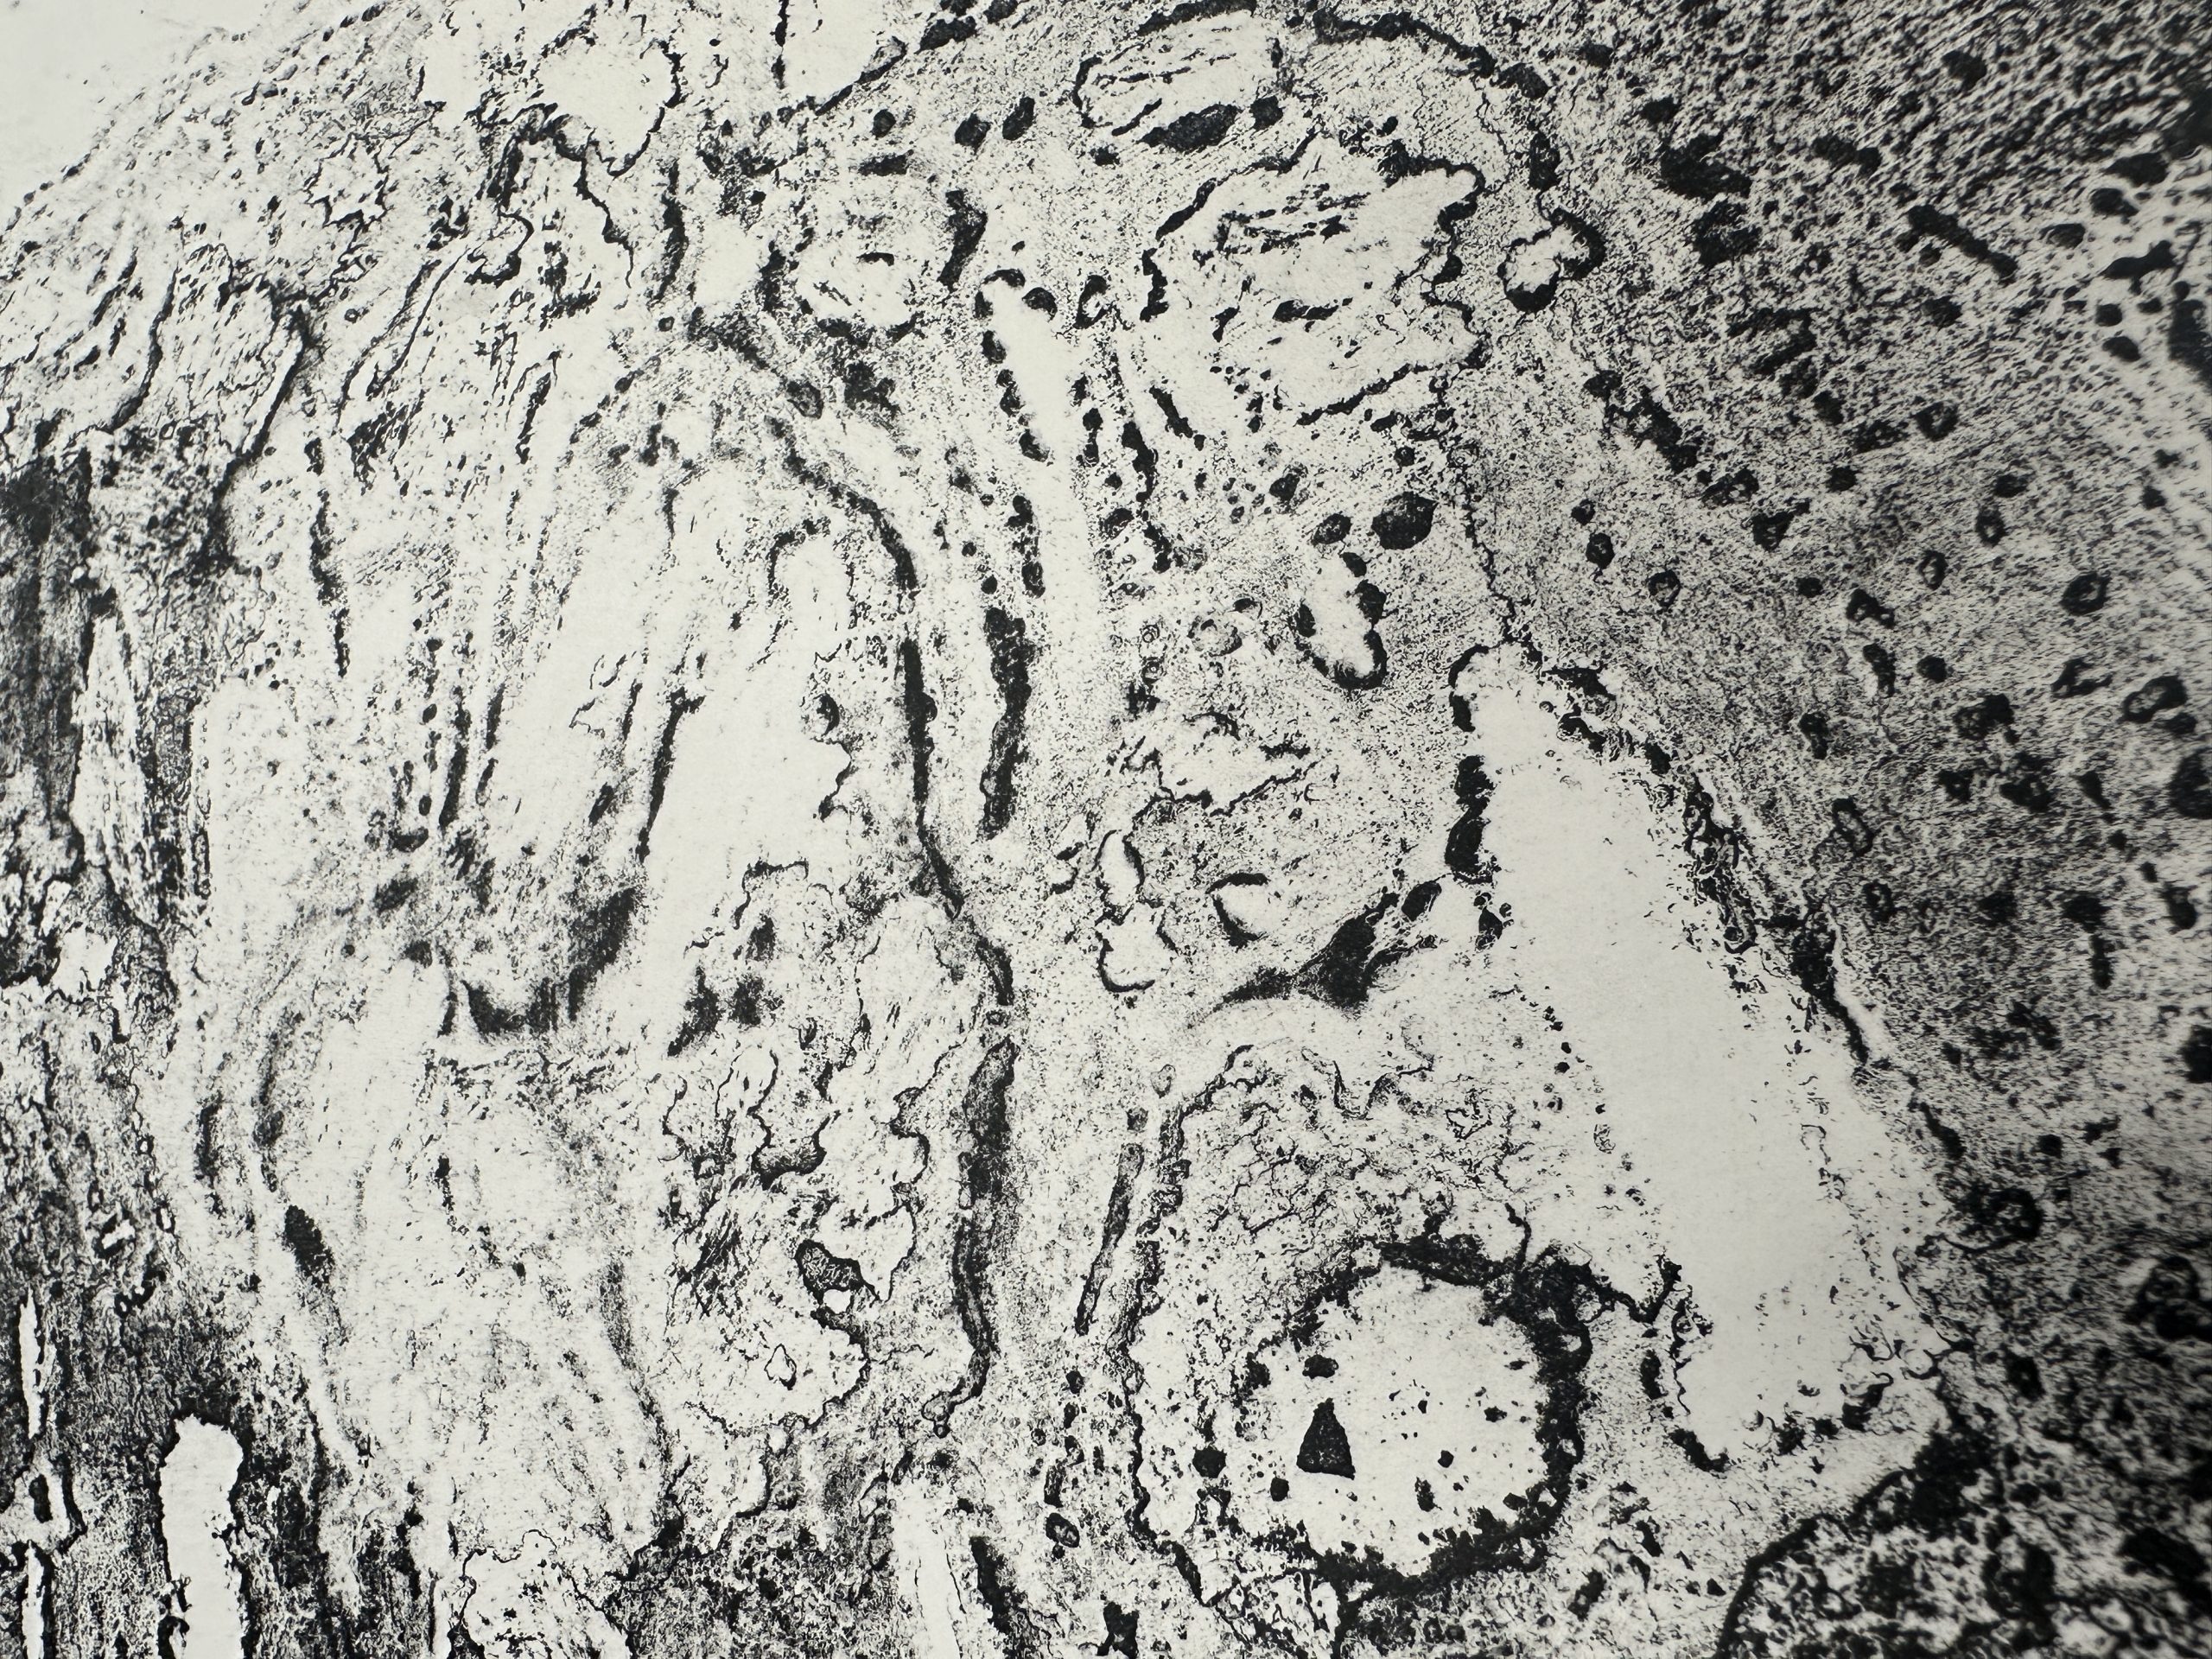
Texture Details:
Texture on plate:
上一页
下一页
Texture on paper:
上一页
下一页
- Offsite Lithography Practice -
In this exercise, I am exploring drawing in a very casual way that reminds me of the way the artist Bloch drew.
I wanted to use an unconscious drawing to express the entanglement between trees and the entanglement of life, so I drew a lot of lines. As well as I wanted to use zinc litho’s texture drawing as a background to add layers.
My intended idea was to overlap these lines over and over again, in different colours. It was also the most prepared for the Copeland show, but later I realised that the group of works had a very different feeling to the previous works, they didn’t feel like a whole body of work. A conversation with my tutor made me realise that I was going astray again and that I should continue to make works that have a sense of a series. So after the conversation, I didn’t continue this development.
But I explored something else in this exercise. I drew with asphalt, an idea that wasn’t really inspired by the artist Brock, but because every time I was applying the asphalt to the plate, I was interested in the process of dipping a stick into the asphalt and dripping them onto the plate, and it made me want to explore drawing in this way. So there was this attempt.
During the drawing process, the smell was particularly strong because of the asphalt I was using. So much so that I opened all the windows in the class and the smell of asphalt could not go away.
After drawing with sticks dipped in asphalt, I began to use a combination of water and brushes. So for me I explored a new visual language, when I use water to paint the asphalt there is a beautiful texture.
I also used Chinese ink, which when mixed with a lot of water and a little bit of asphalt gives a textural effect. When I draw mushrooms, I also use Chinese ink, when a lot of water is mixed with a little bit of asphalt a different texture will appear.
Drawing Process:
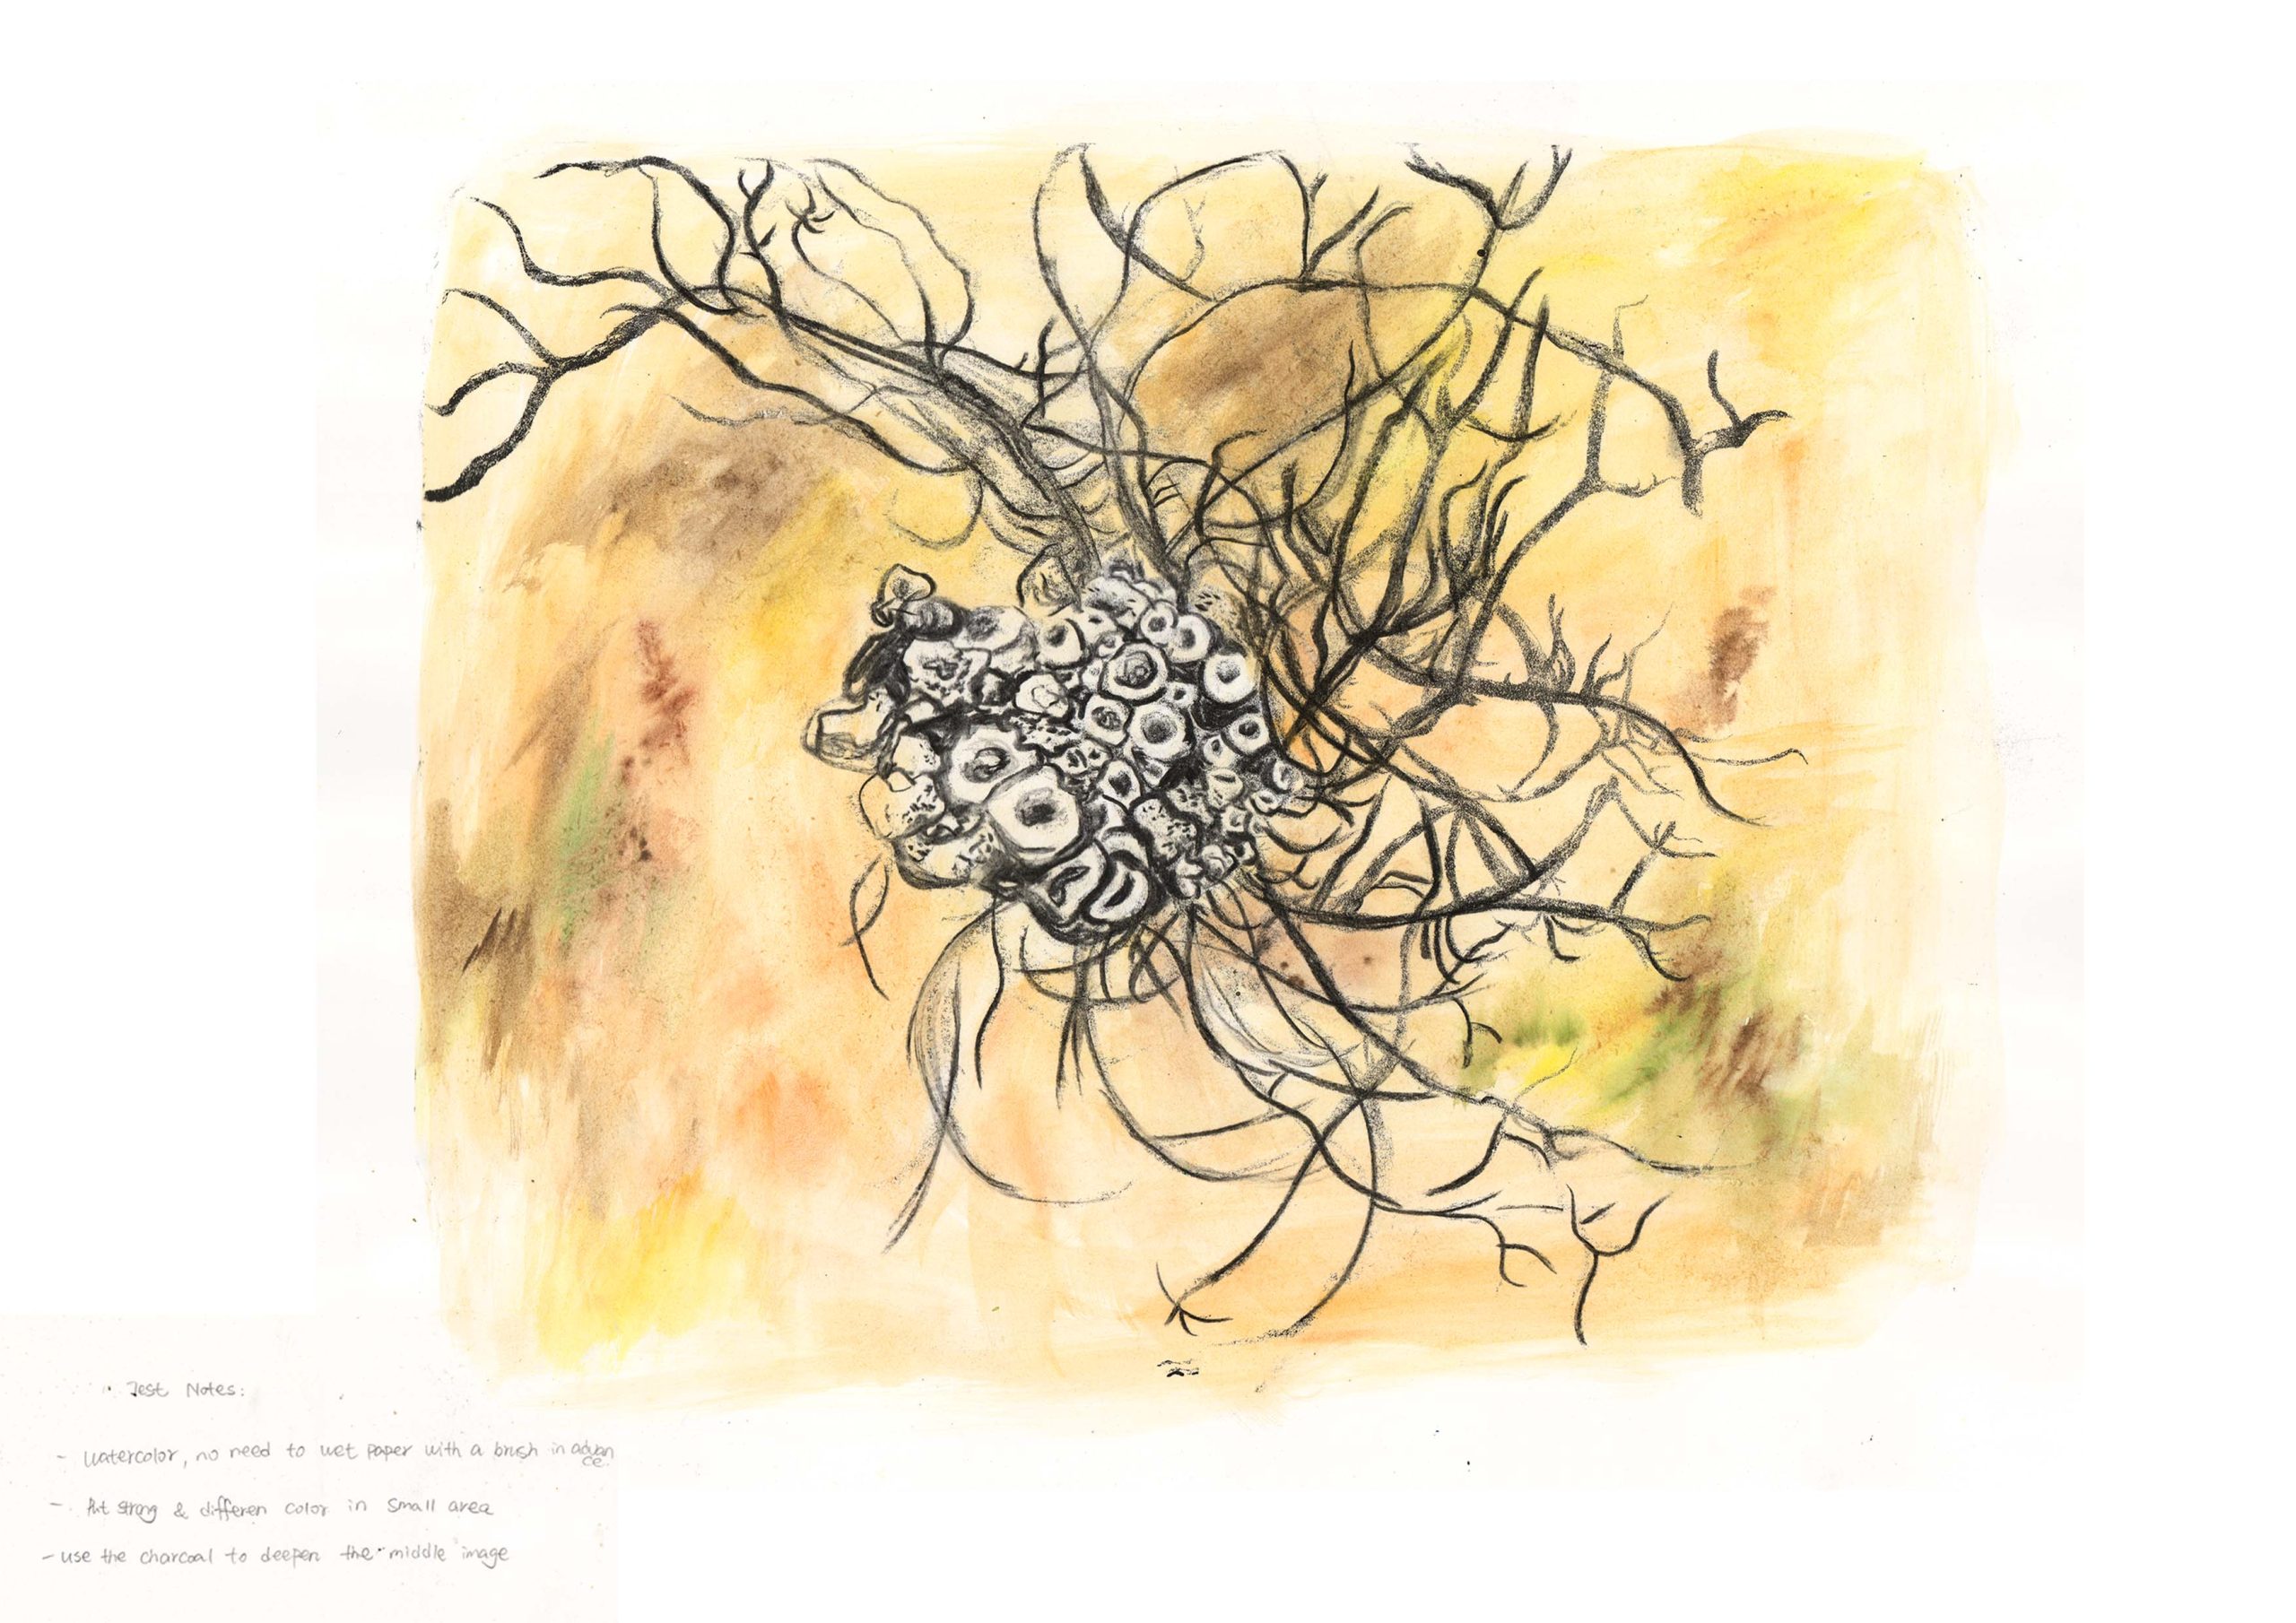
The drawing on the left is done on film paper in a slightly more detailed way, using charcoal and pencil. I was able to clearly see the size and image of my previous work because the film was transparent during the drawing process. It was easy to preset the final result in advance.
Printing Process:
During the printing process I still wanted to add colour between the images, so I used watercolour on the plate. But when I printed it, not a bit of colour appeared on the paper and I decided to add the colour by manually afterwards.
When I exposed my drawing on the plate I could see a very obvious texture. It’s a combination of water and China ink and asphalt.
When I was inking the plate, the image gradually increased in black and in different shades. So the visual effect presented is very three-dimensional, which I quite like.
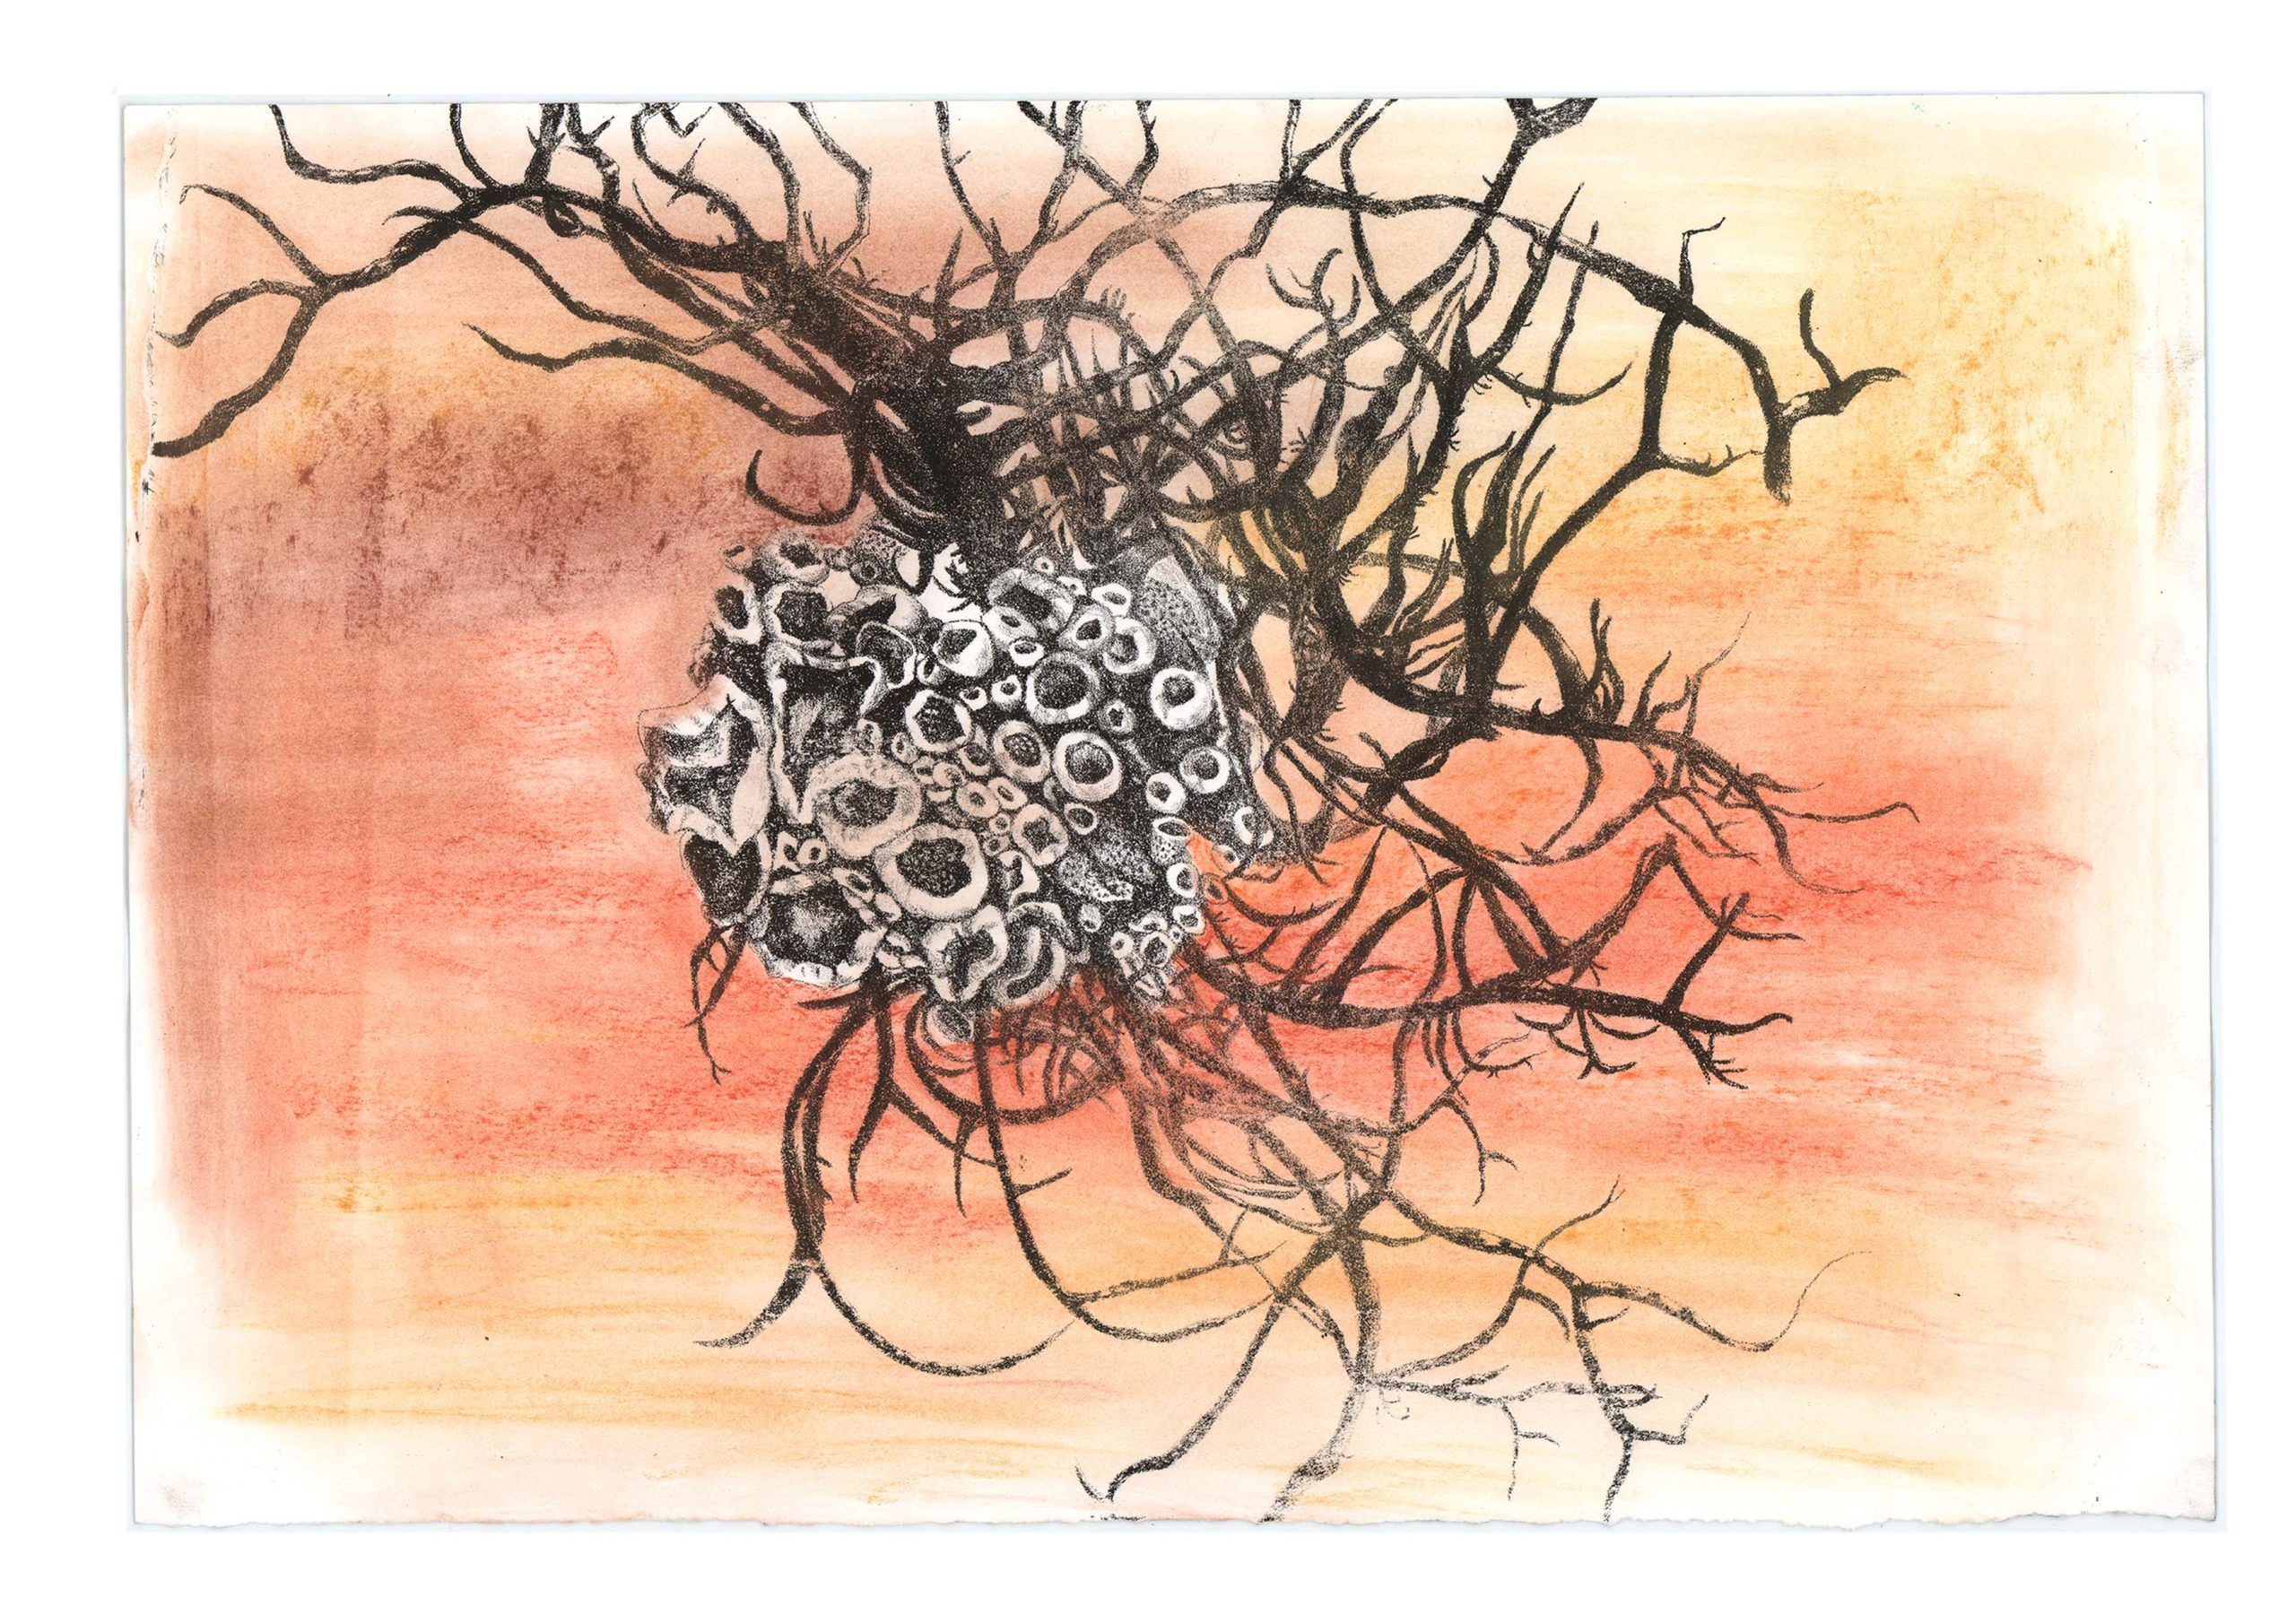
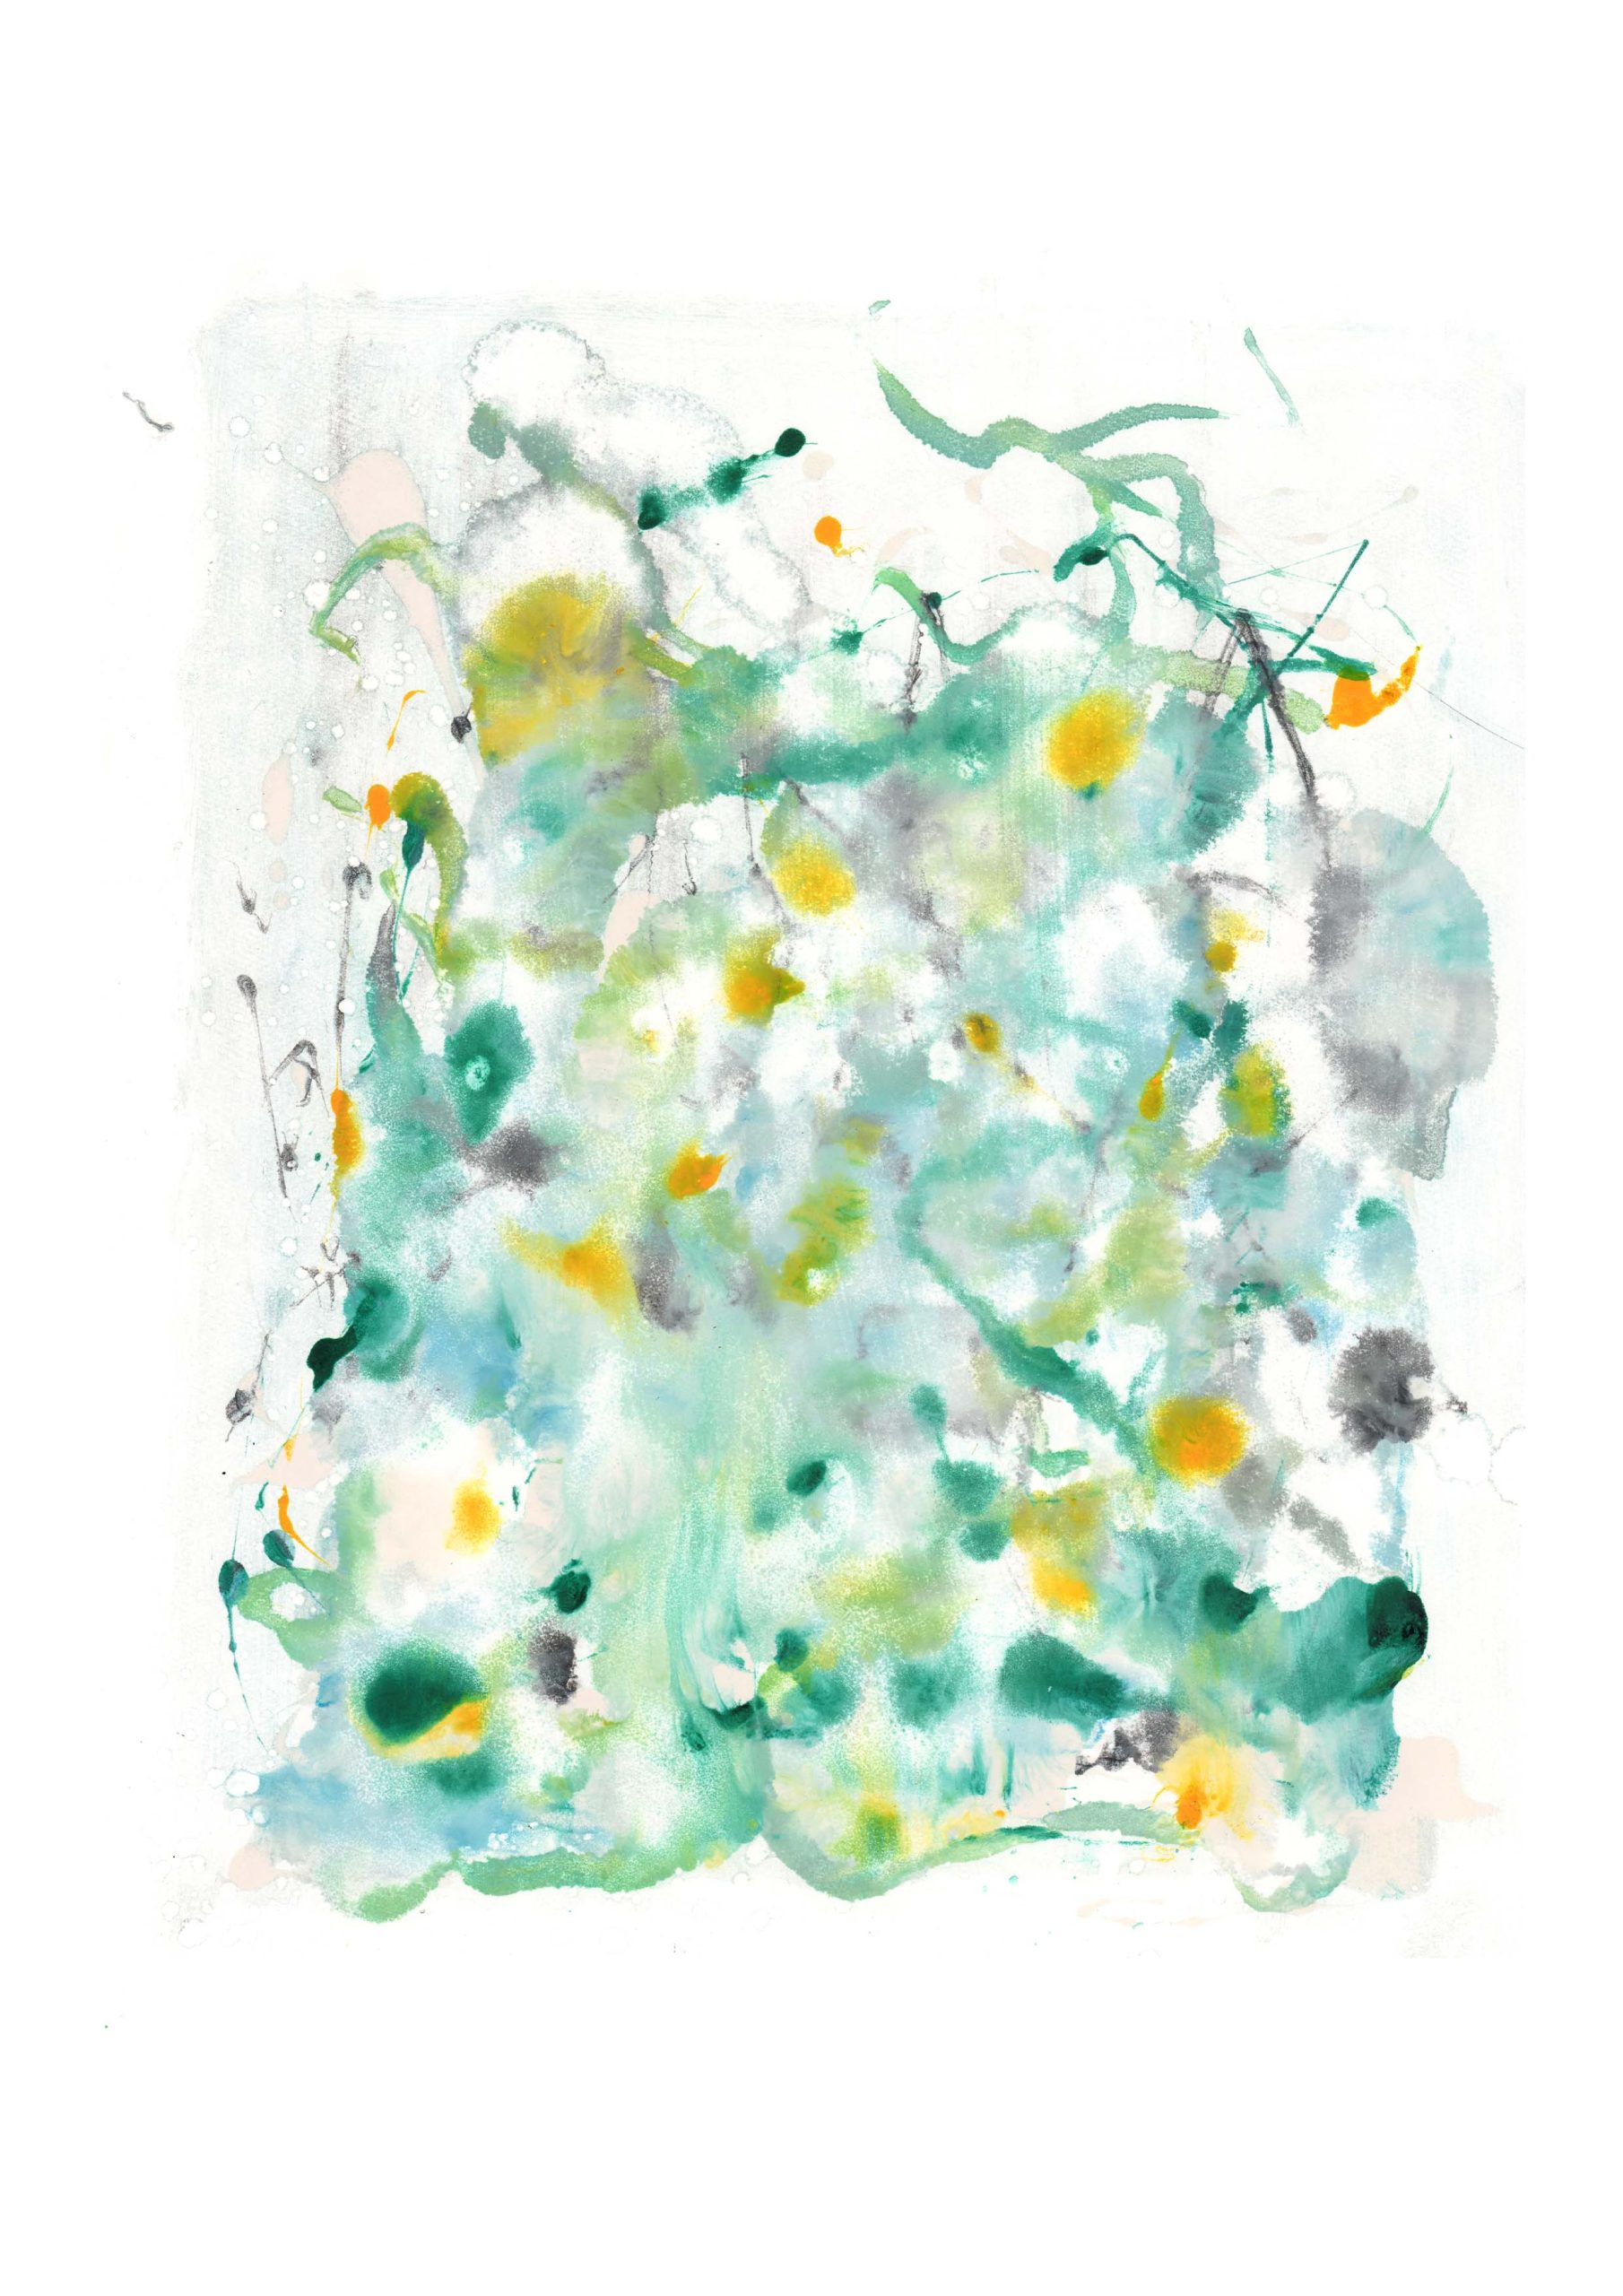
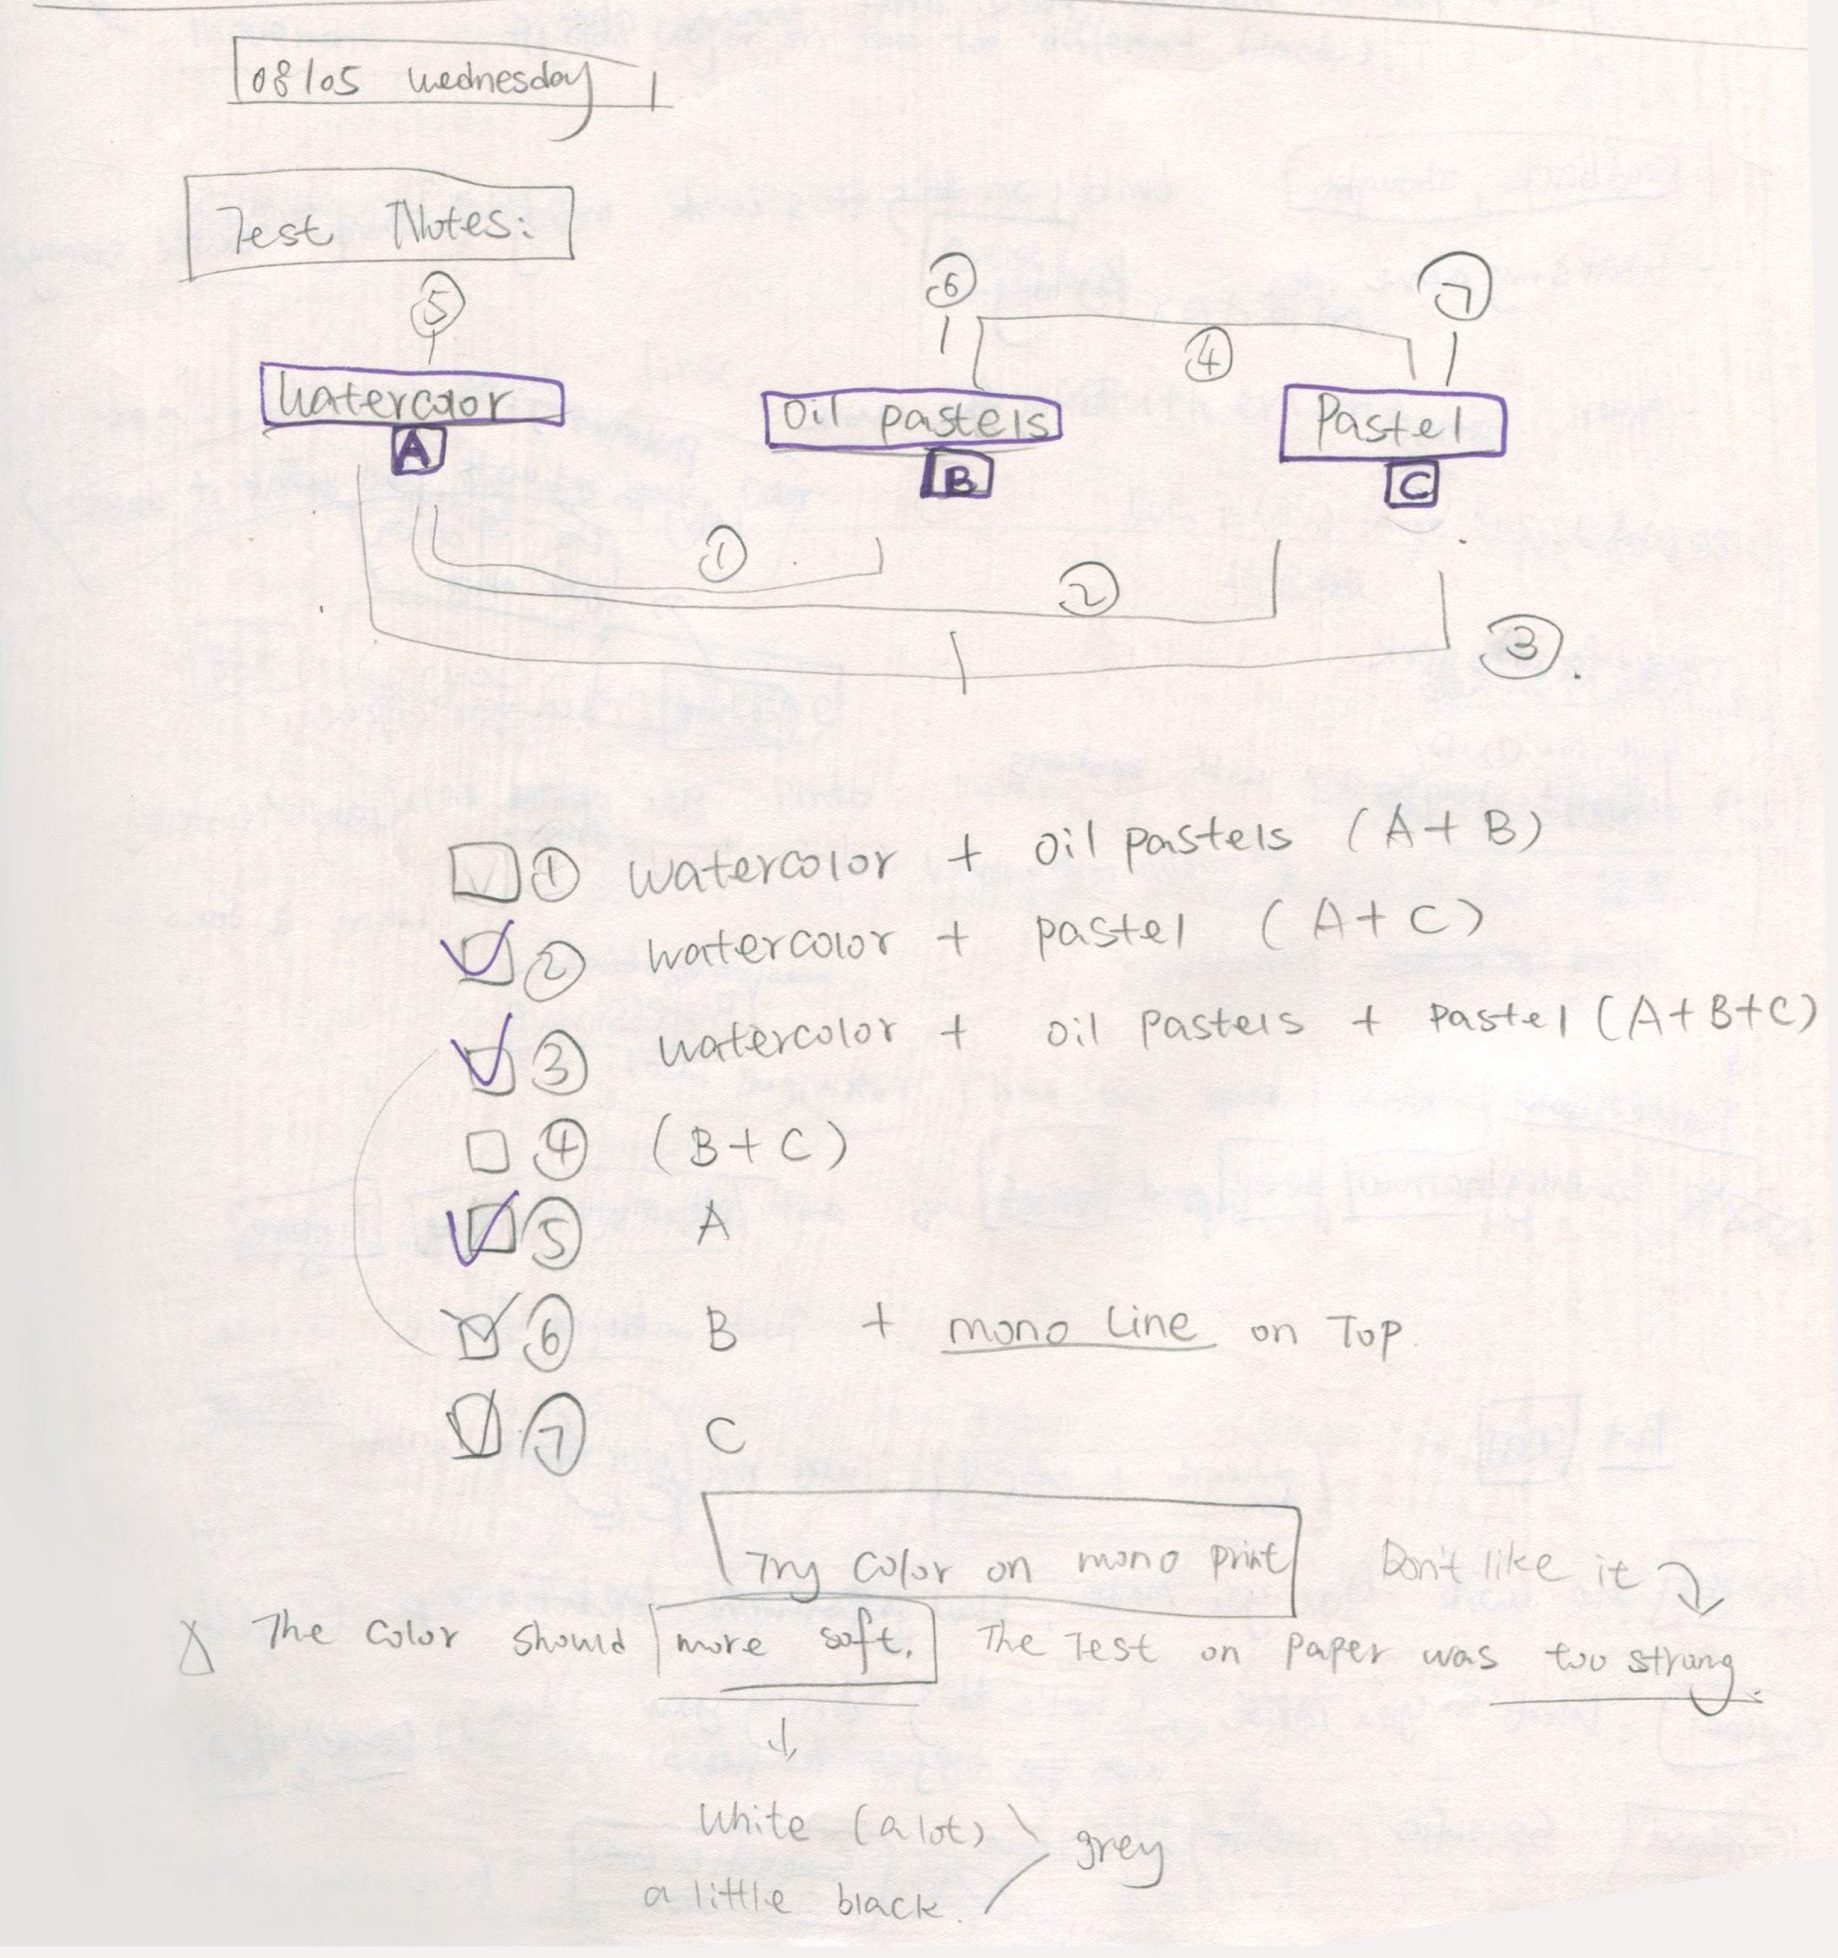
- Colour Study -
The exercises in this group are exploring the combination of colour and lithography.
This exploration came after the Copeland show because I felt that when I looked at my work at the show I thought there was something ordinary and dull about just black and white, but I don’t know if I’m right. The more I practiced the colours, the more I realised that this feeling was not the result I was looking for. I’ve always wanted a very soft tone or a very neutral tone for my colours, but every time I’ve experimented with colours, I’ve ended up with very bright colours. It seems like this colour is only there because I want it to look good, but I don’t question myself why I want to add the colour, and whether the colour has a special meaning, so all these colours I add make me dissatisfied.
But looking back, the reason I wanted to add the colours was because I wanted the fungus to grow in an environment where the universe was the backdrop. Or to continue the idea I had earlier after doing etching, as well as continuing from my first unit, the idea that a part of the universe also exists within the human body, so we are a part of the universe, and then this concept can be linked right in to the fungi’s characteristics of death and rebirth.
In this part, I am influenced by three artists, one is Zao Wou-ki and the other two are Japanese artists Sergej Jensen and Yoko Matsumoto, both of whom have exhibitions curated by white cube. The colour study of the two Japanese artists I will put in the exercise of the mono print below. The paintings of these three artists all give me a mysterious feeling like the universe. So when I was doing the monoprint, I referred to the colour schemes of each of these artists’ works to experiment with colours.
Process and Experimentation:
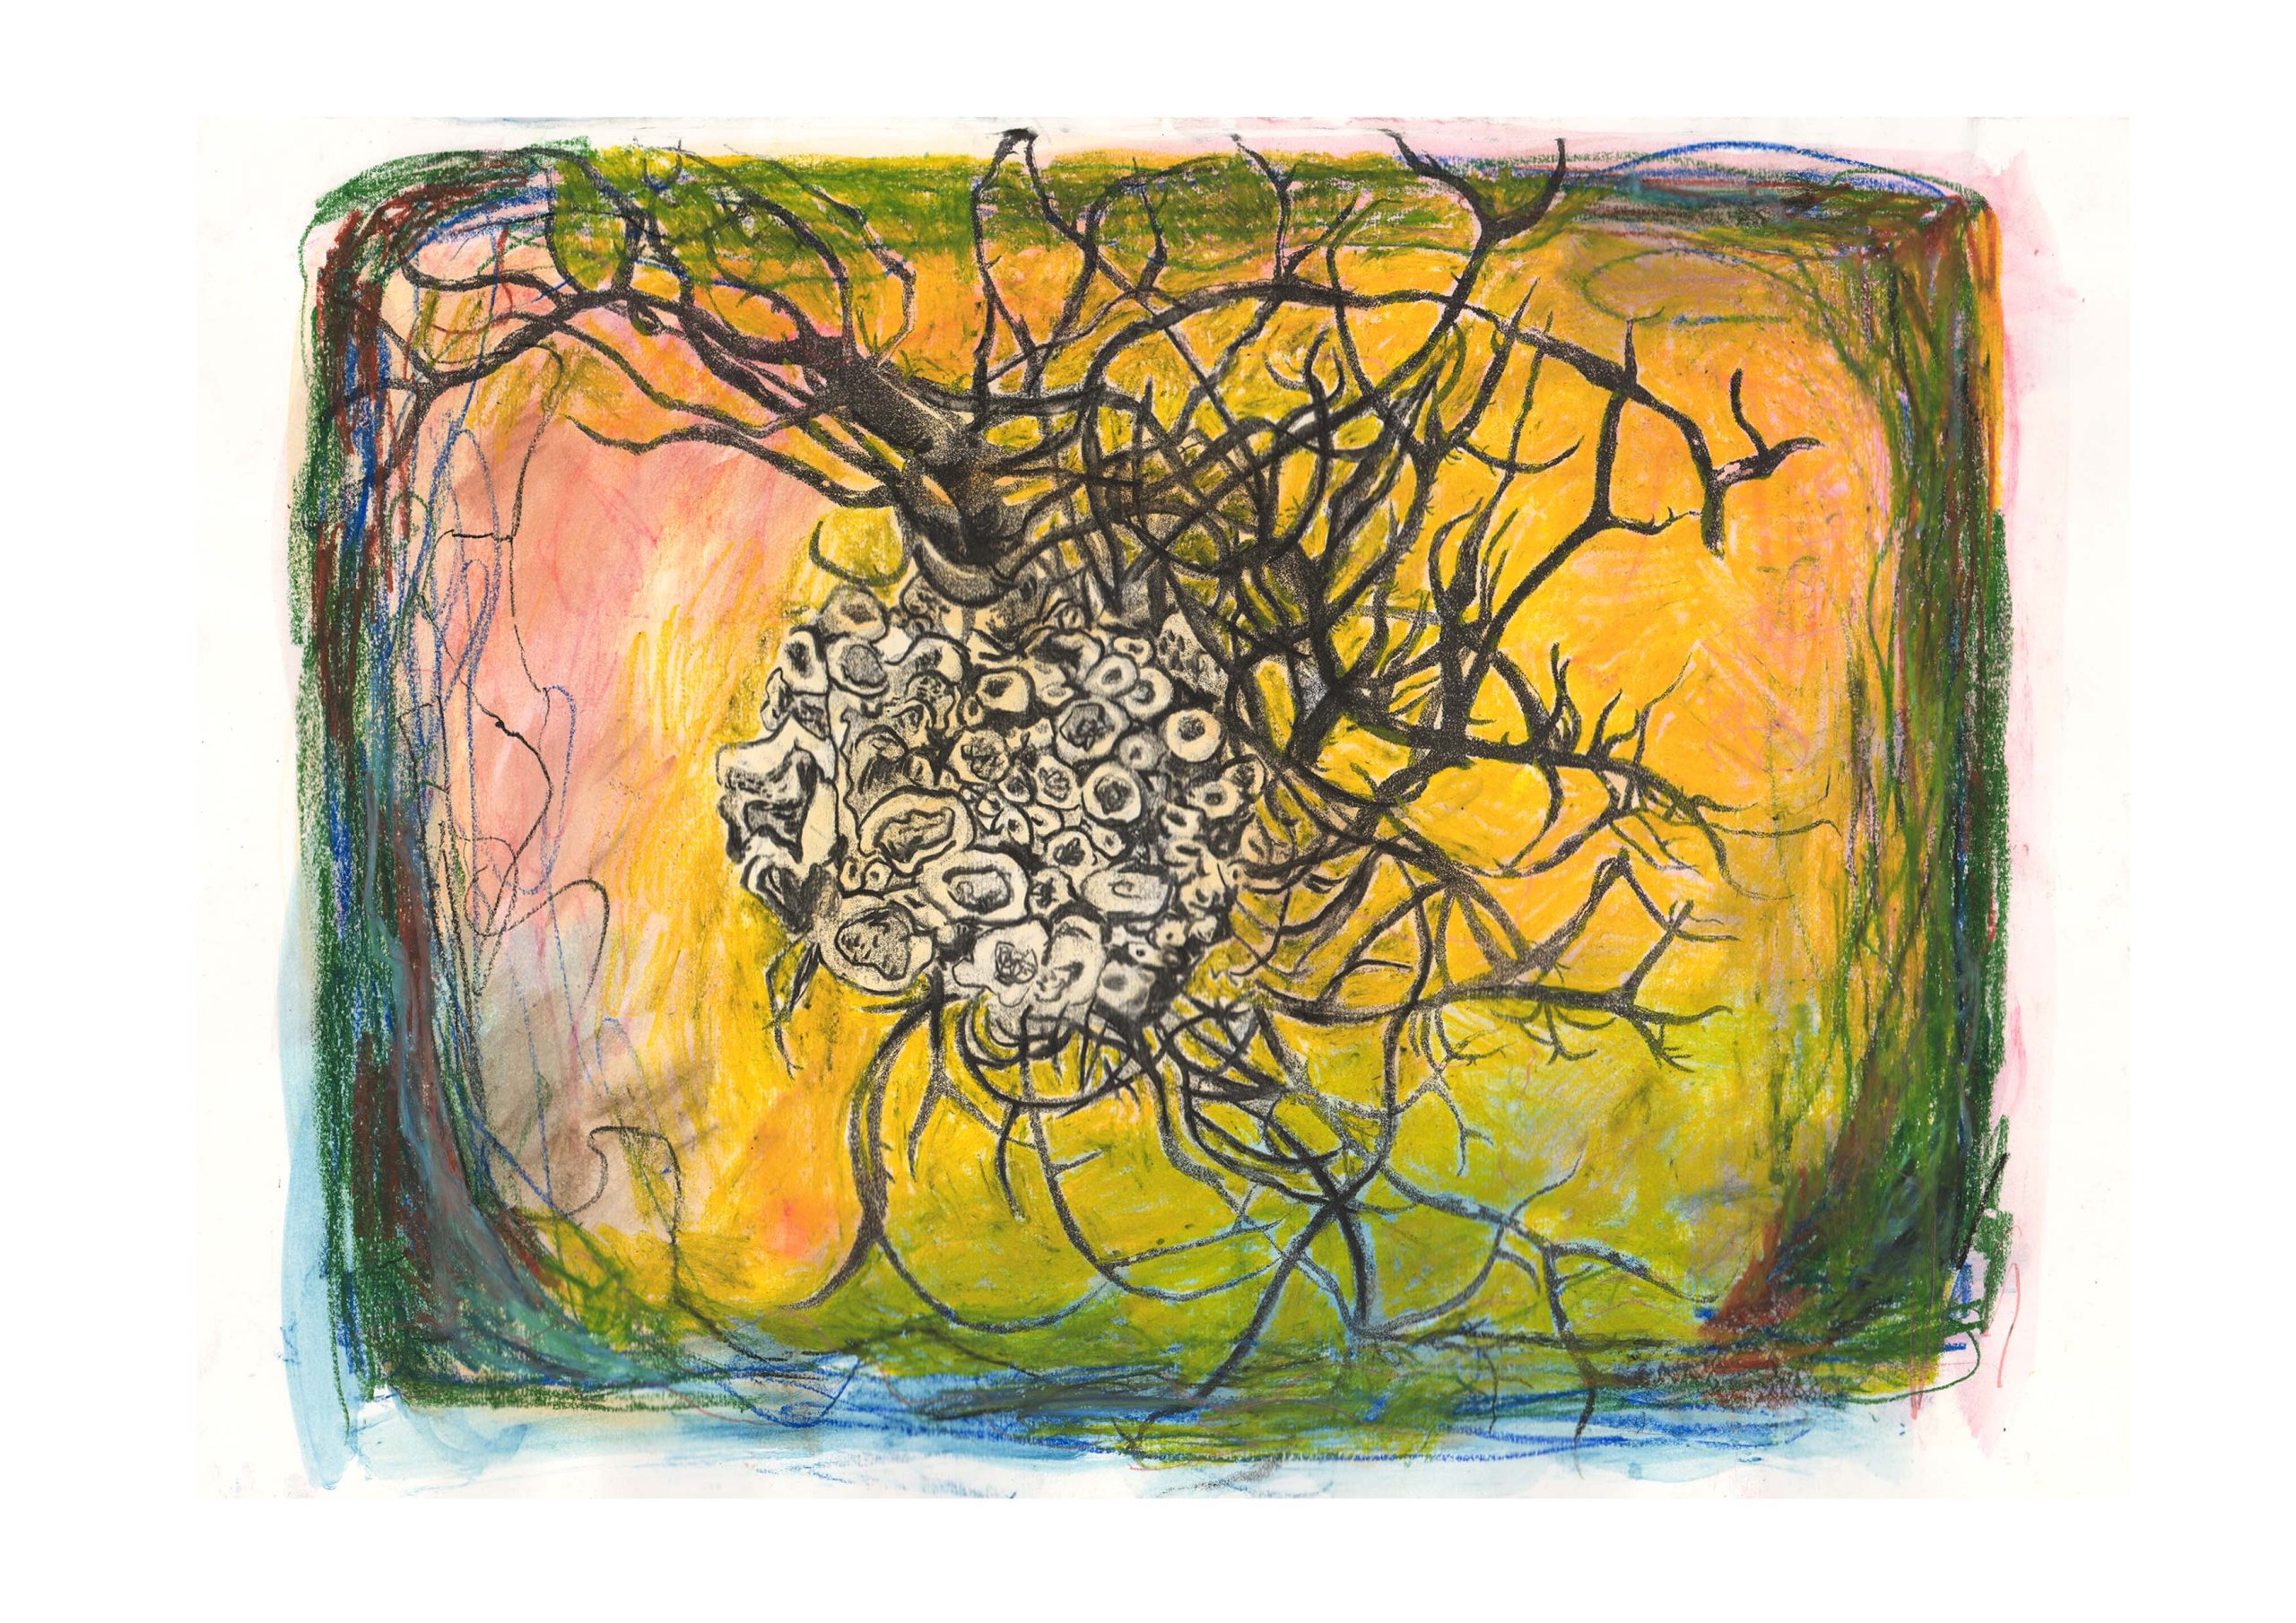
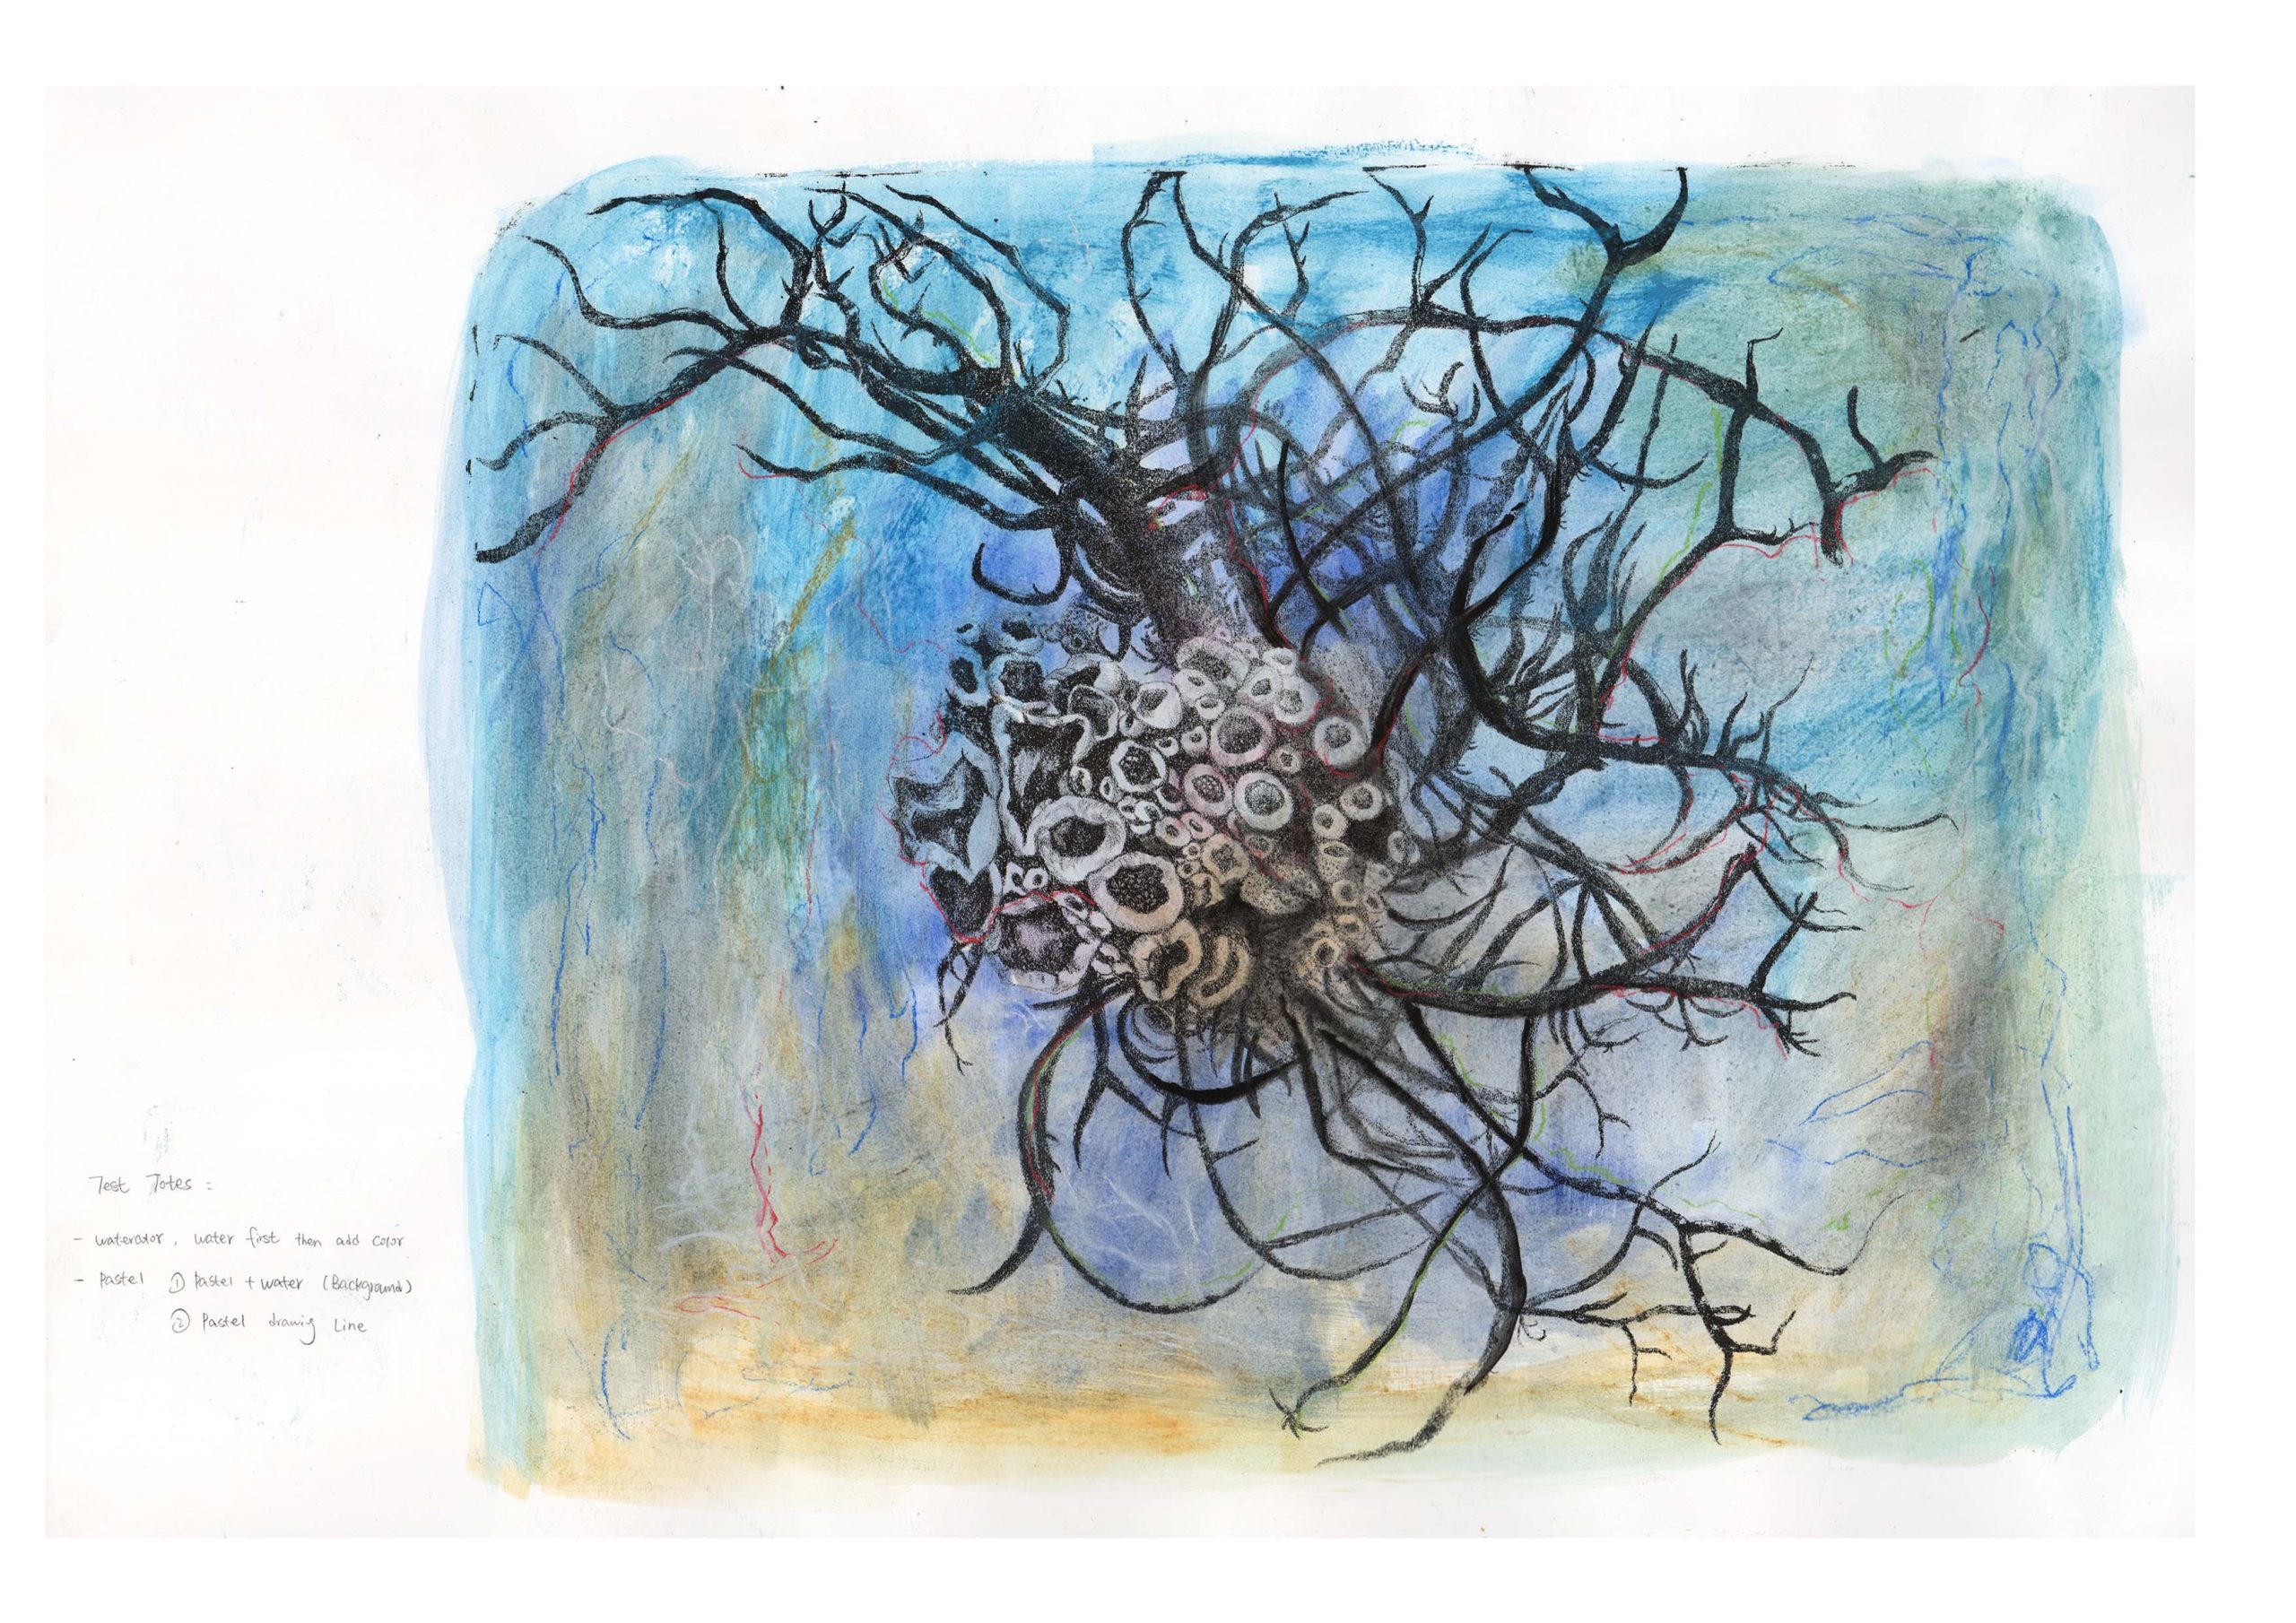
My first reference was Zao Wou-ki’s work, for some reason I am fascinated by the abstract way of painting and I used the Zao Wou-ki book of paintings I borrowed from the library for my colour references. I have used different techniques to add colour to each piece. Partly I have scanned in the photos to show the steps of the drawings I was doing at the time.
Reference
Reference
Only pastel was used here.
Reference
Reference
For this one I used watercolour, crayons and mono print.
For the image on the right I am using just mono print. using the palm of my hand to print the colour onto the paper, I tried to combine two different colours together and then used a pen to draw the lines.
The outcome of the colour study:
上一页
下一页
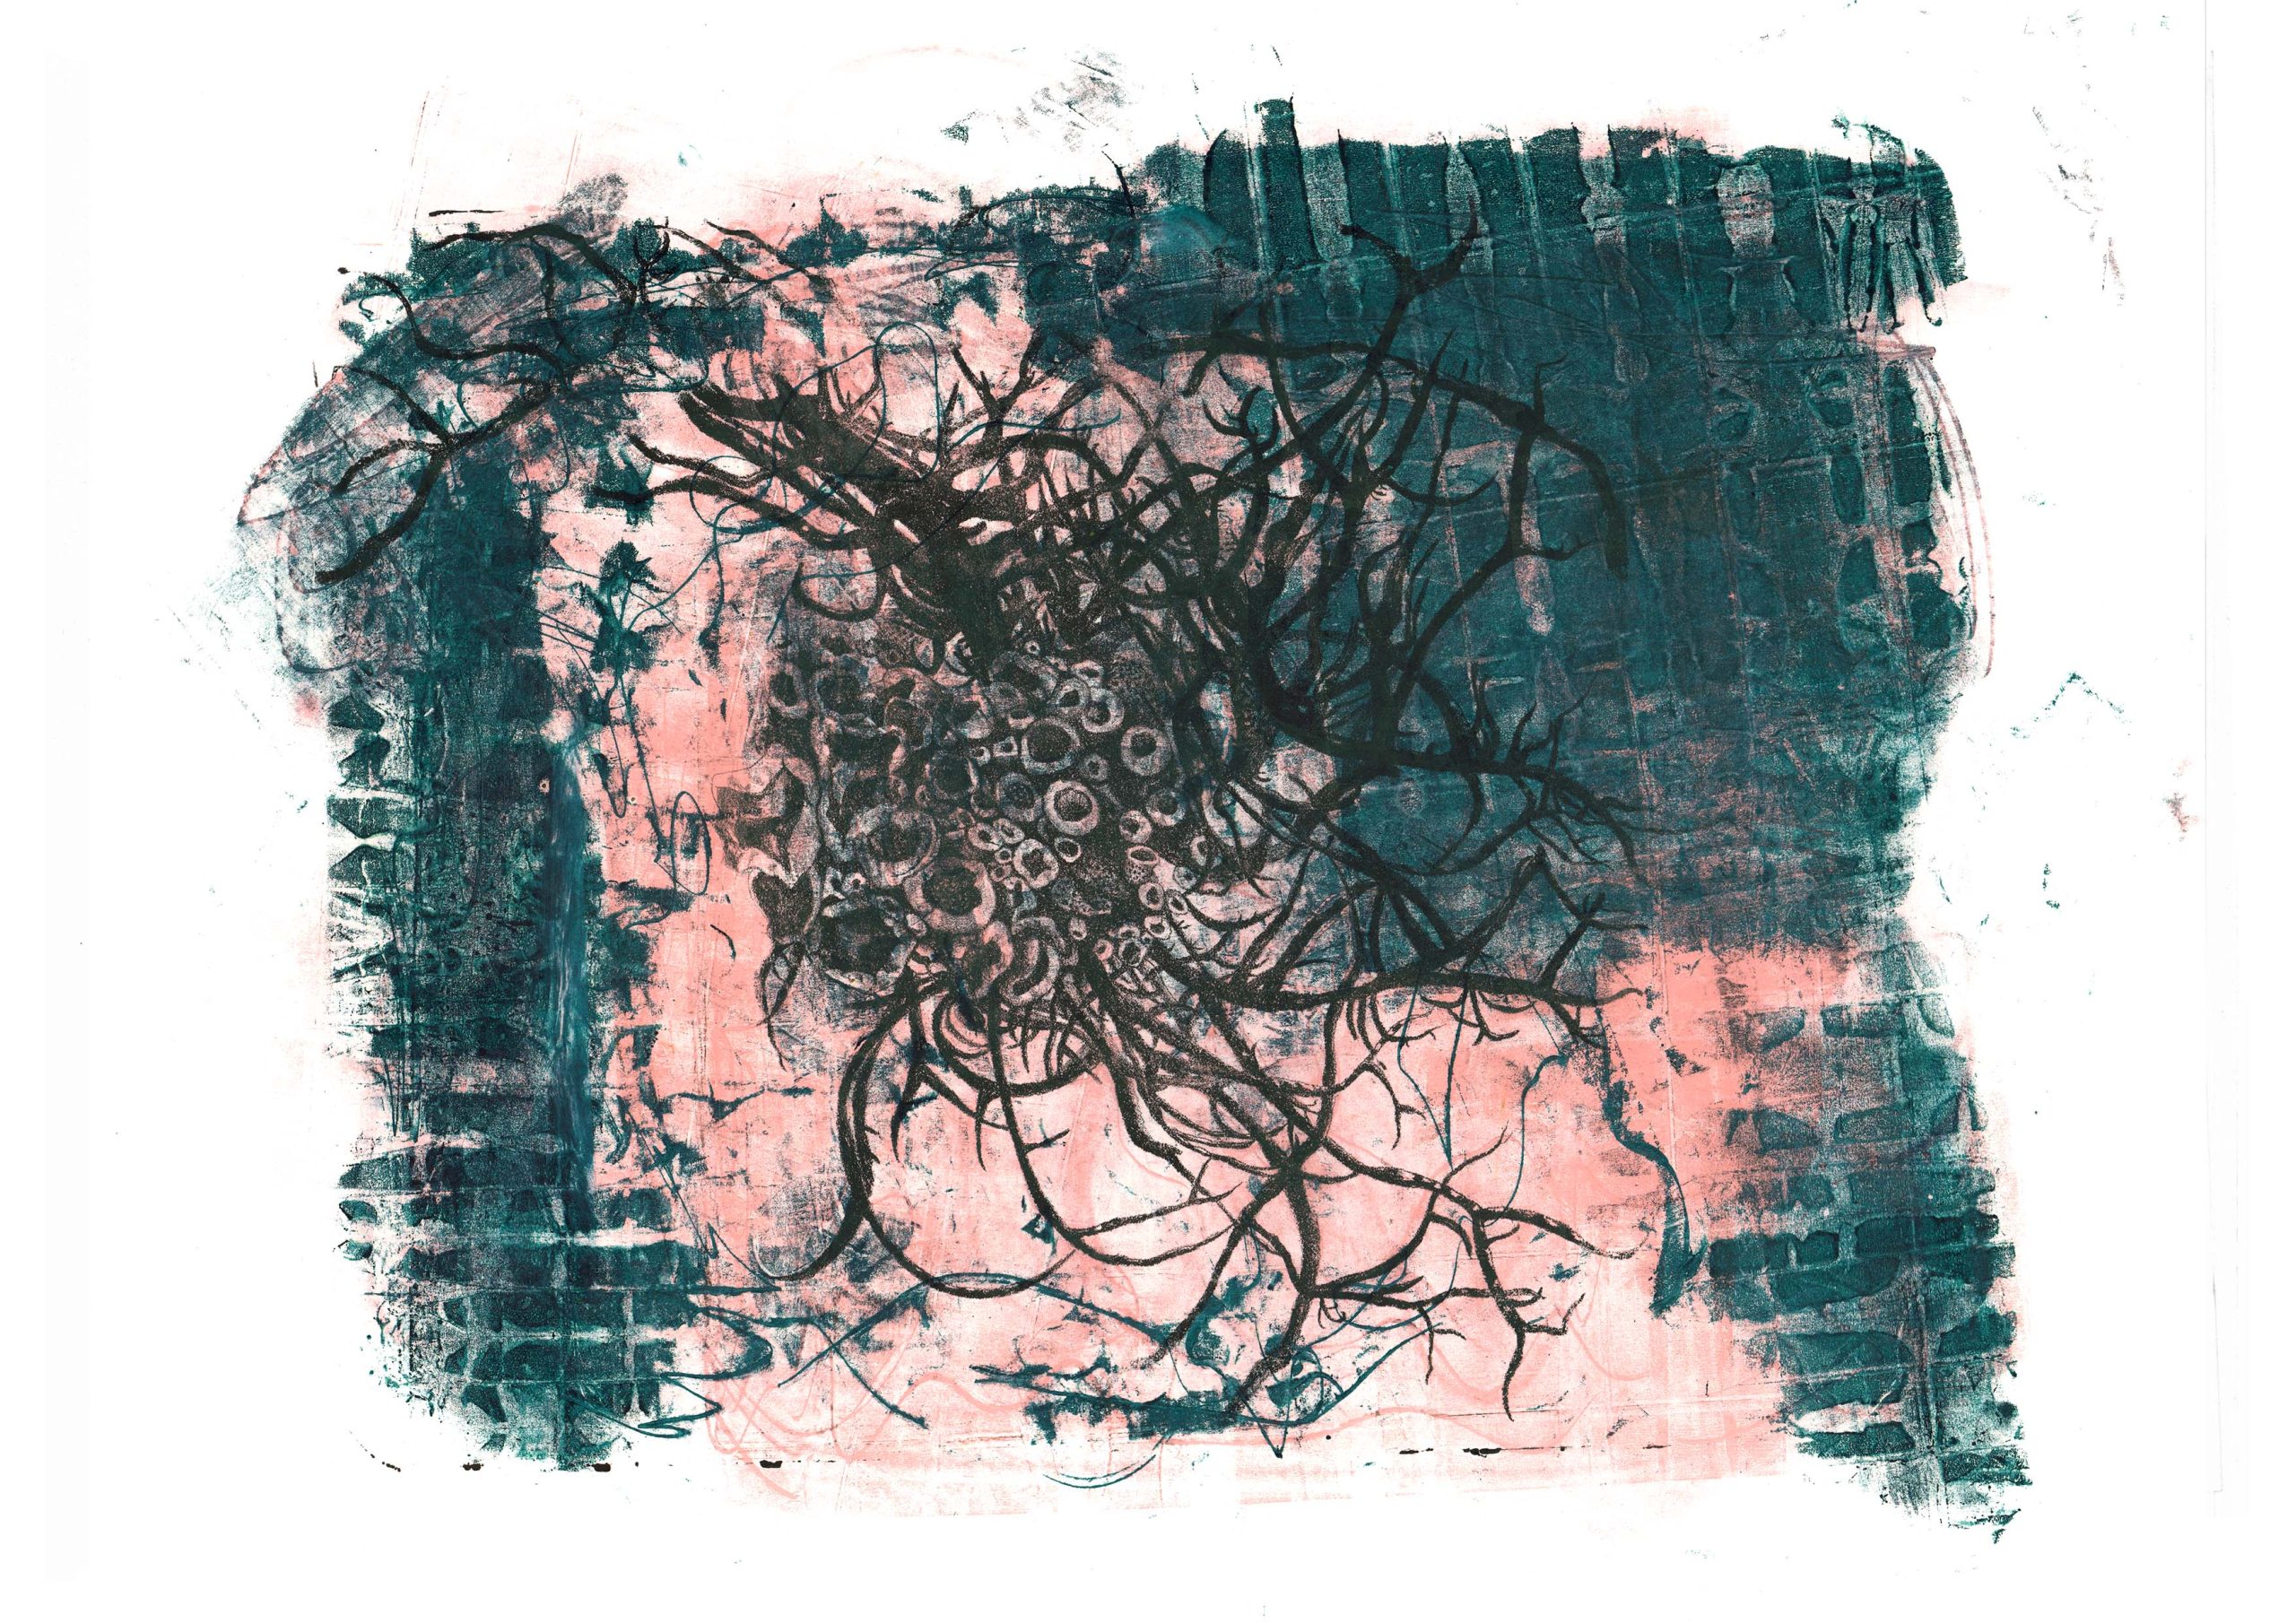
- Monoprinting Practice -
This is partly a colour study where I refer to the paintings of two Japanese artists, Sergej Jensen and Yoko Matsumoto.
Process:
reference by Sergej Jensen
I started by taking my previous bad prints and experimenting with the colours. The first attempt my mono print covered my print. A very important factor was that I forgot to add a lot of transparent pigment.
reference by Yoko Matsumoto
So I changed my mind, I decided to do the mono print as a background first and then print lithography on it later.
I first tried mono print on my fabric, but because my fabric wasn’t very flat, it wasn’t printing a lot of colours on the fabric so I wet the paper with better quality paper so that the paper could absorb the colours more, so I got the comparison pictures on the right.
I found that it would work better on paper than on fabric, so I continued to explore the effects of paper printing with mono print.
print on fabric
print on paper
This time I used a lot of white as well as transparent pigments, but still not as much proportion as I had used in the earlier attempt.
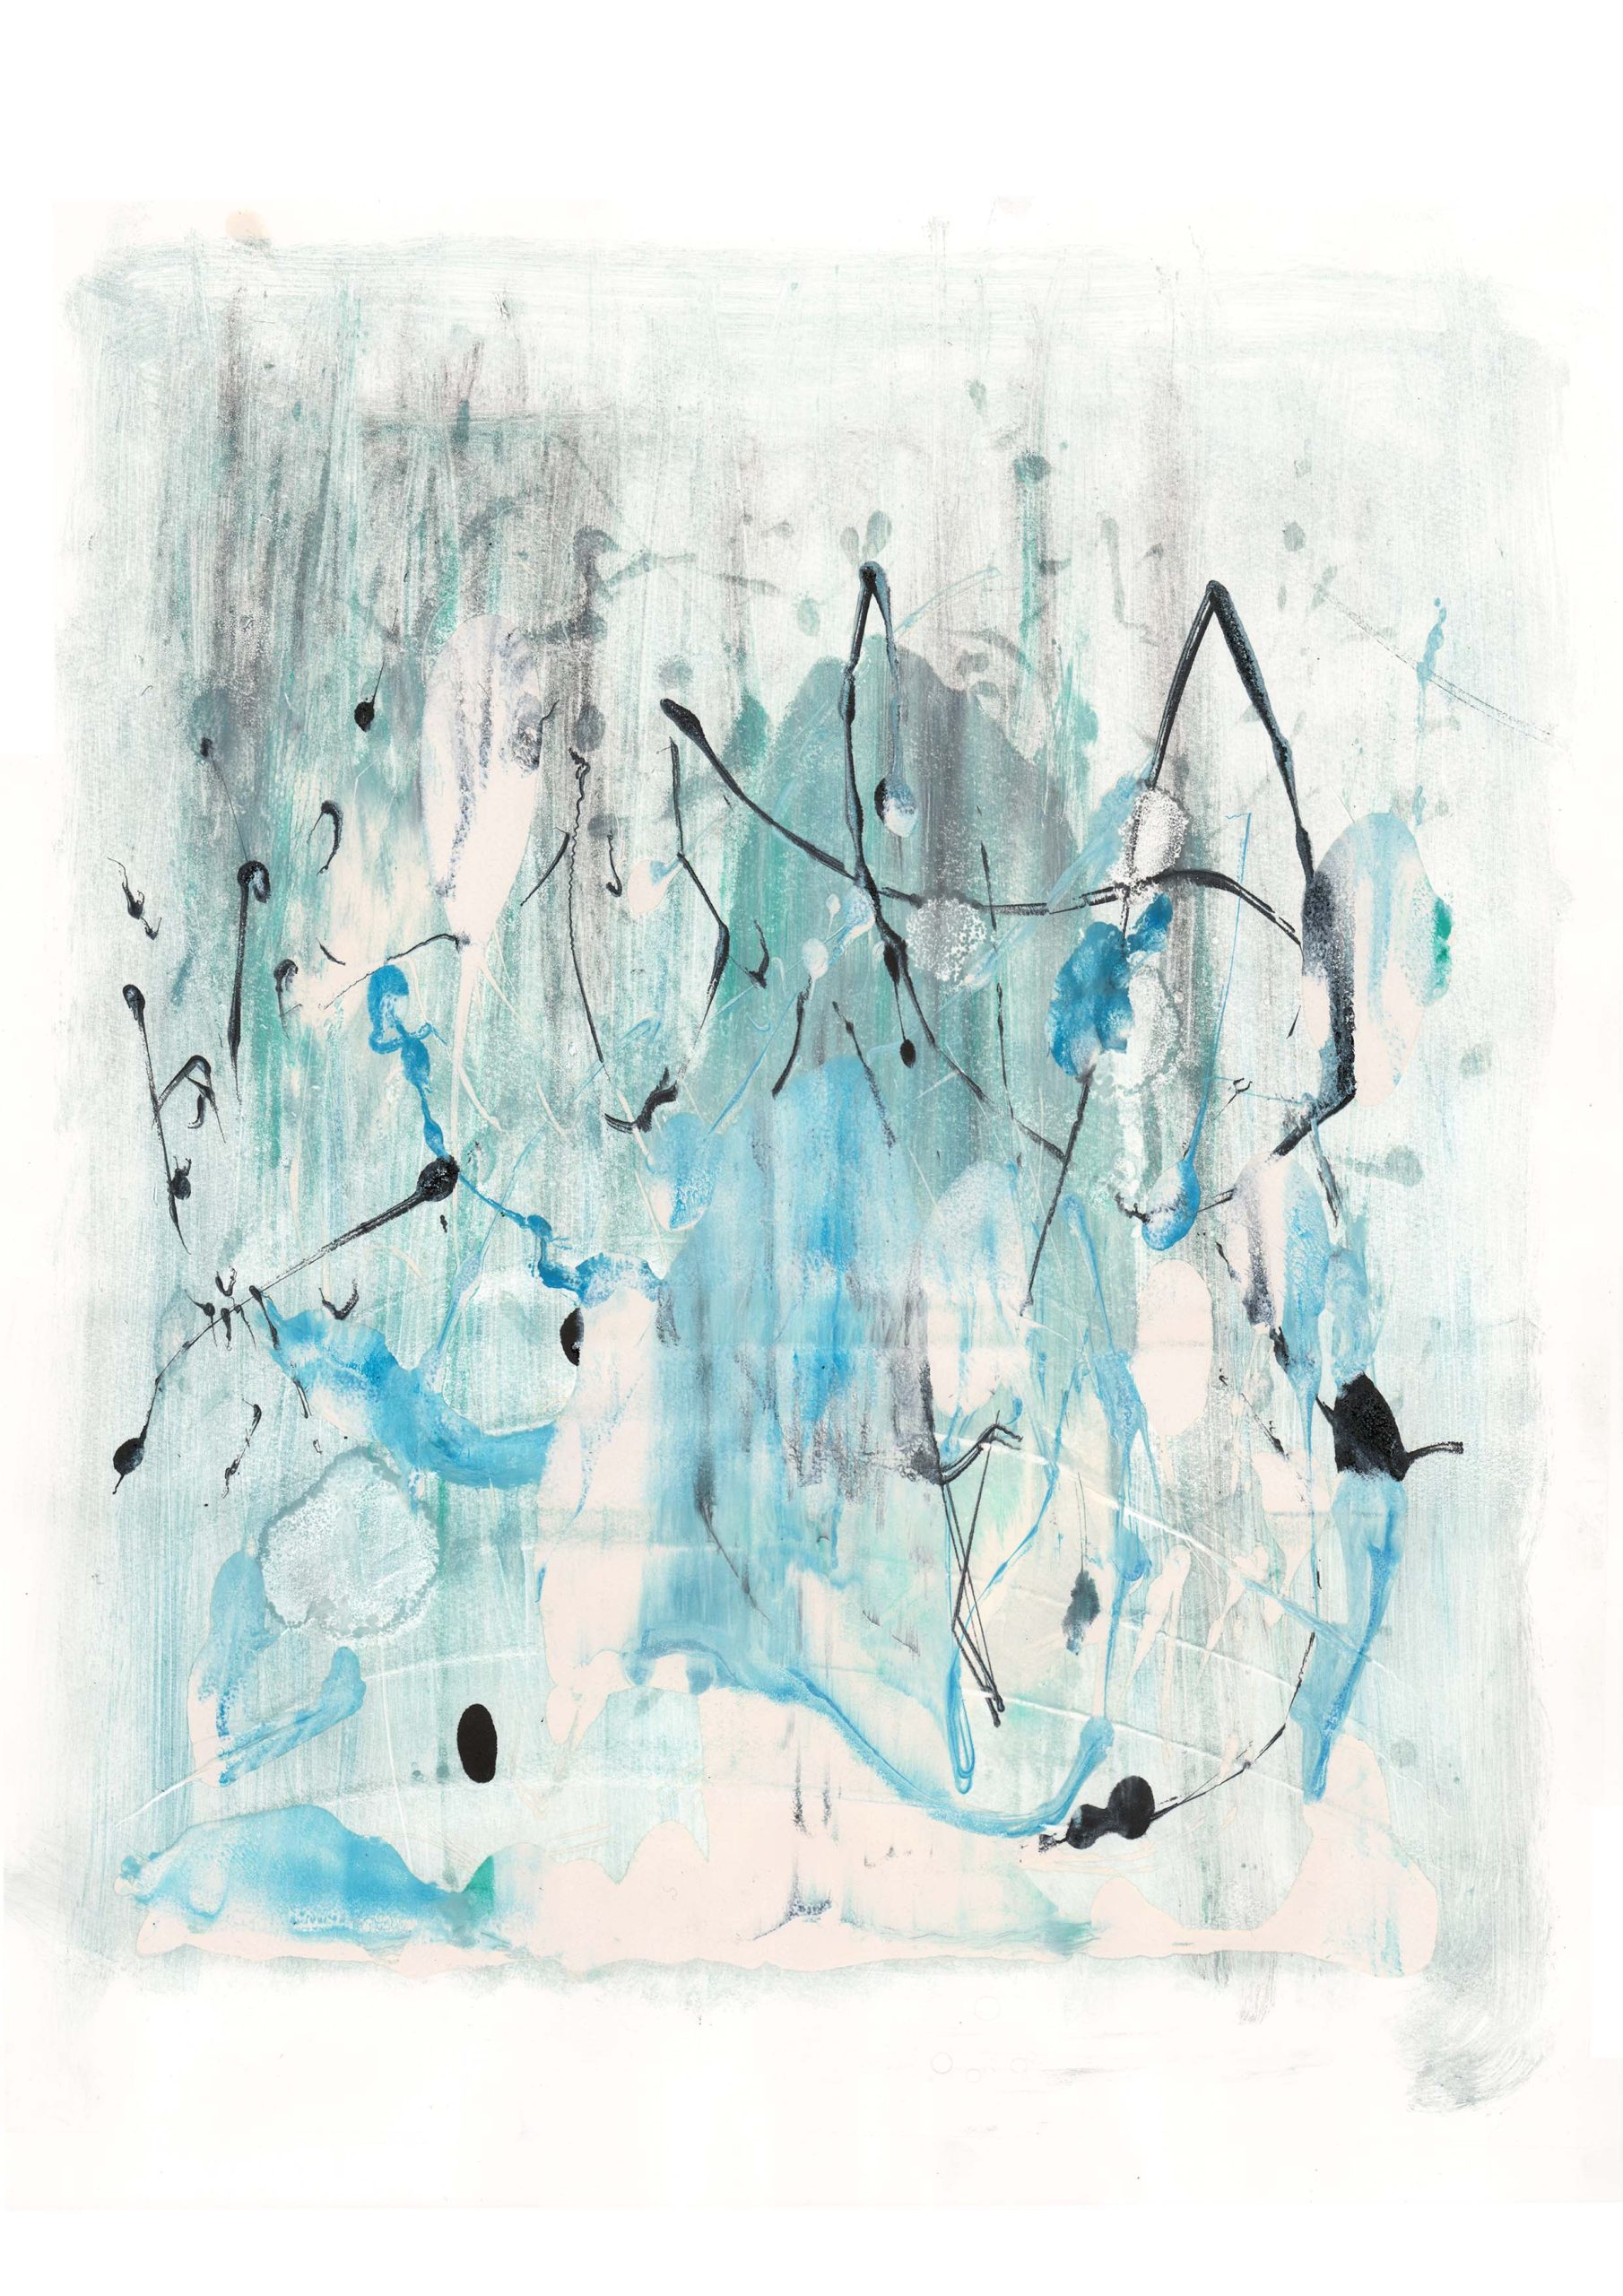
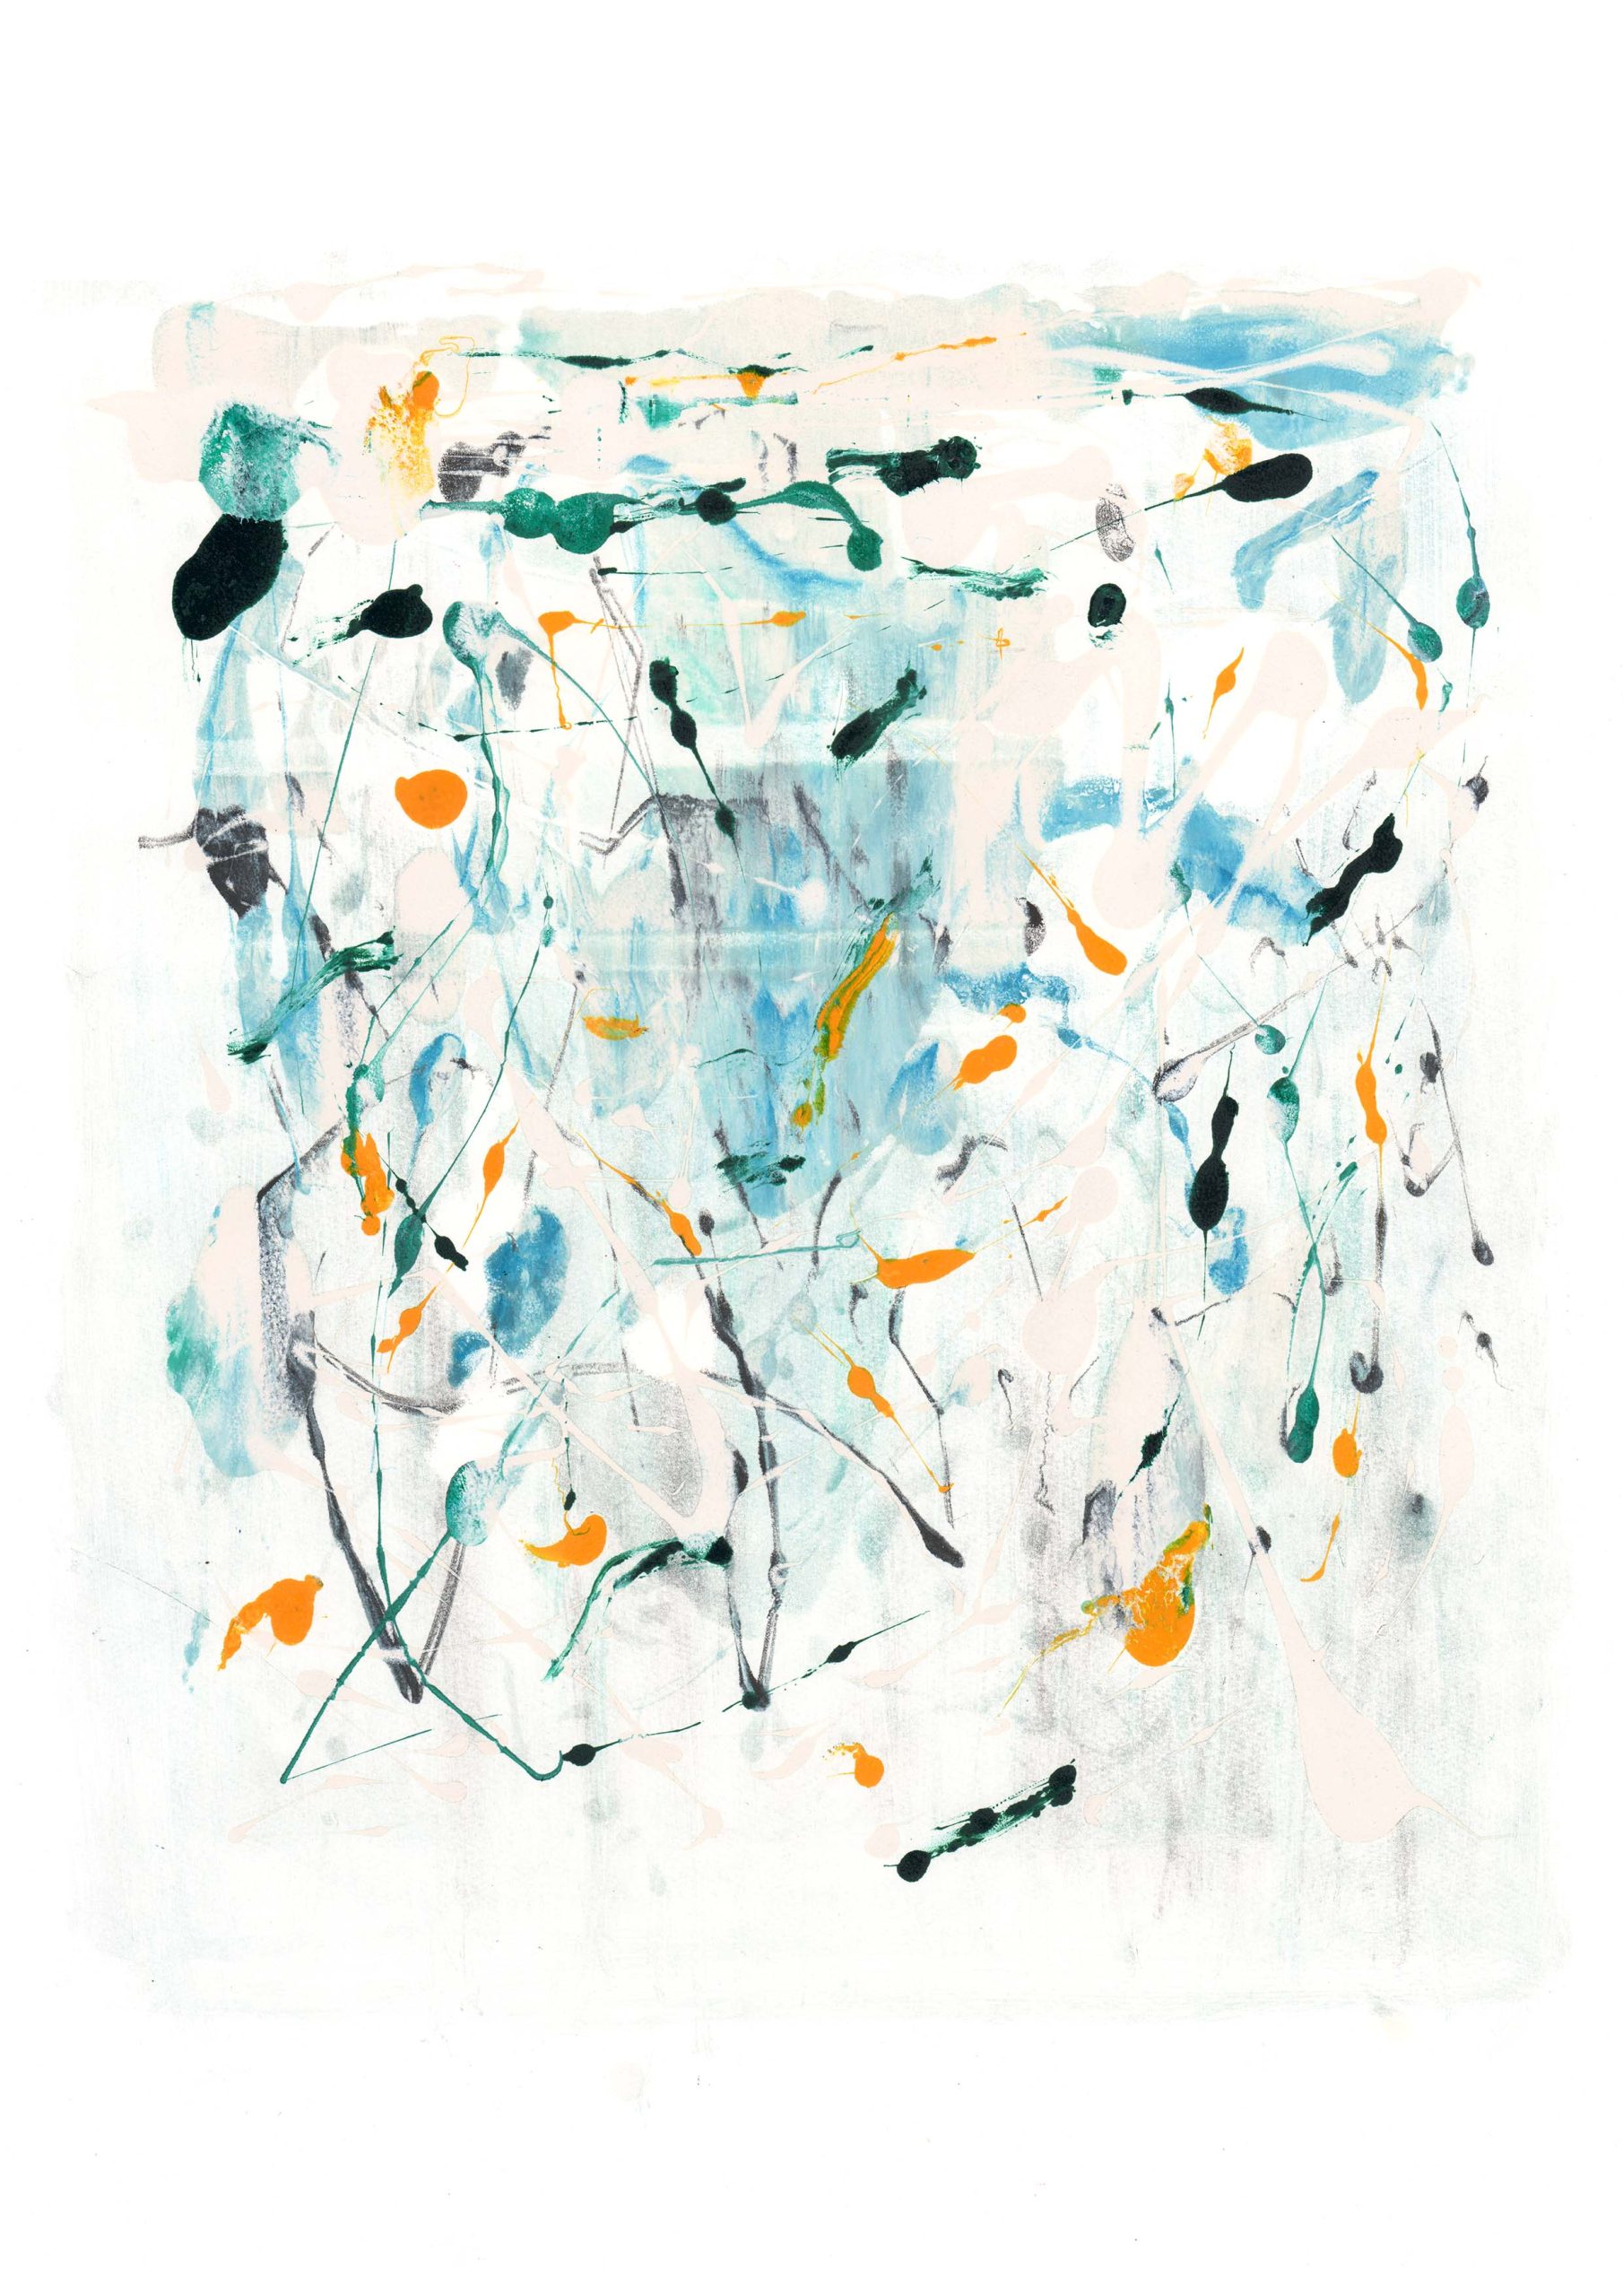
I started by blending the colours with a brush and then began to draw lines on the plate with a palette knife, reminding me of the continuation of the asphalt I used in the previous exercise. I’m quite happy with the end result, but he doesn’t seem to be able to combine with my lithographs because he doesn’t make any sense, and their combination doesn’t look good to me. But I like the image itself. The lines and dots in the image are free like the stars flying in the sky.
reference by Sergej Jensen
I then started experimenting with drawing lines with a palette knife without adding a background as well as spraying with a lot of white spirit after the first print and then drawing lines on it with a brush. I found that the colours came out a bit closer to the softness I wanted.
The outcome of the monoprint:
上一页
下一页
- Photo Transfers -
This part of the exercise was me trying to integrate all my previous printmaking elements and some of the texture elements. For example combining elements from my relief, zinc litho and stone litho.
Problem Solving :
When I was doing the photo transfer I had a problem at the beginning because all my photos were printed from home so I got them to the school already the next morning and when I was trying to transfer the photos, the paper could not show any transferred image. After consulting my classmates for advice I realised that with photo transfers, I needed to use very freshly printed paper so that the ink that hadn’t dried could be transferred onto the paper.
Print out the materials that will be used
Spray for photo transfers
Photo transfer process
During the photo transfer process, at the beginning, I was looking forward to transferring the perfect image, and I was a little annoyed about the missing parts of the image. But then I realised that such accidents would provide more development to the original image, and it may be from these accidents that new images can be explored.
With the help of my tutor, I realised that many parts of my images could be selected and enlarged to create new ones.
So after that, I would scan the partial words in very high resolution for electronic printing and then make new drawings on them.
- Supporting Work -
Photographs
上一页
下一页
上一页
下一页
上一页
下一页
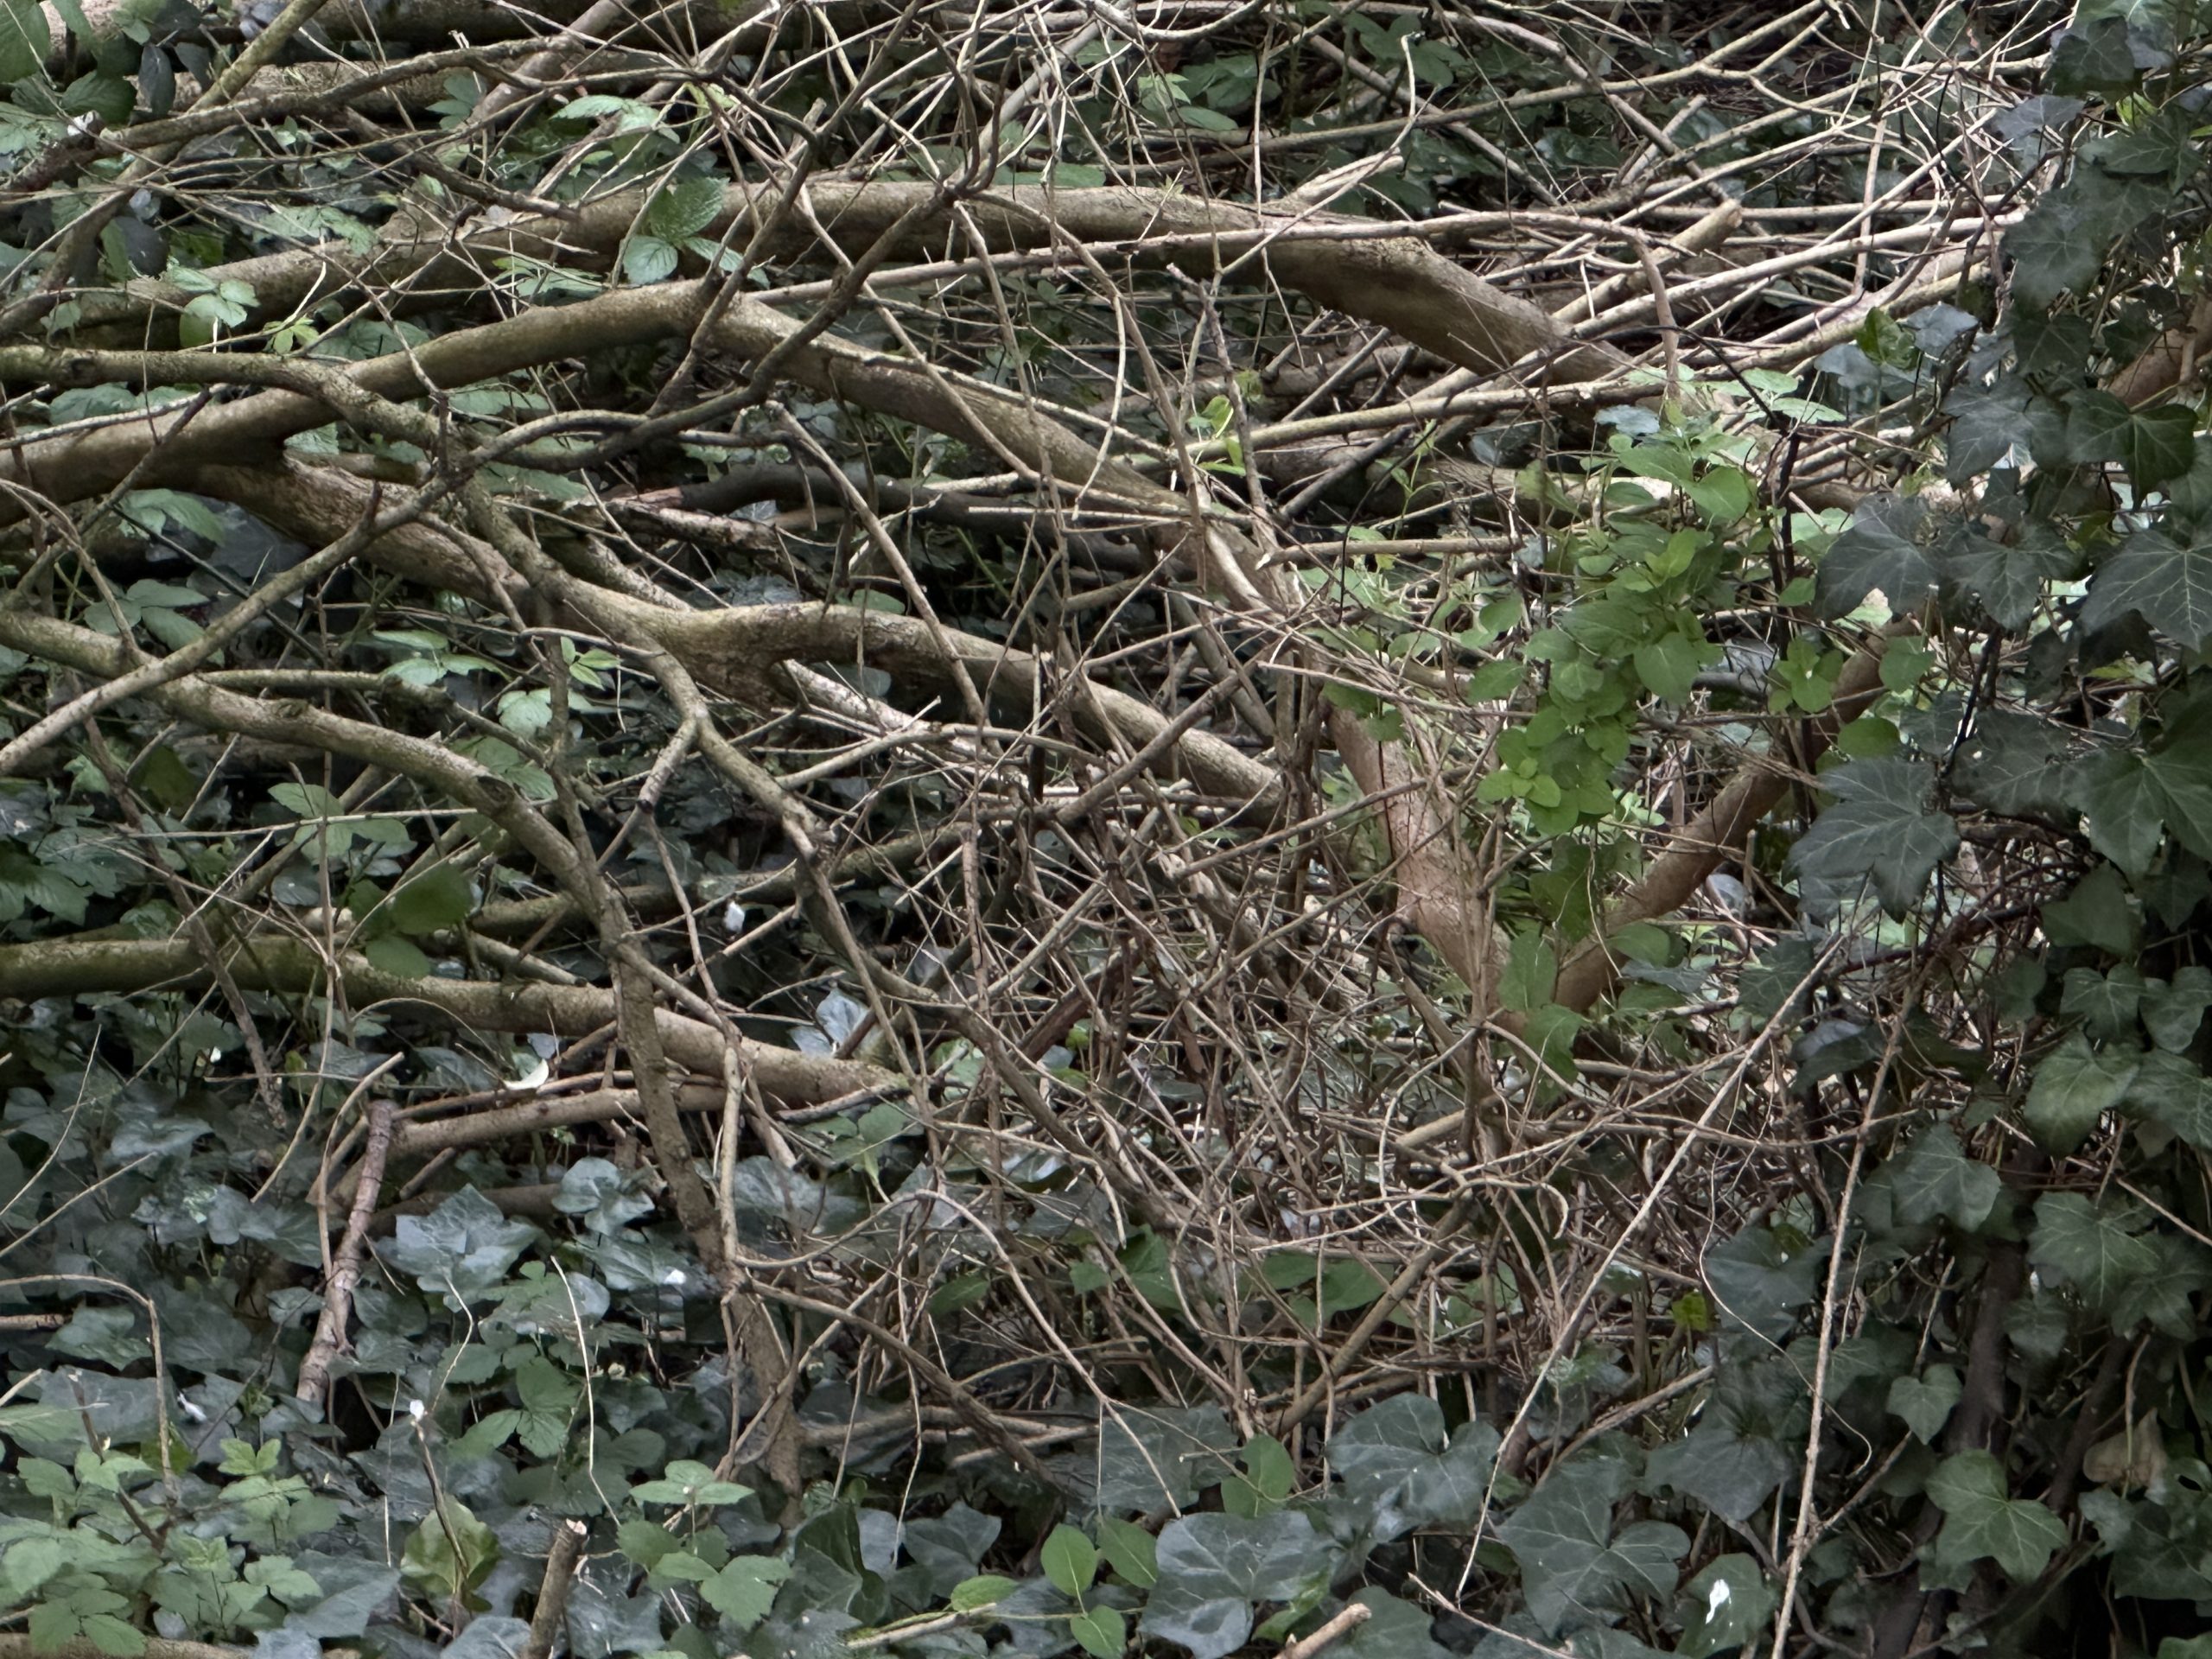
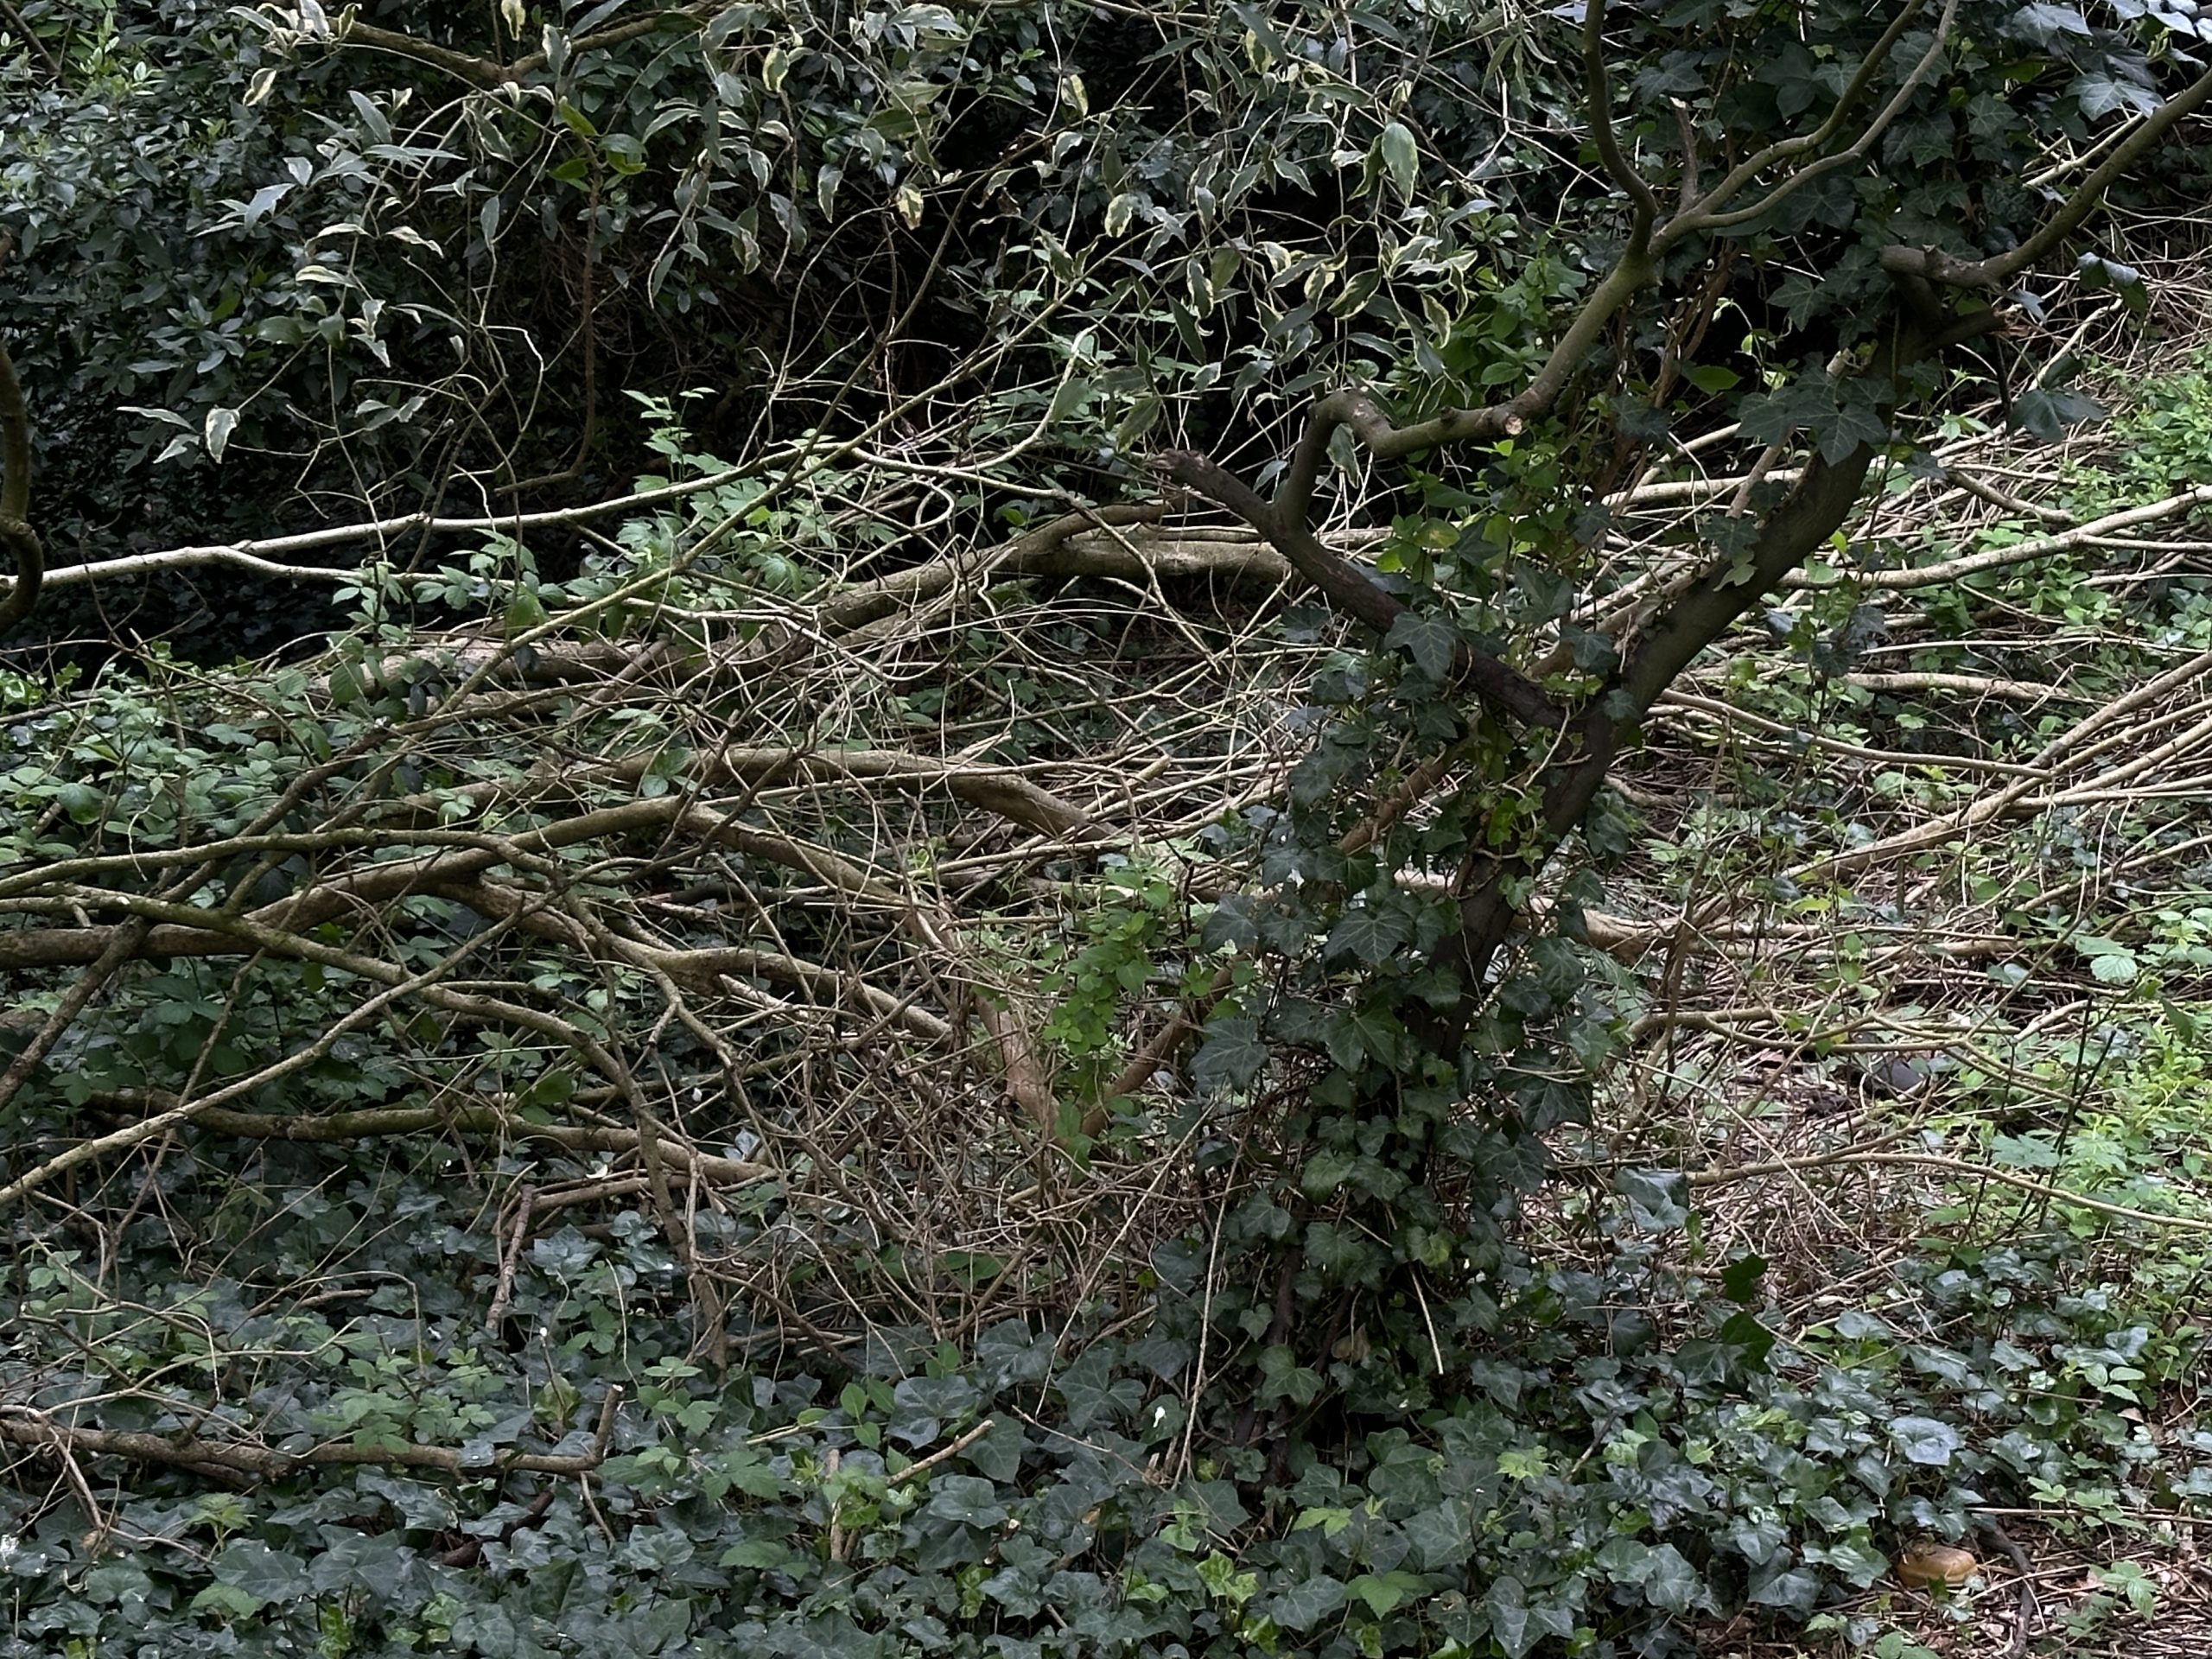
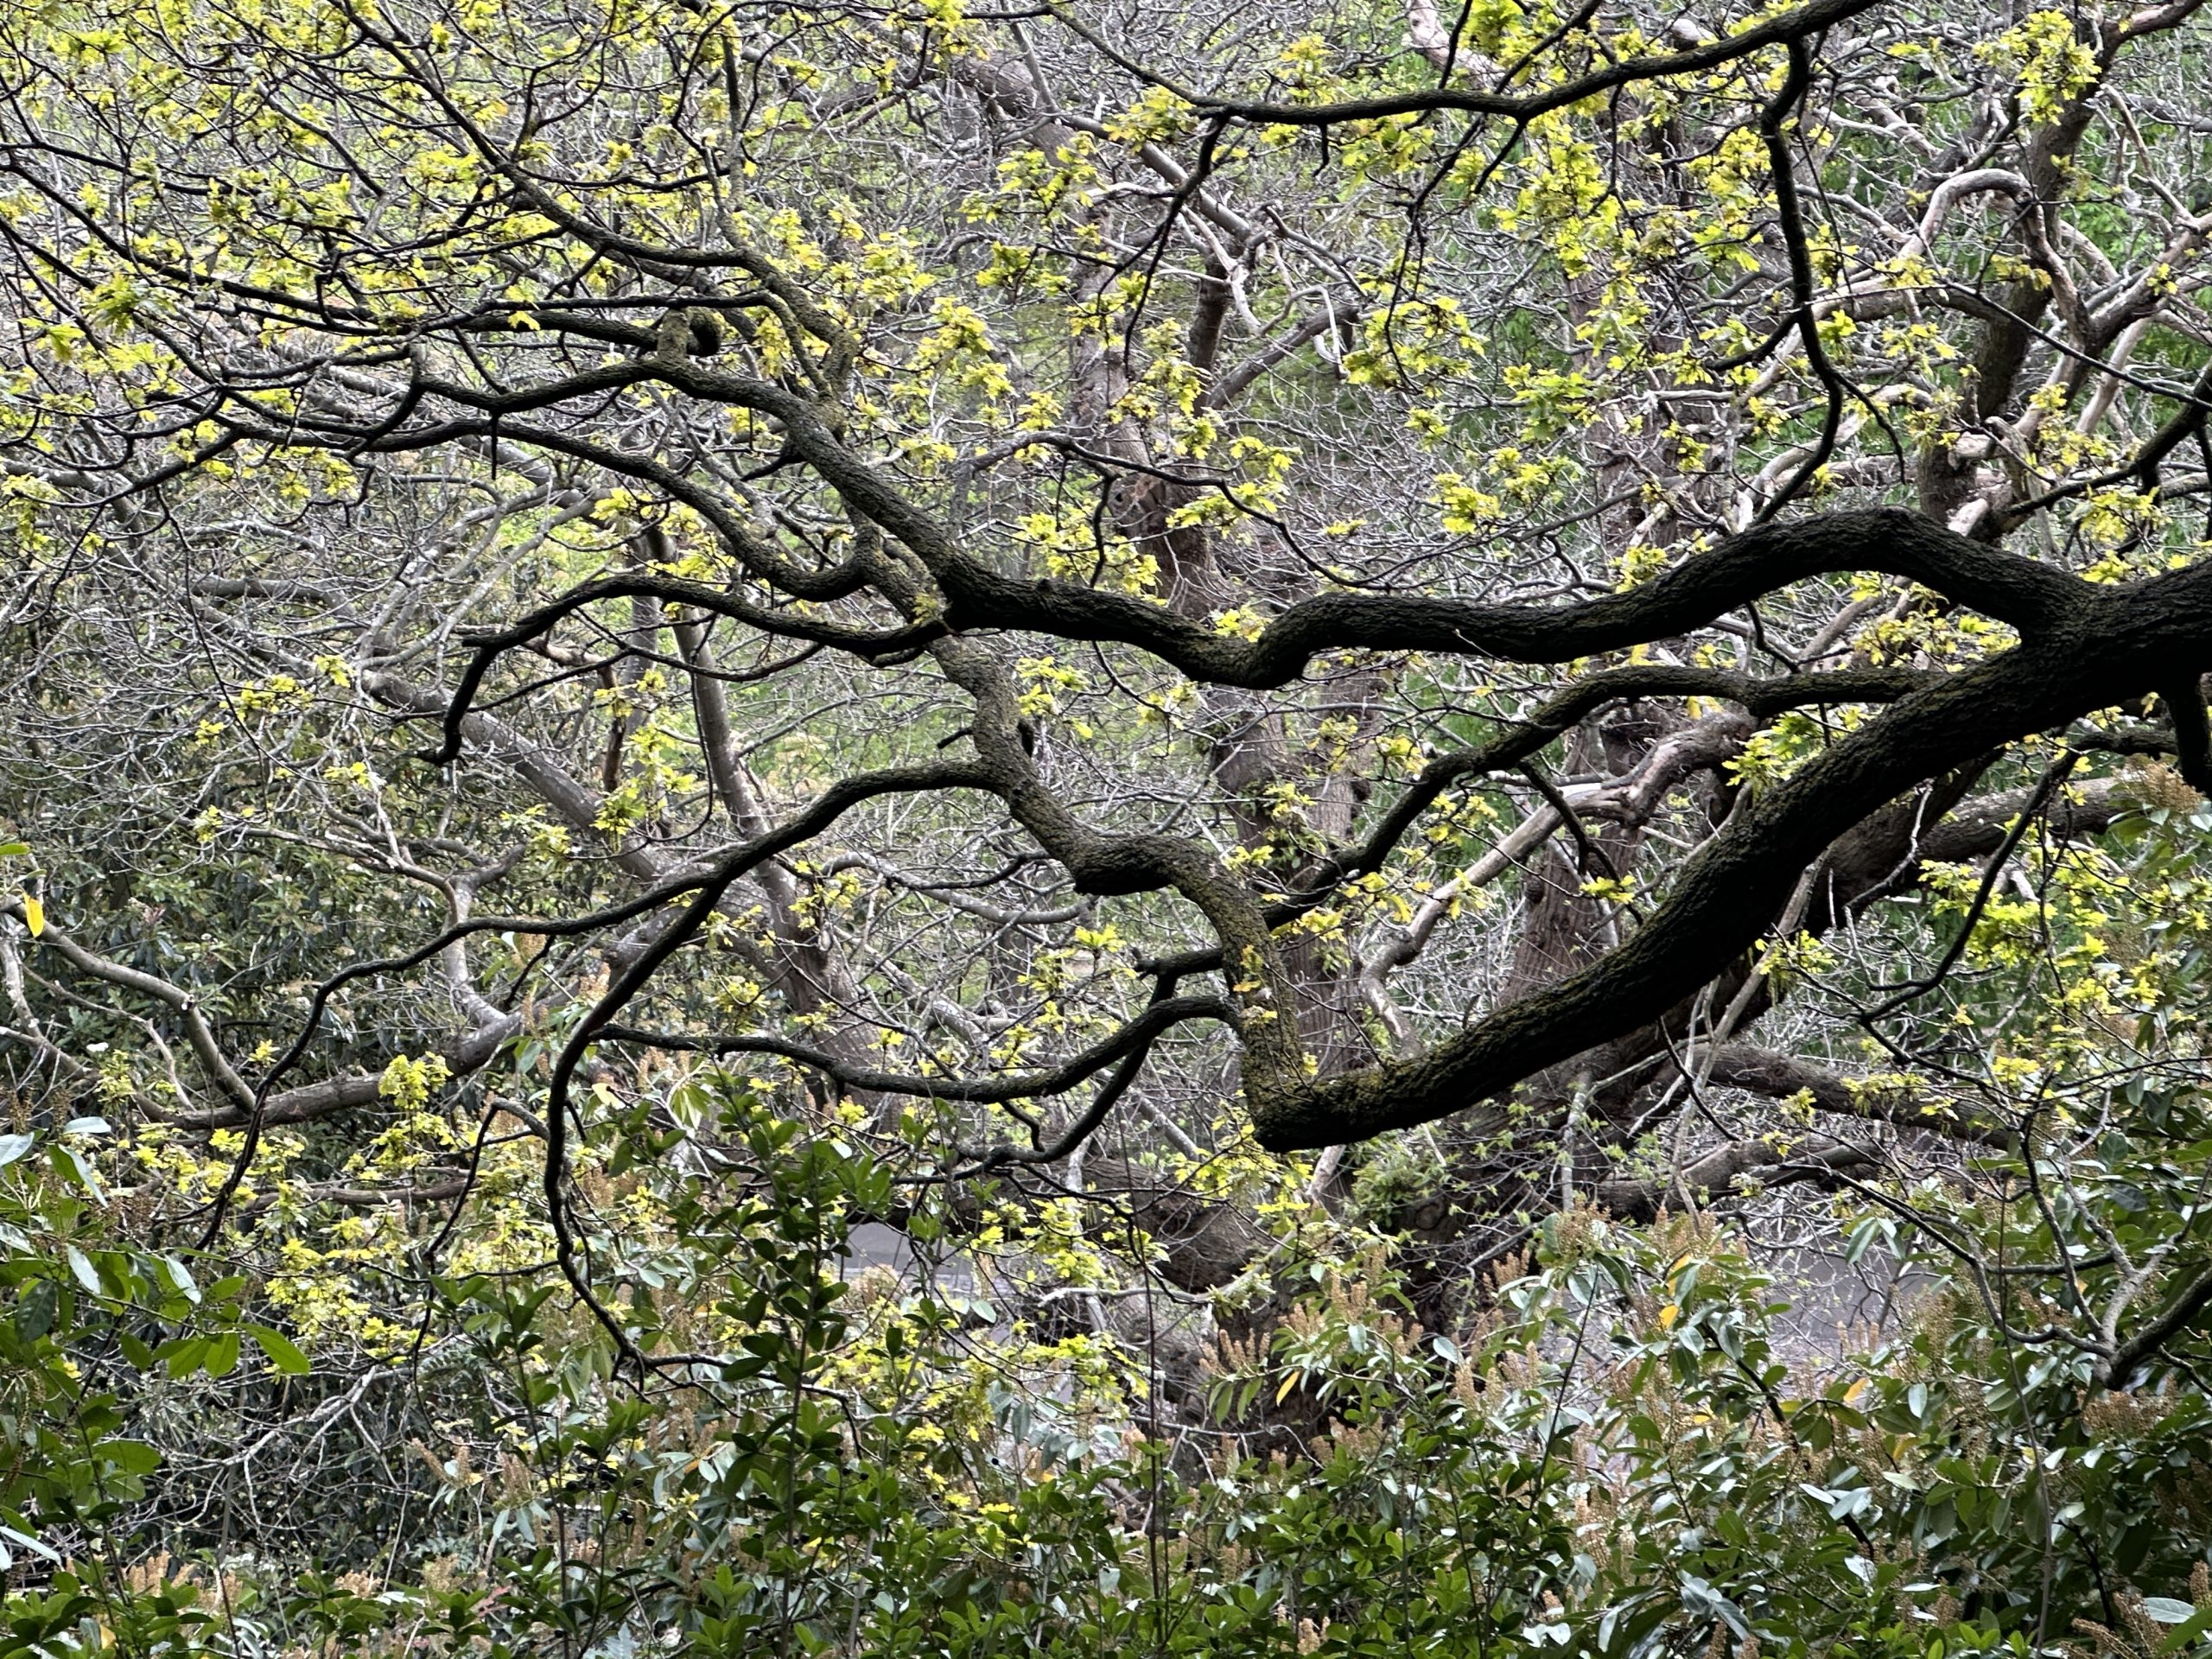
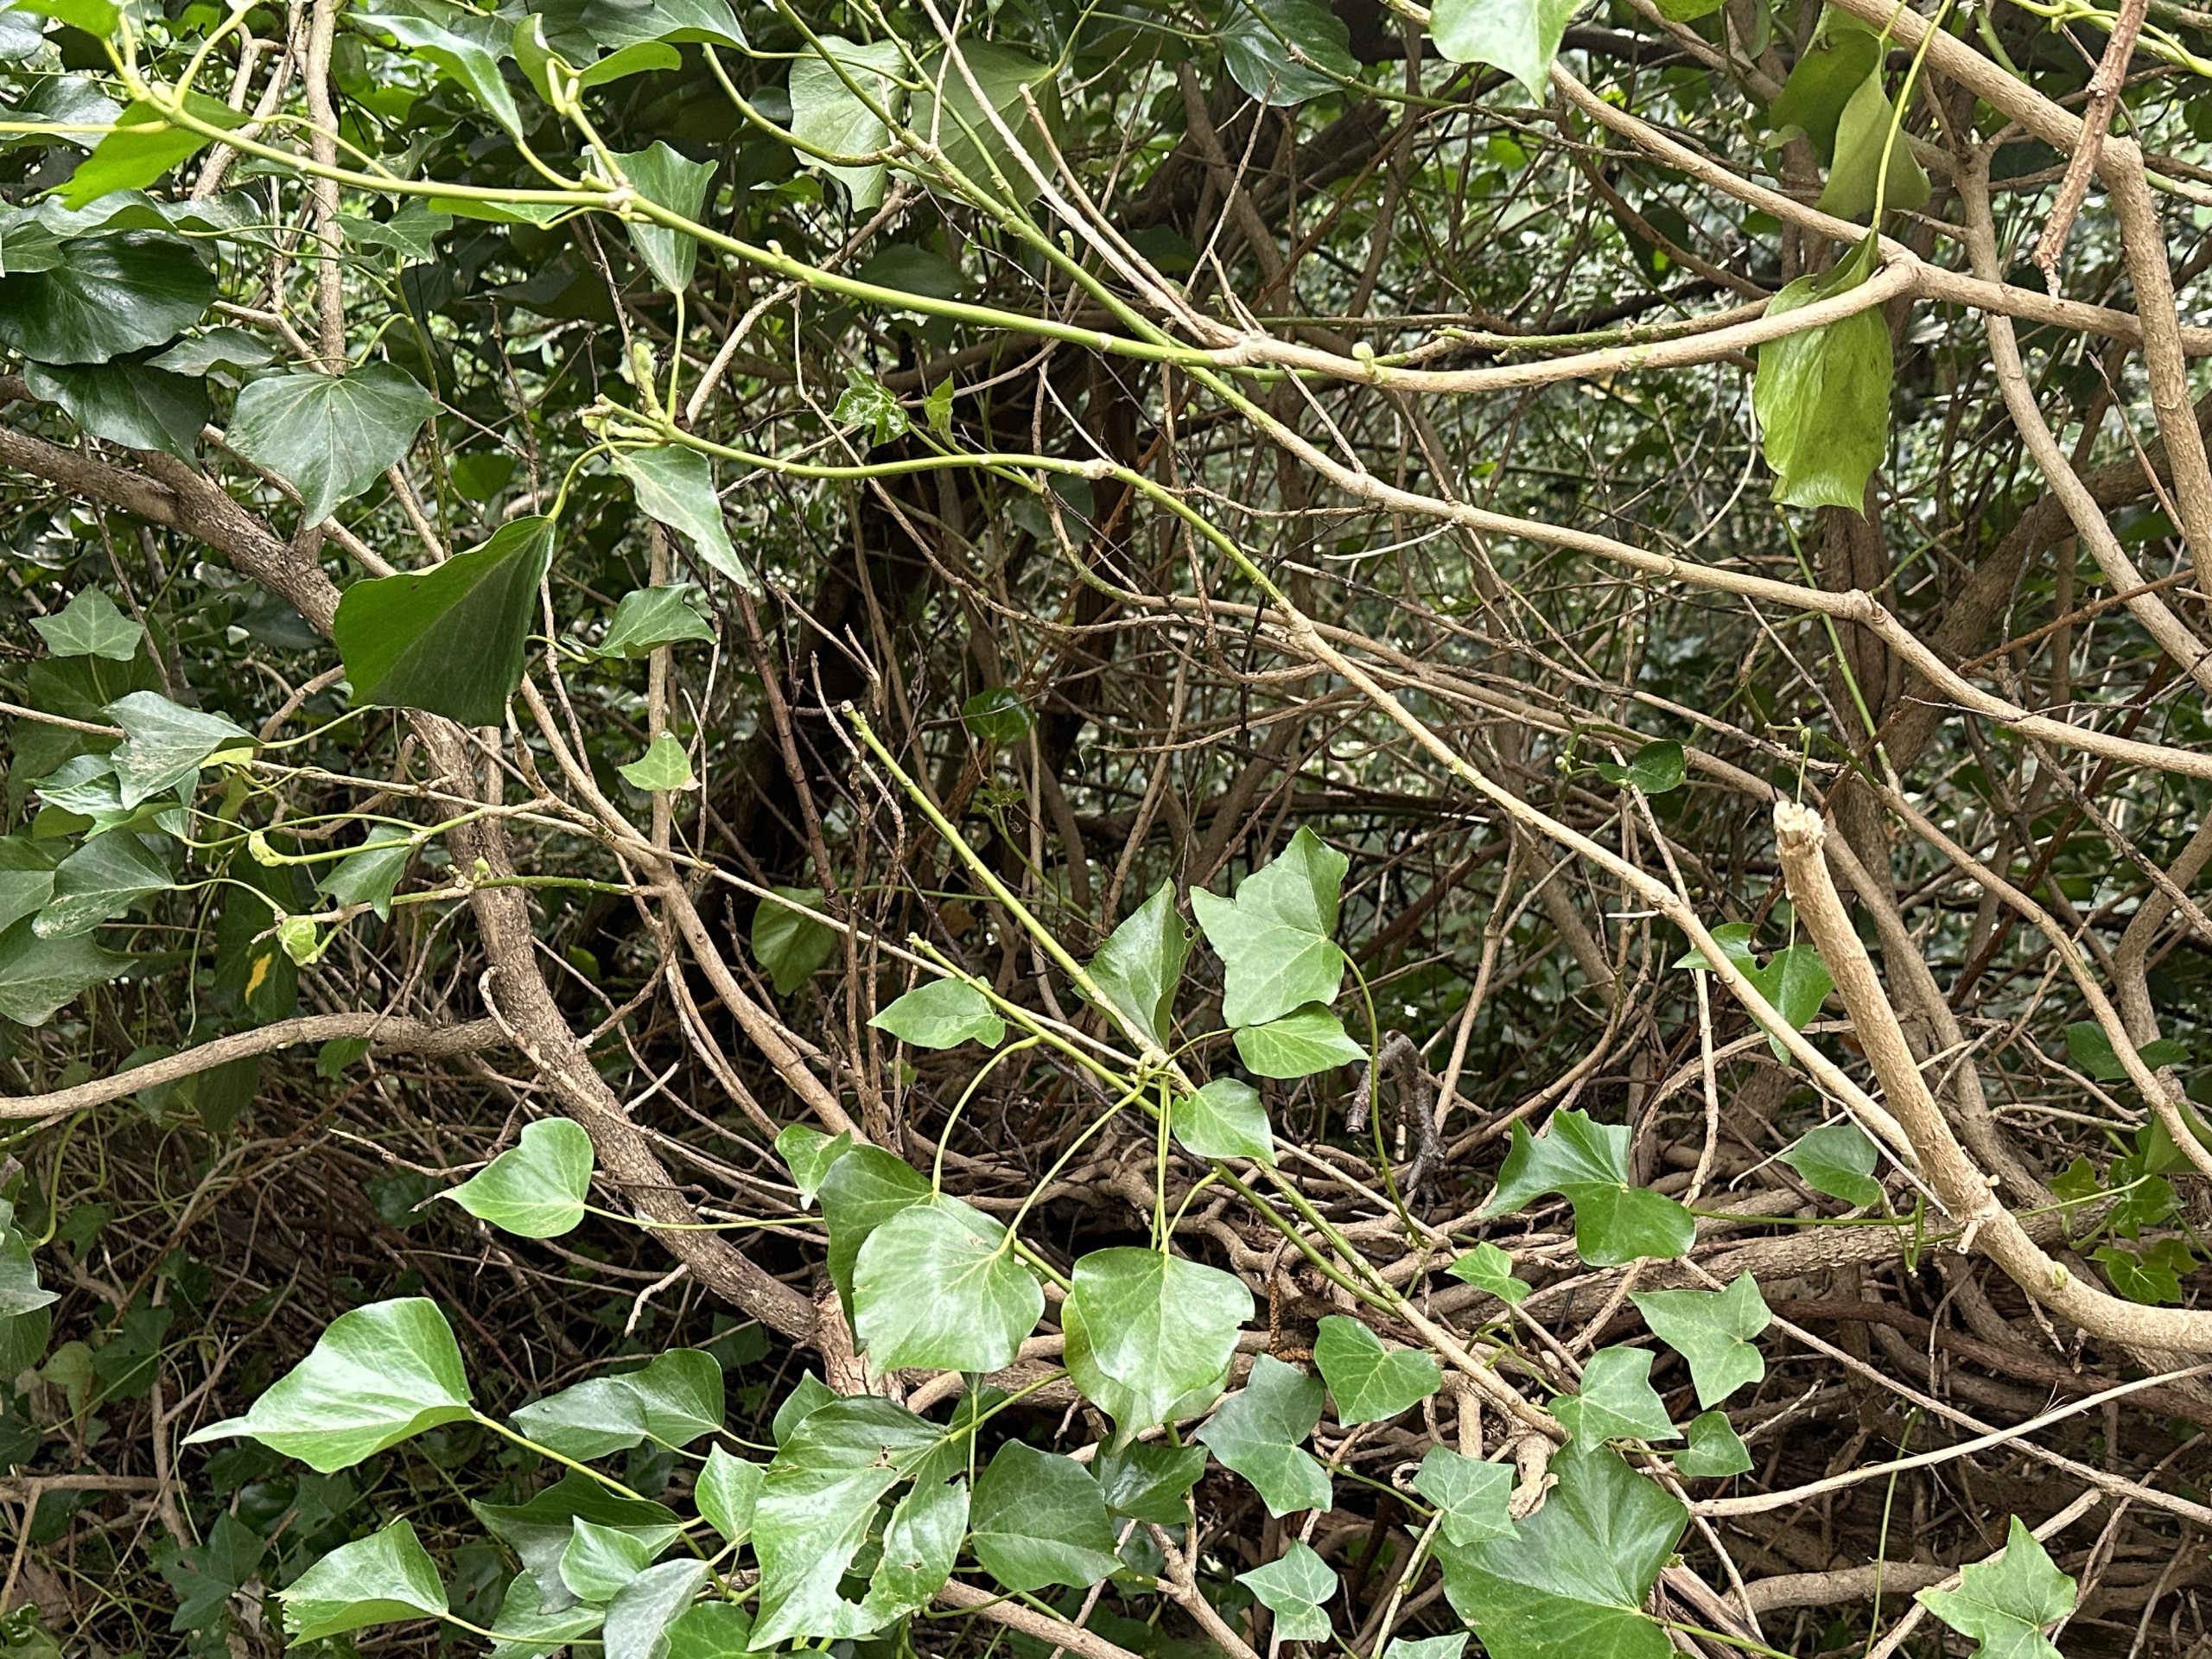
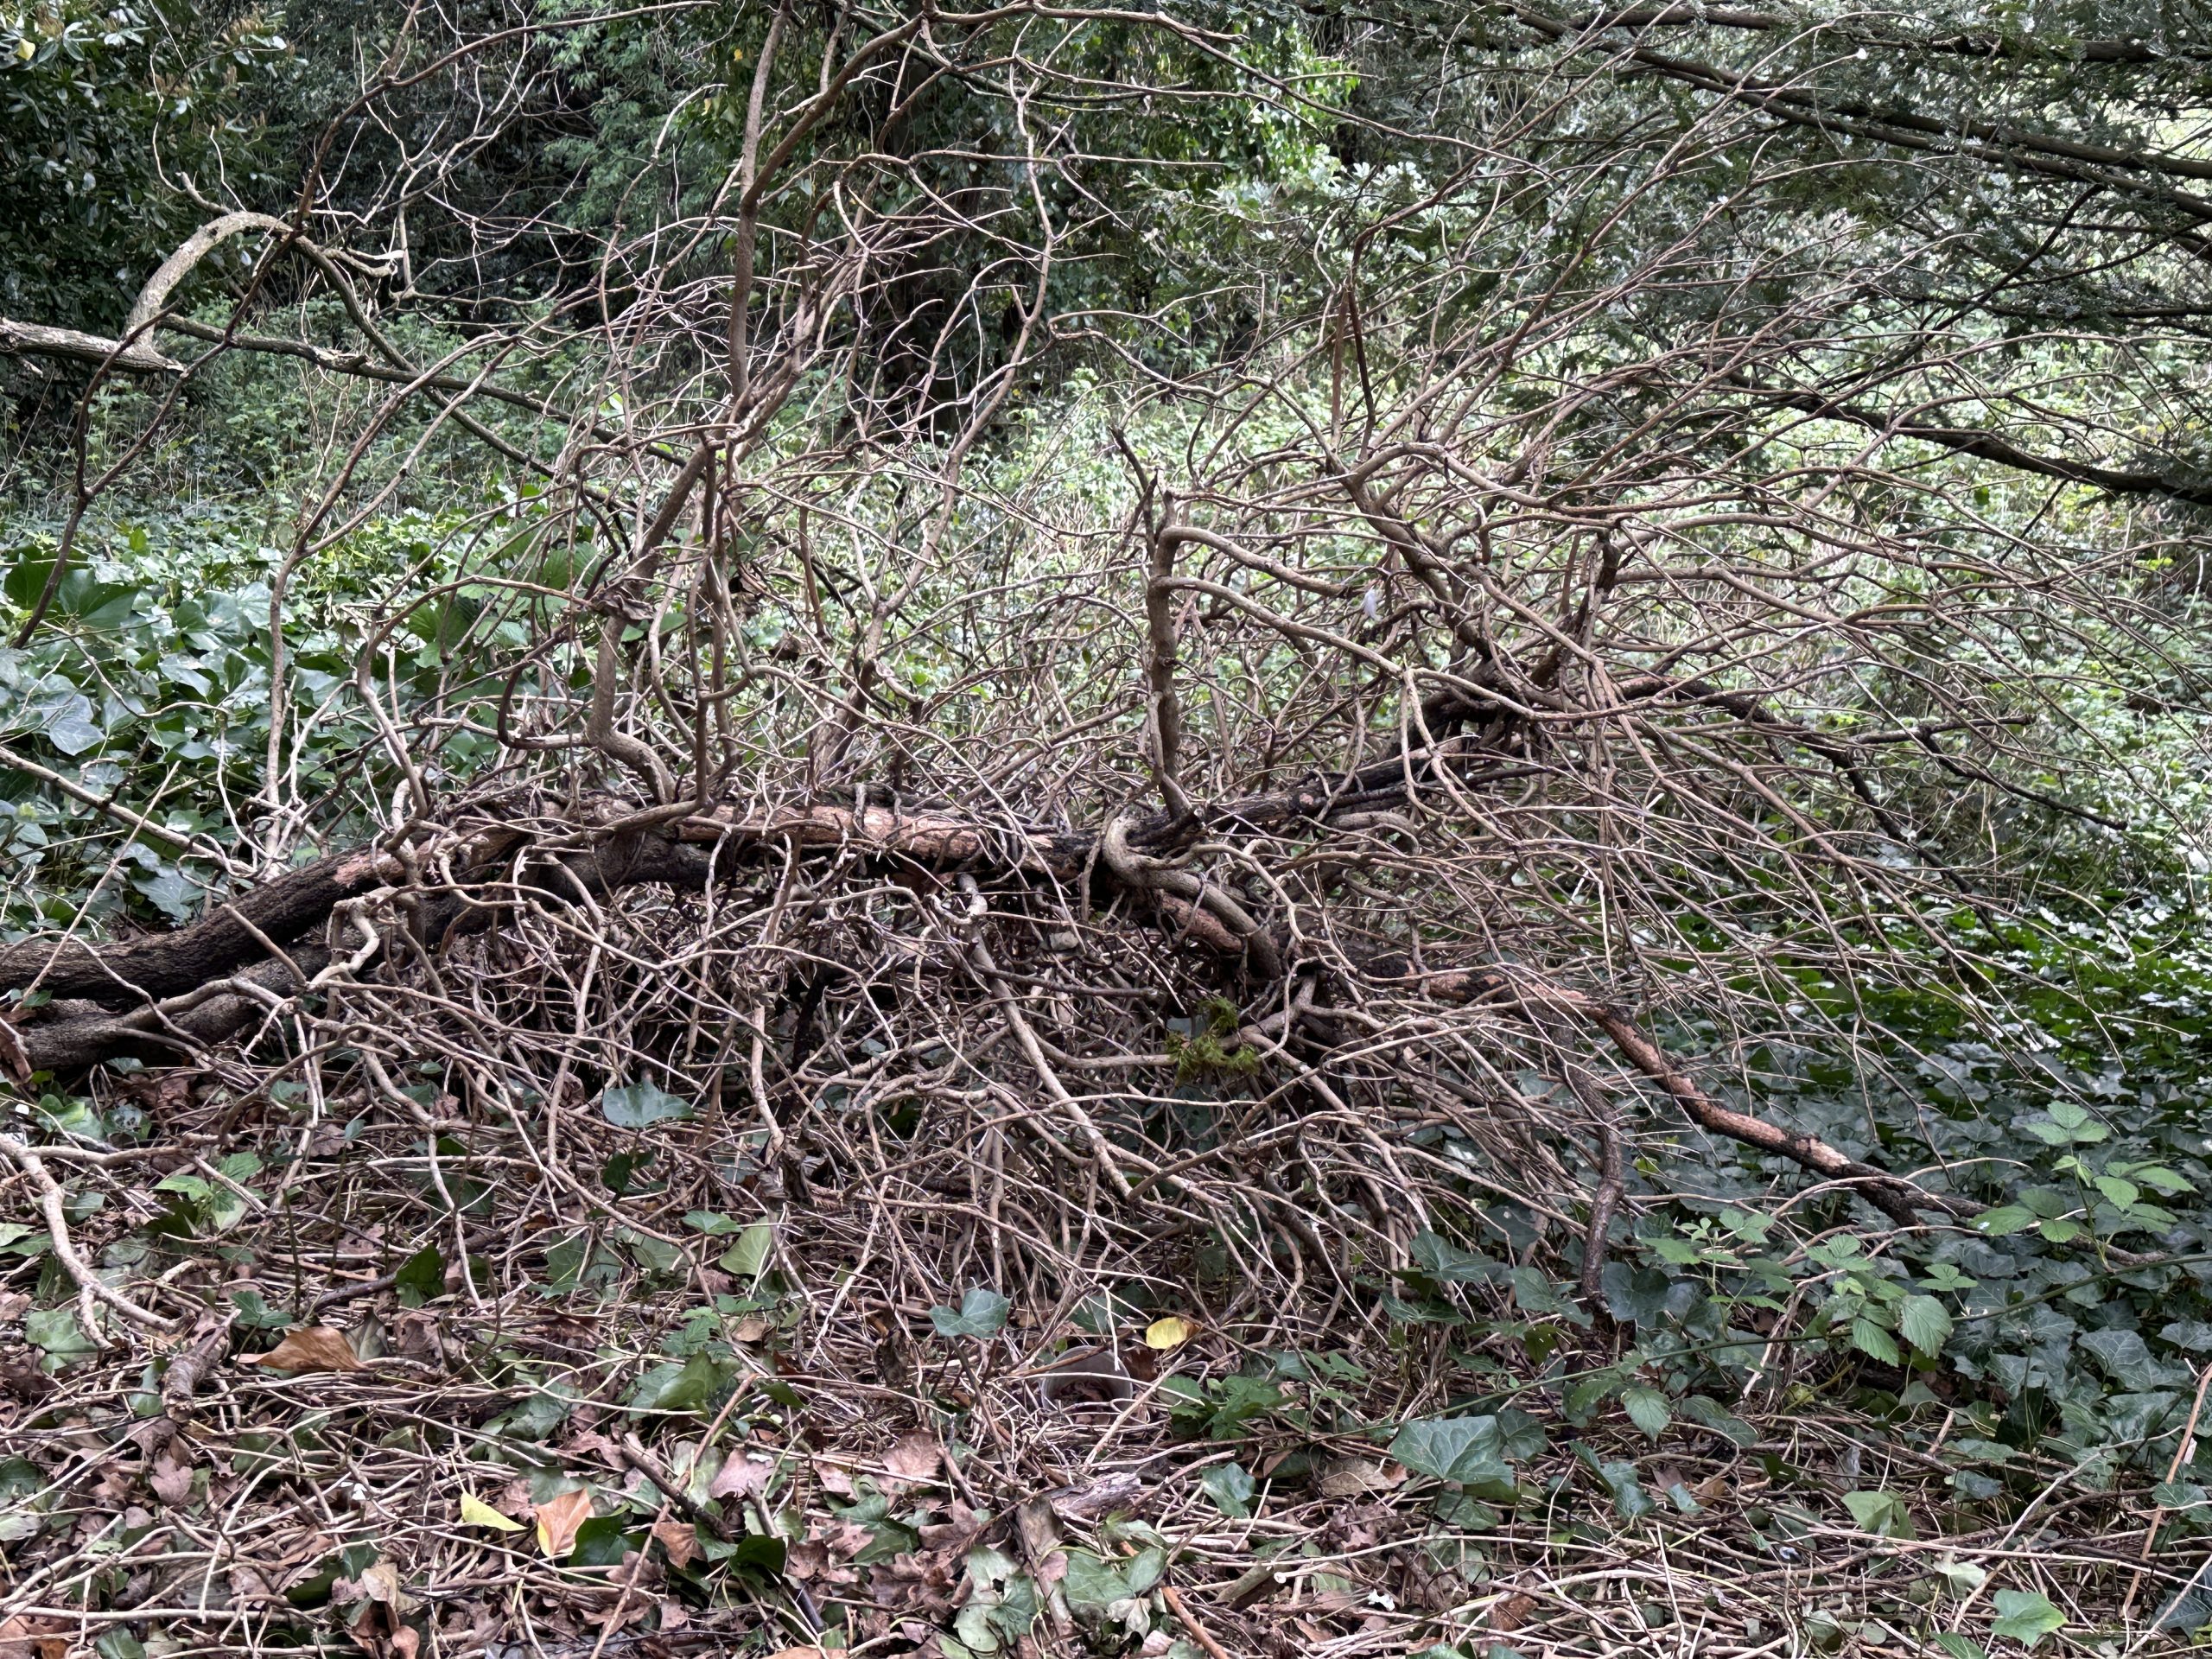
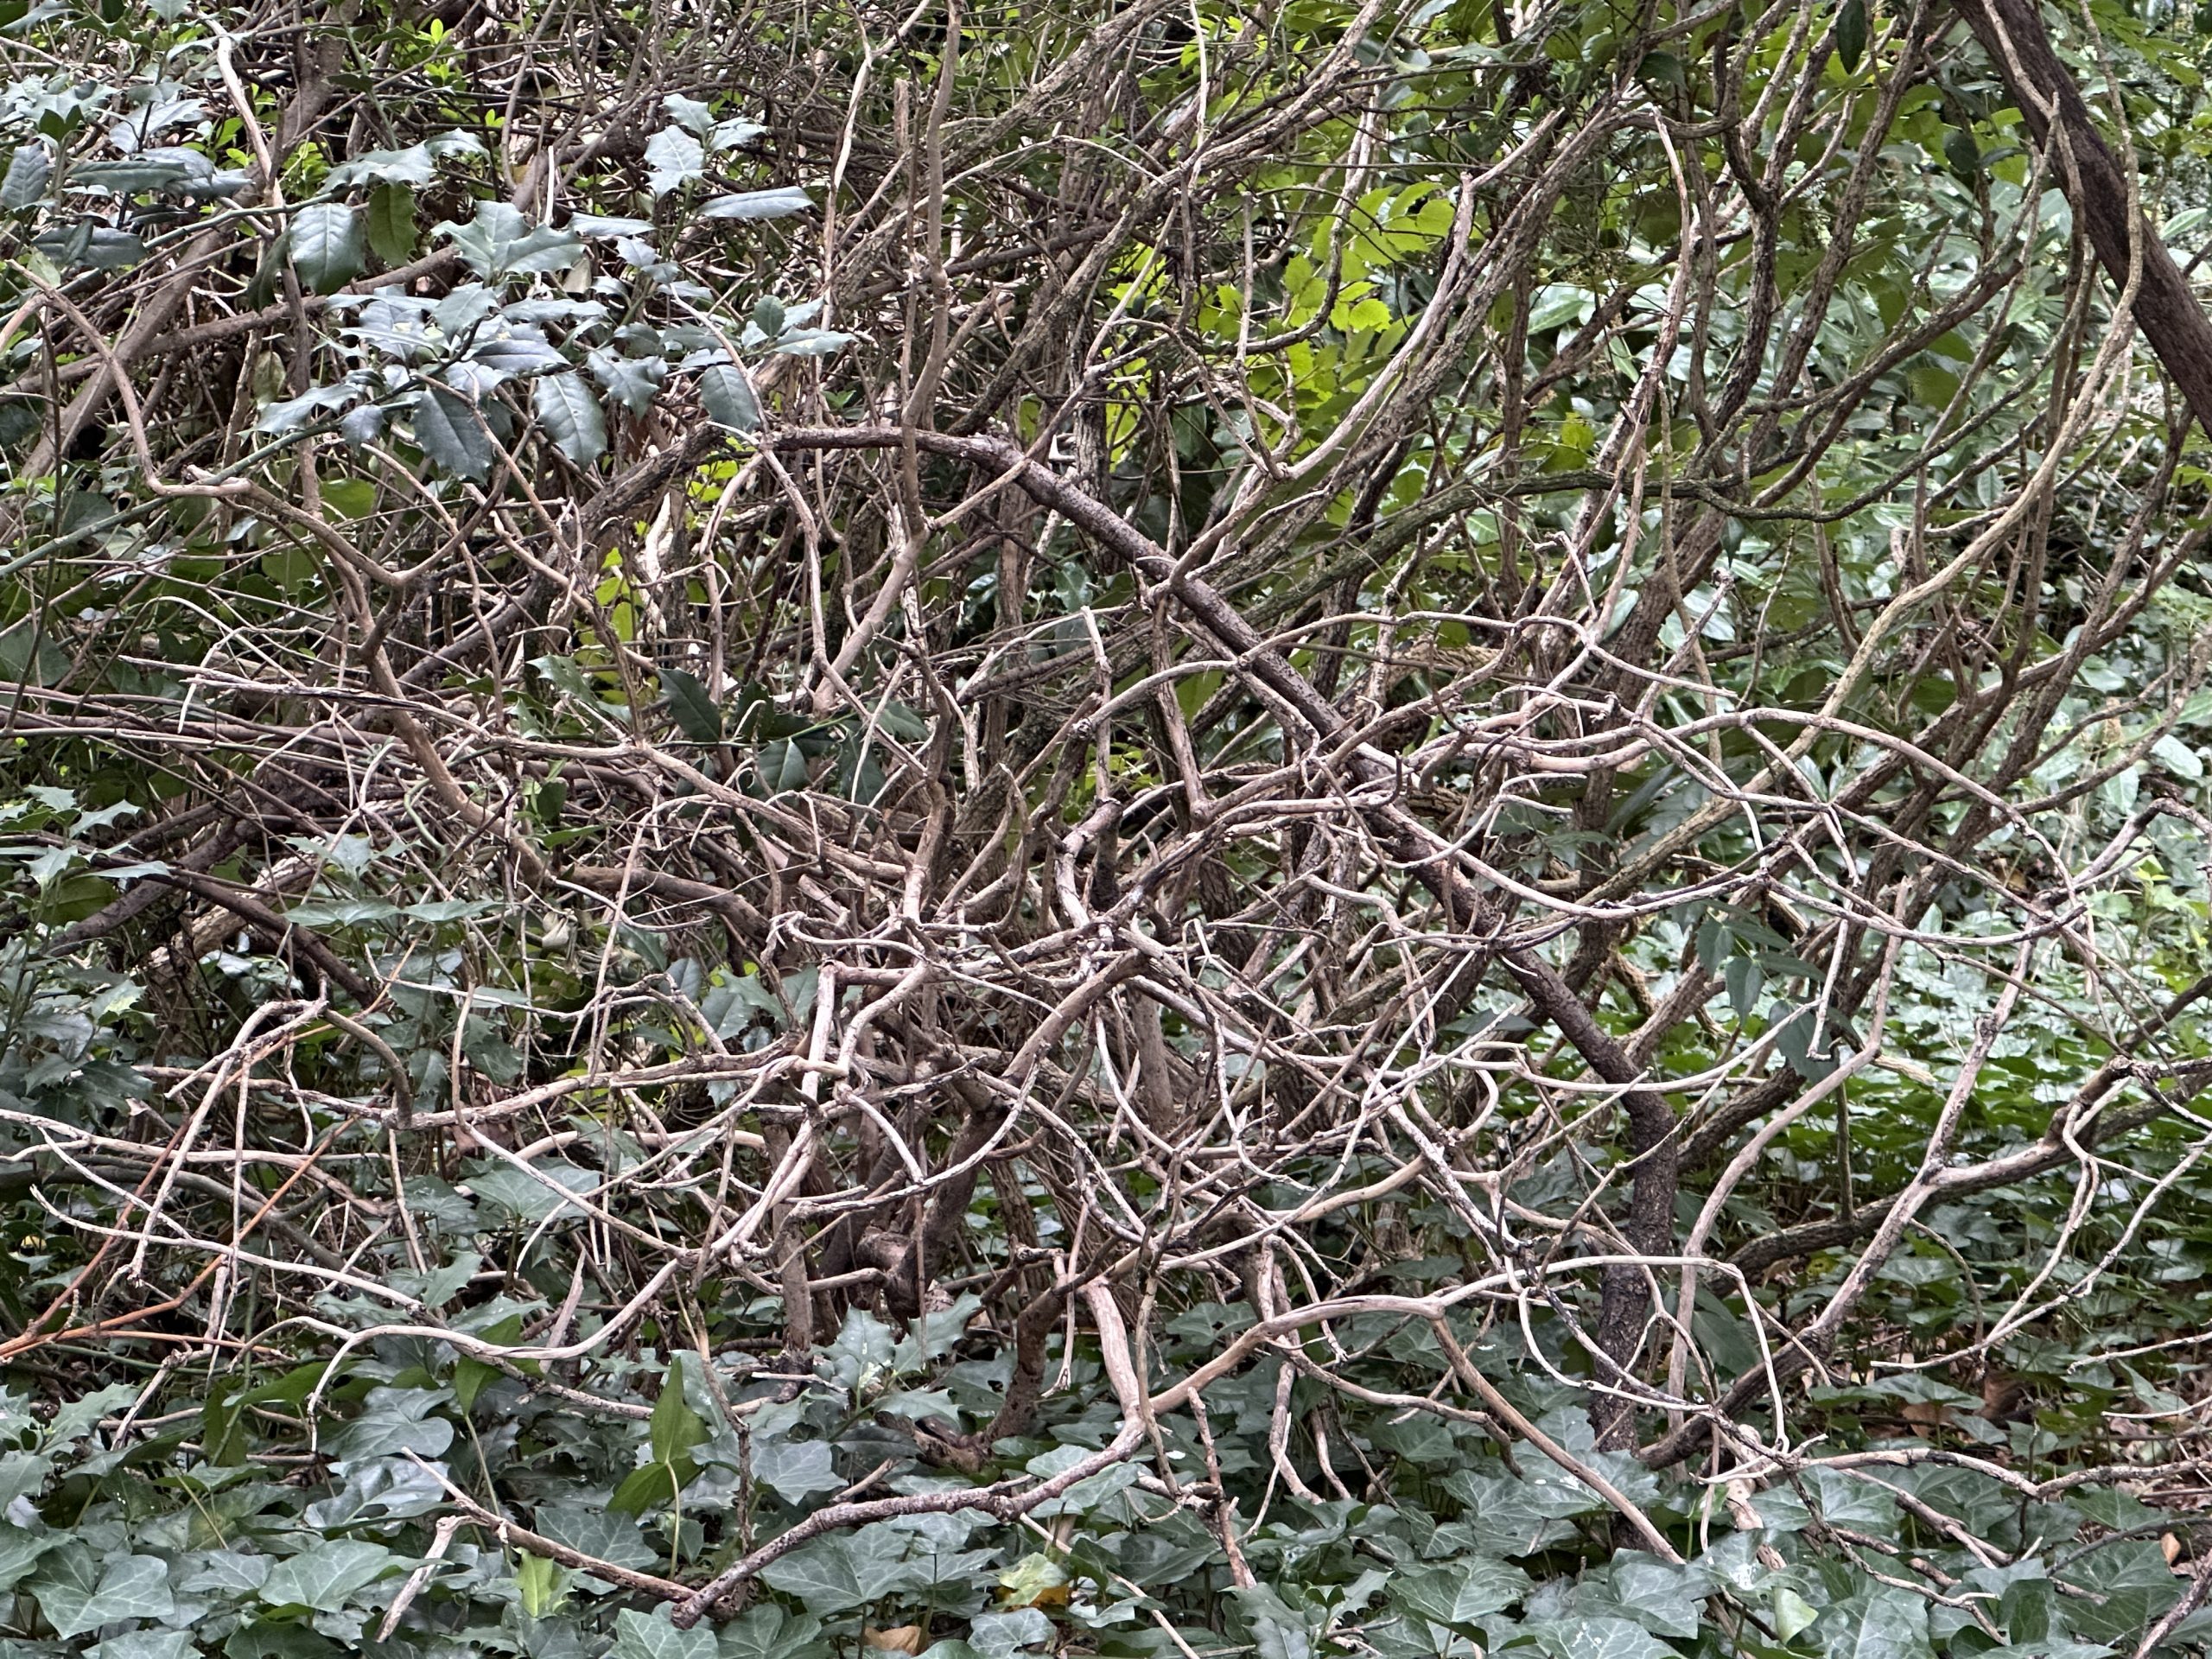
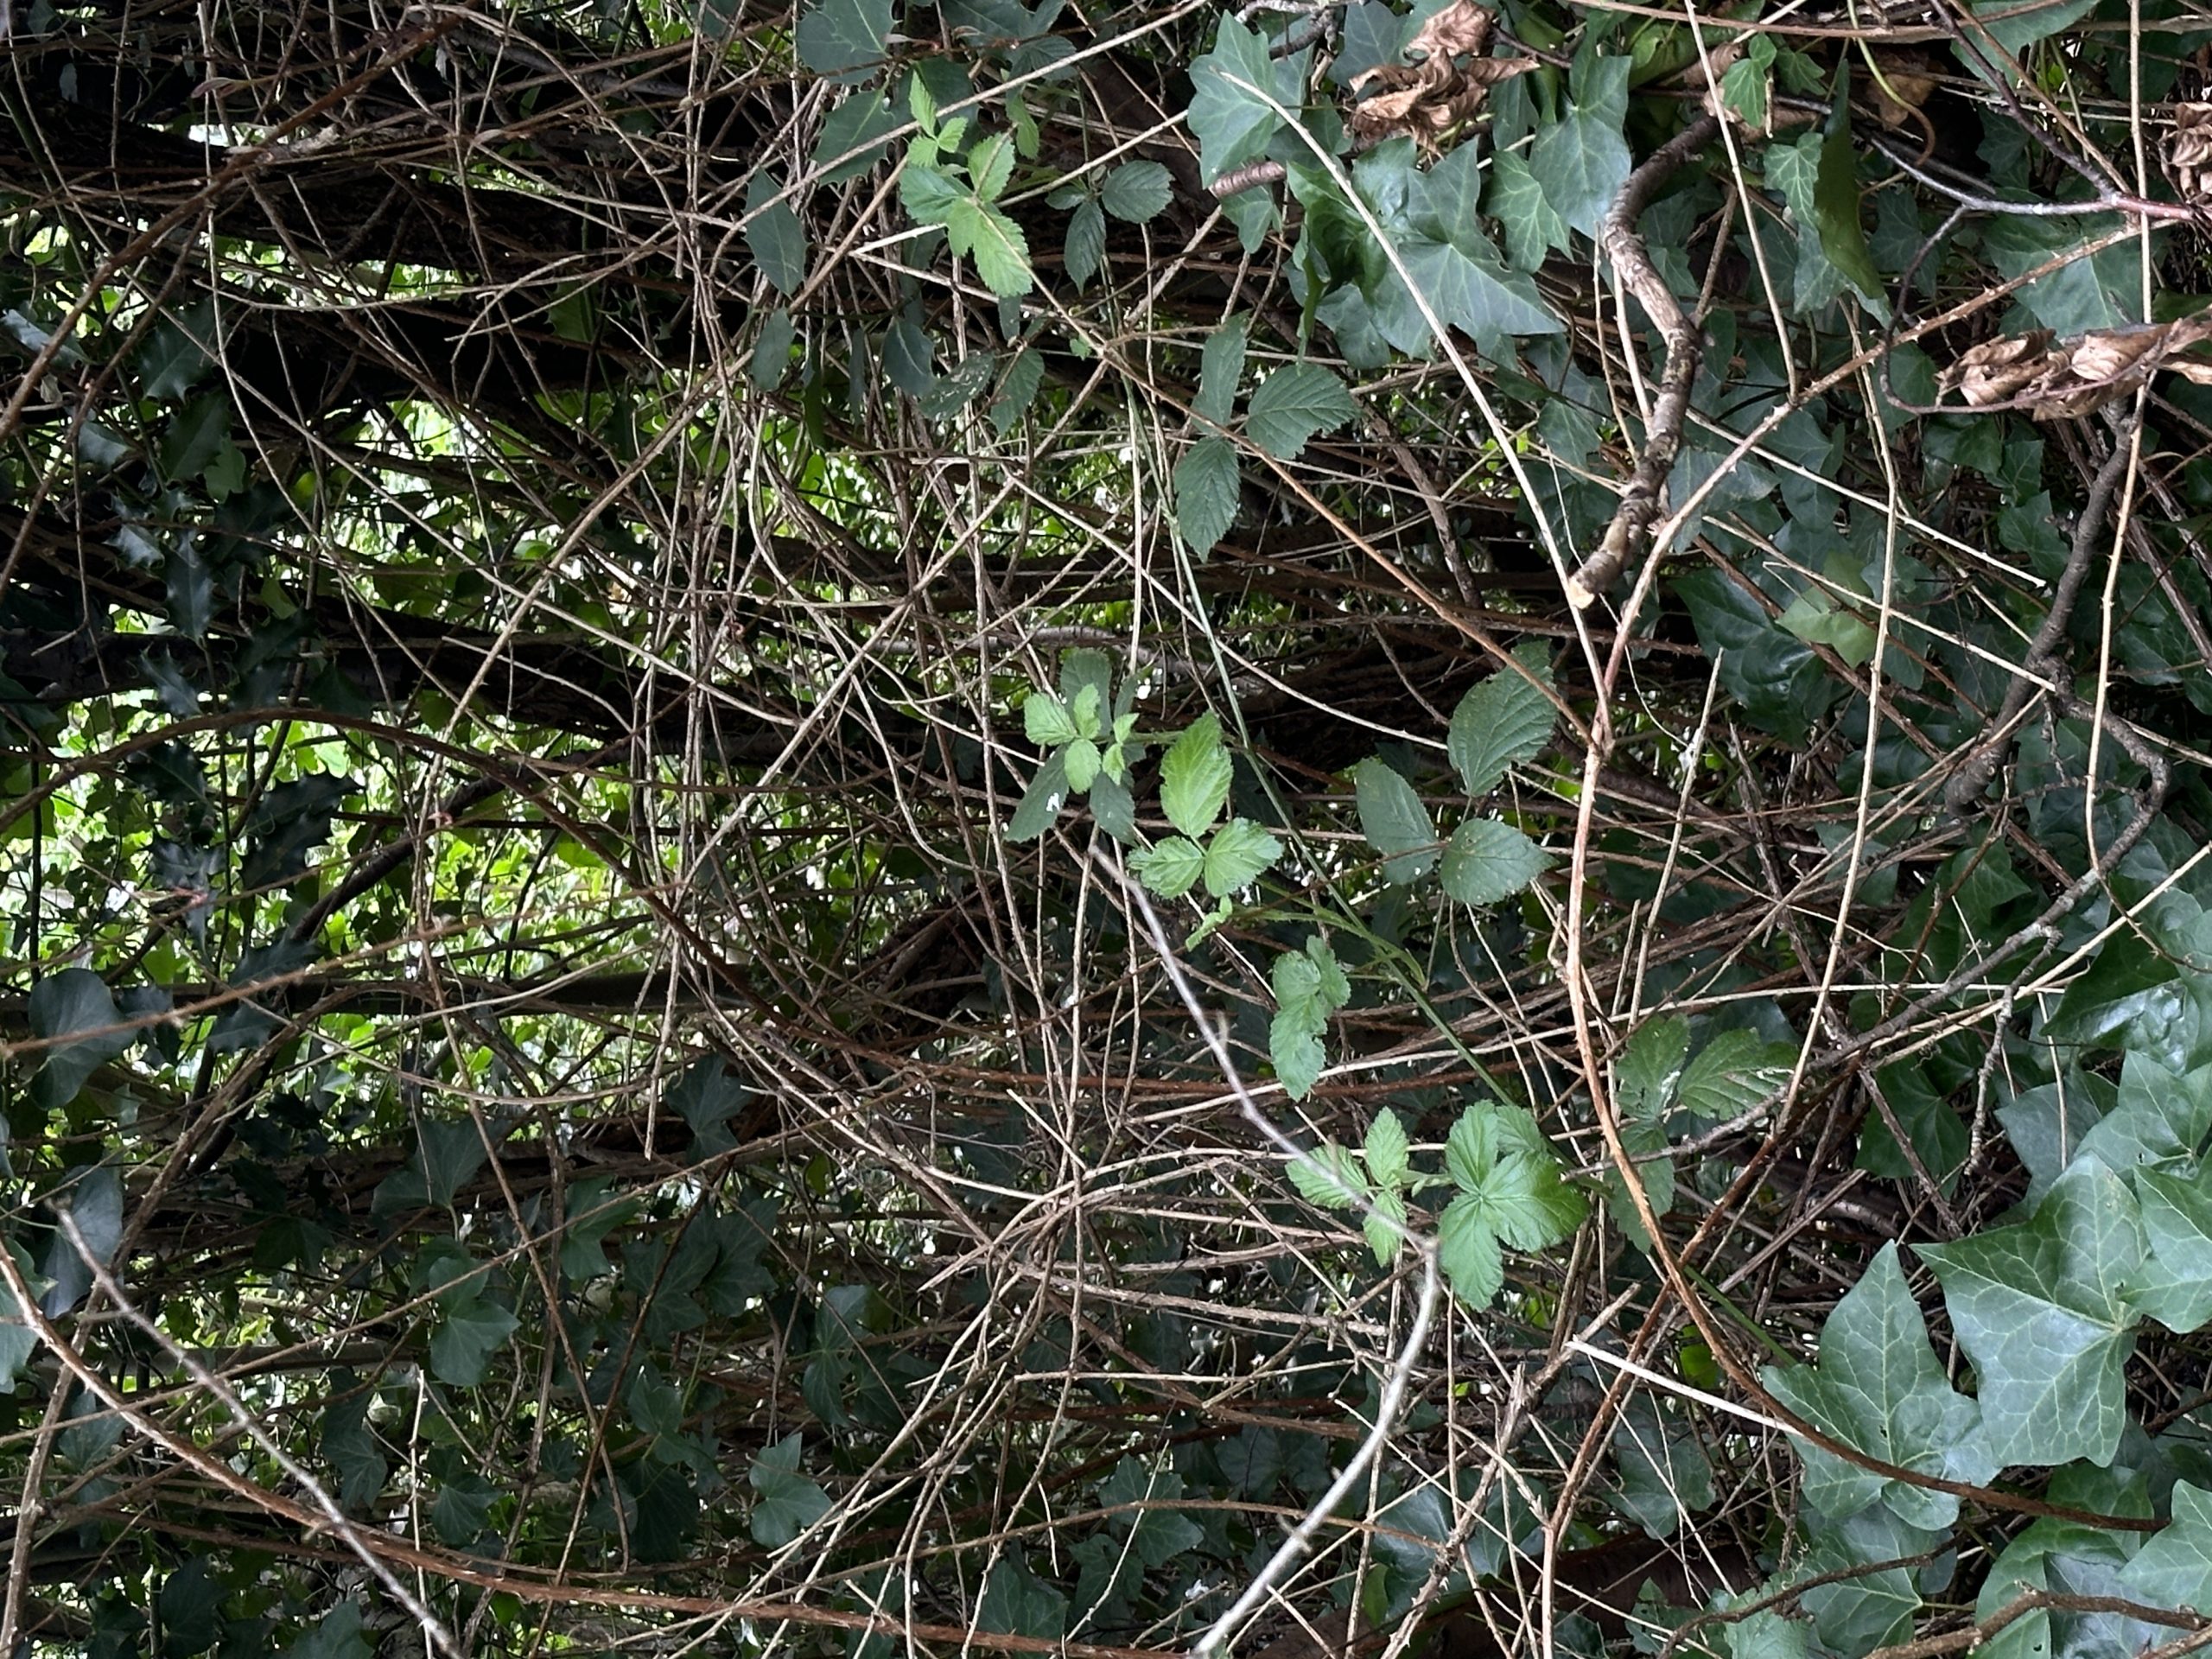
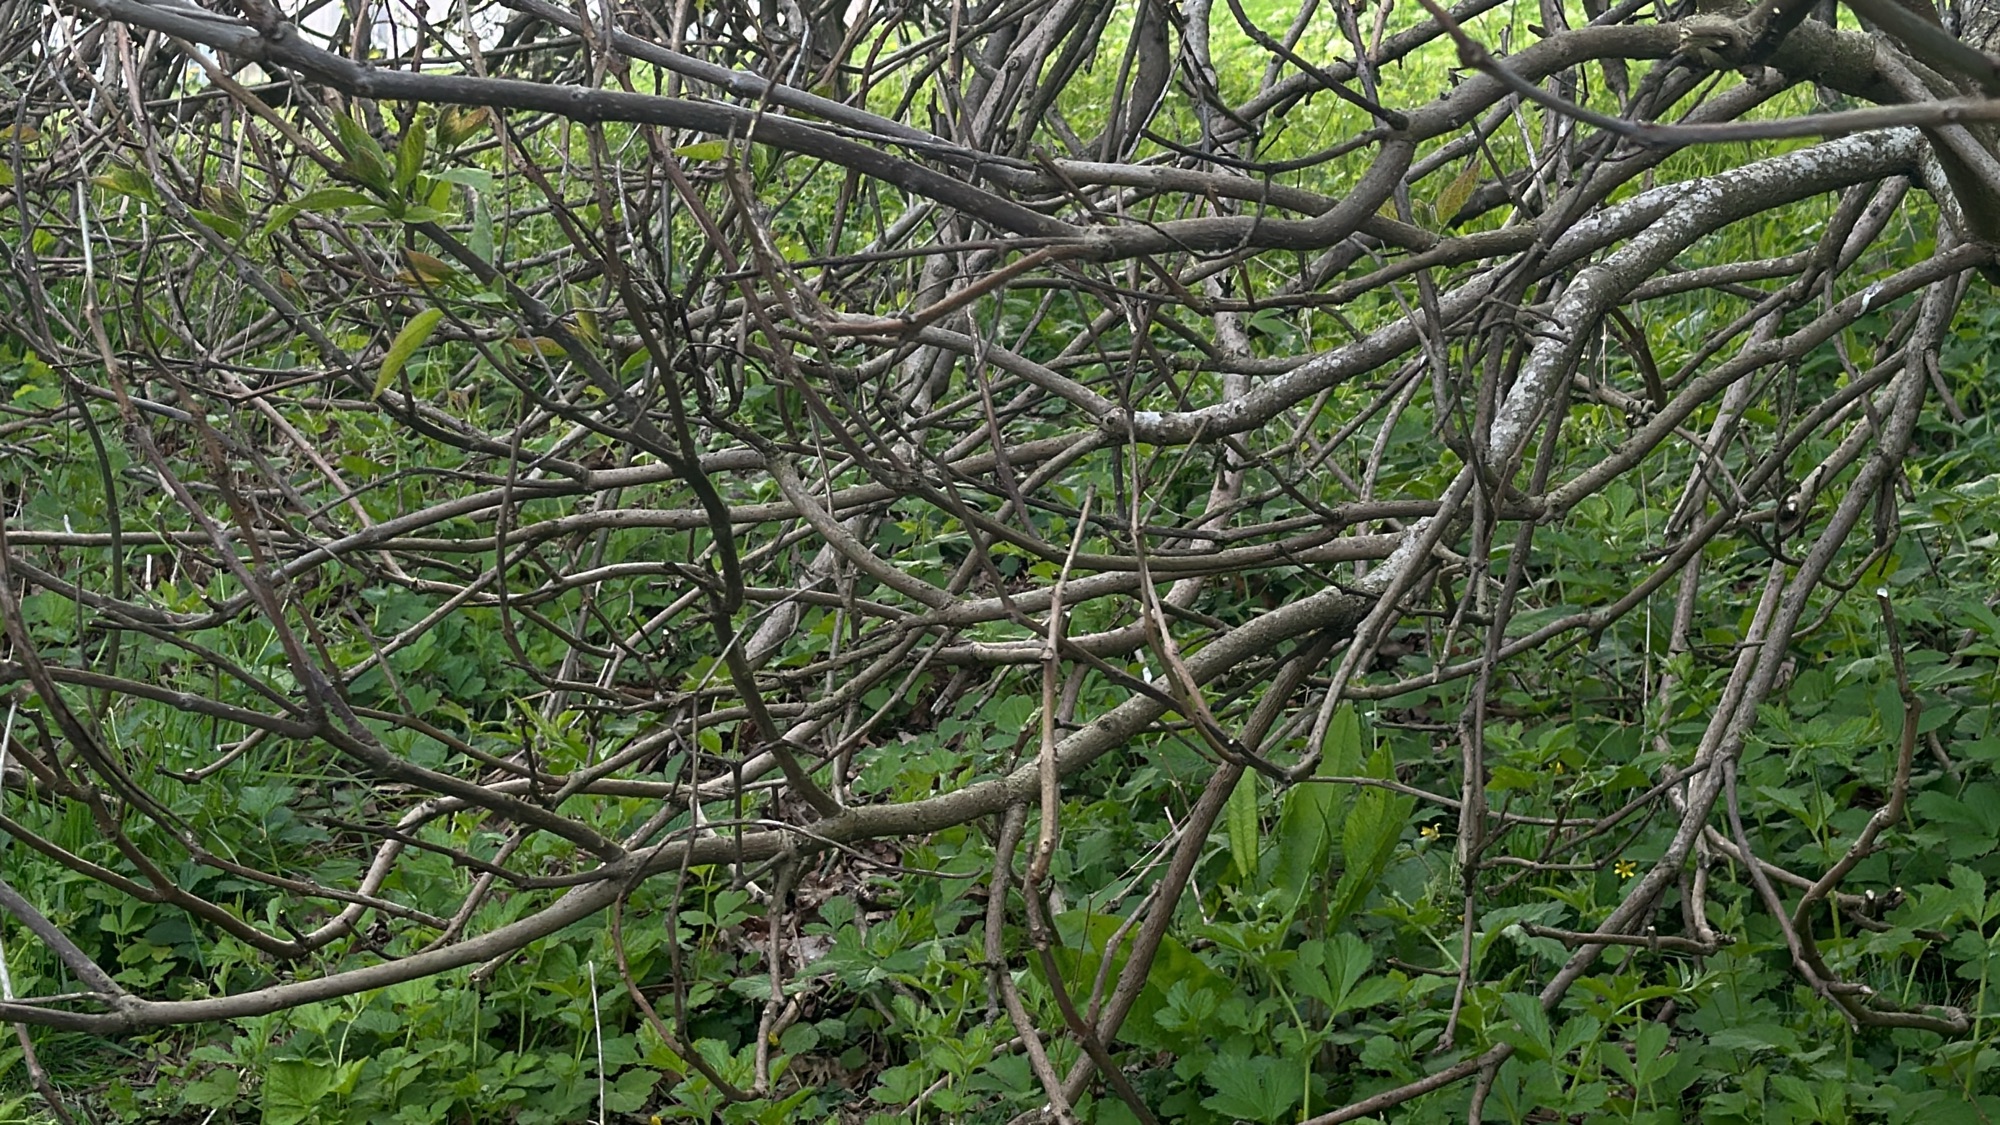
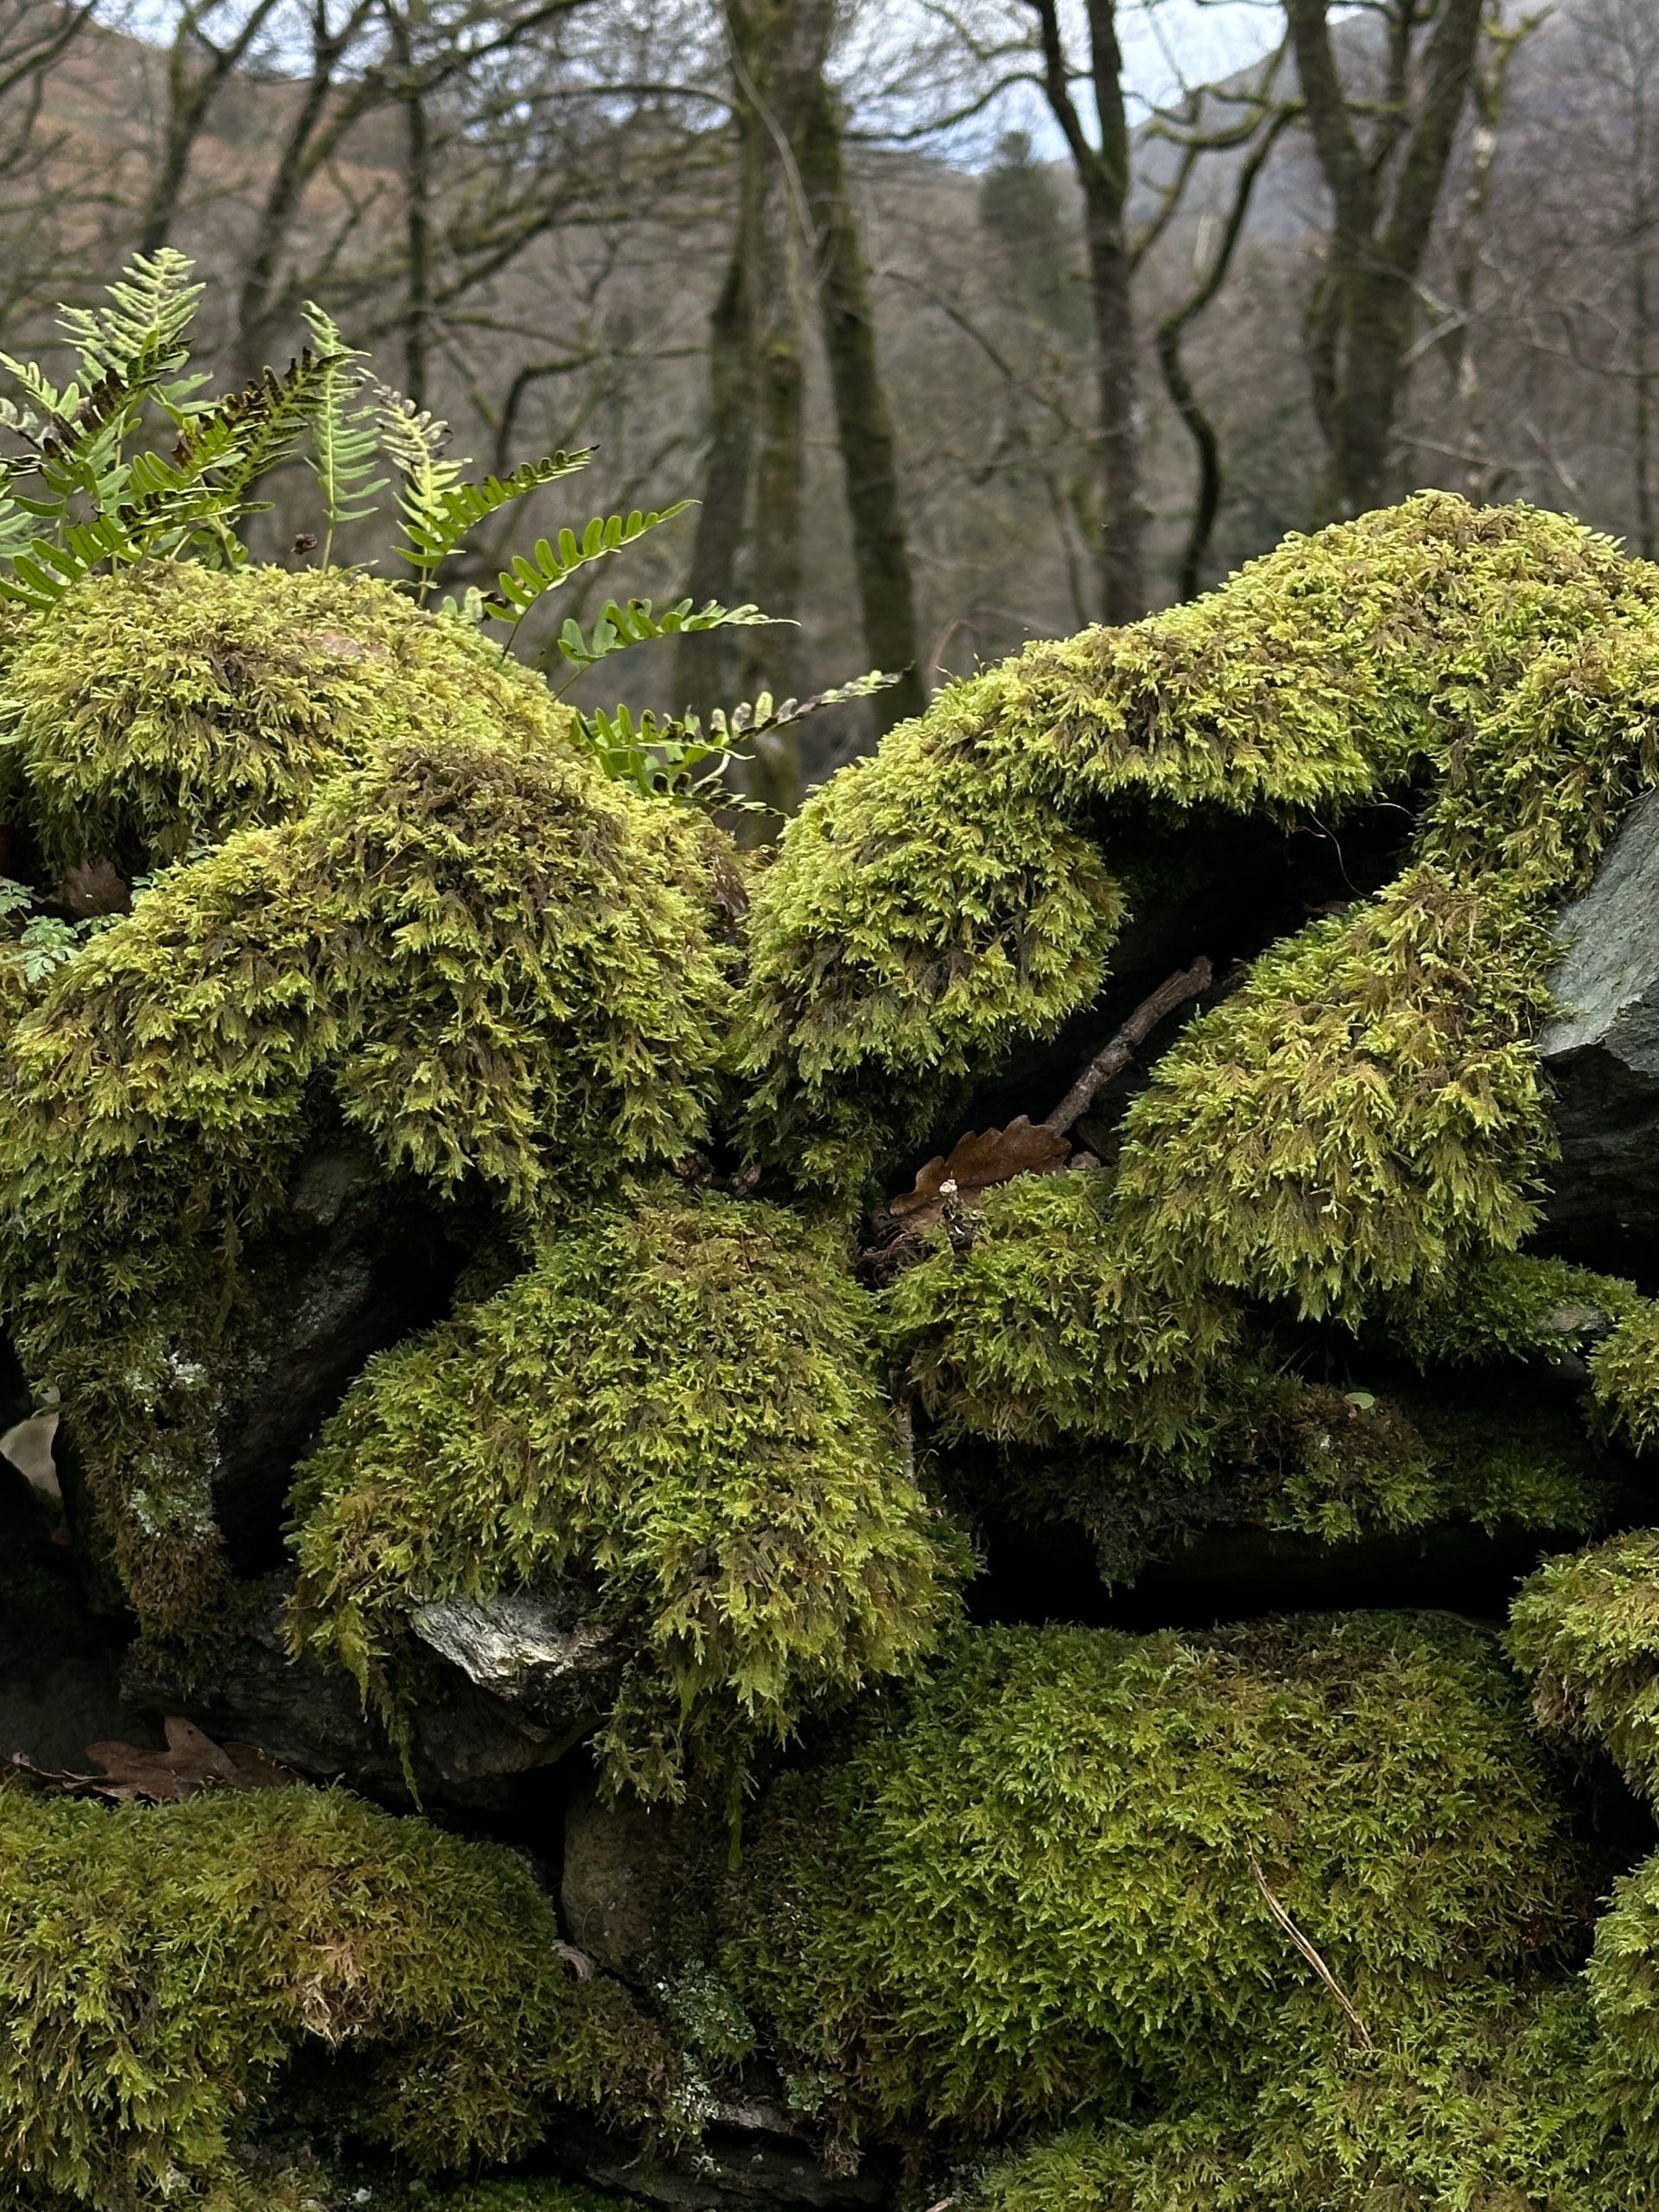
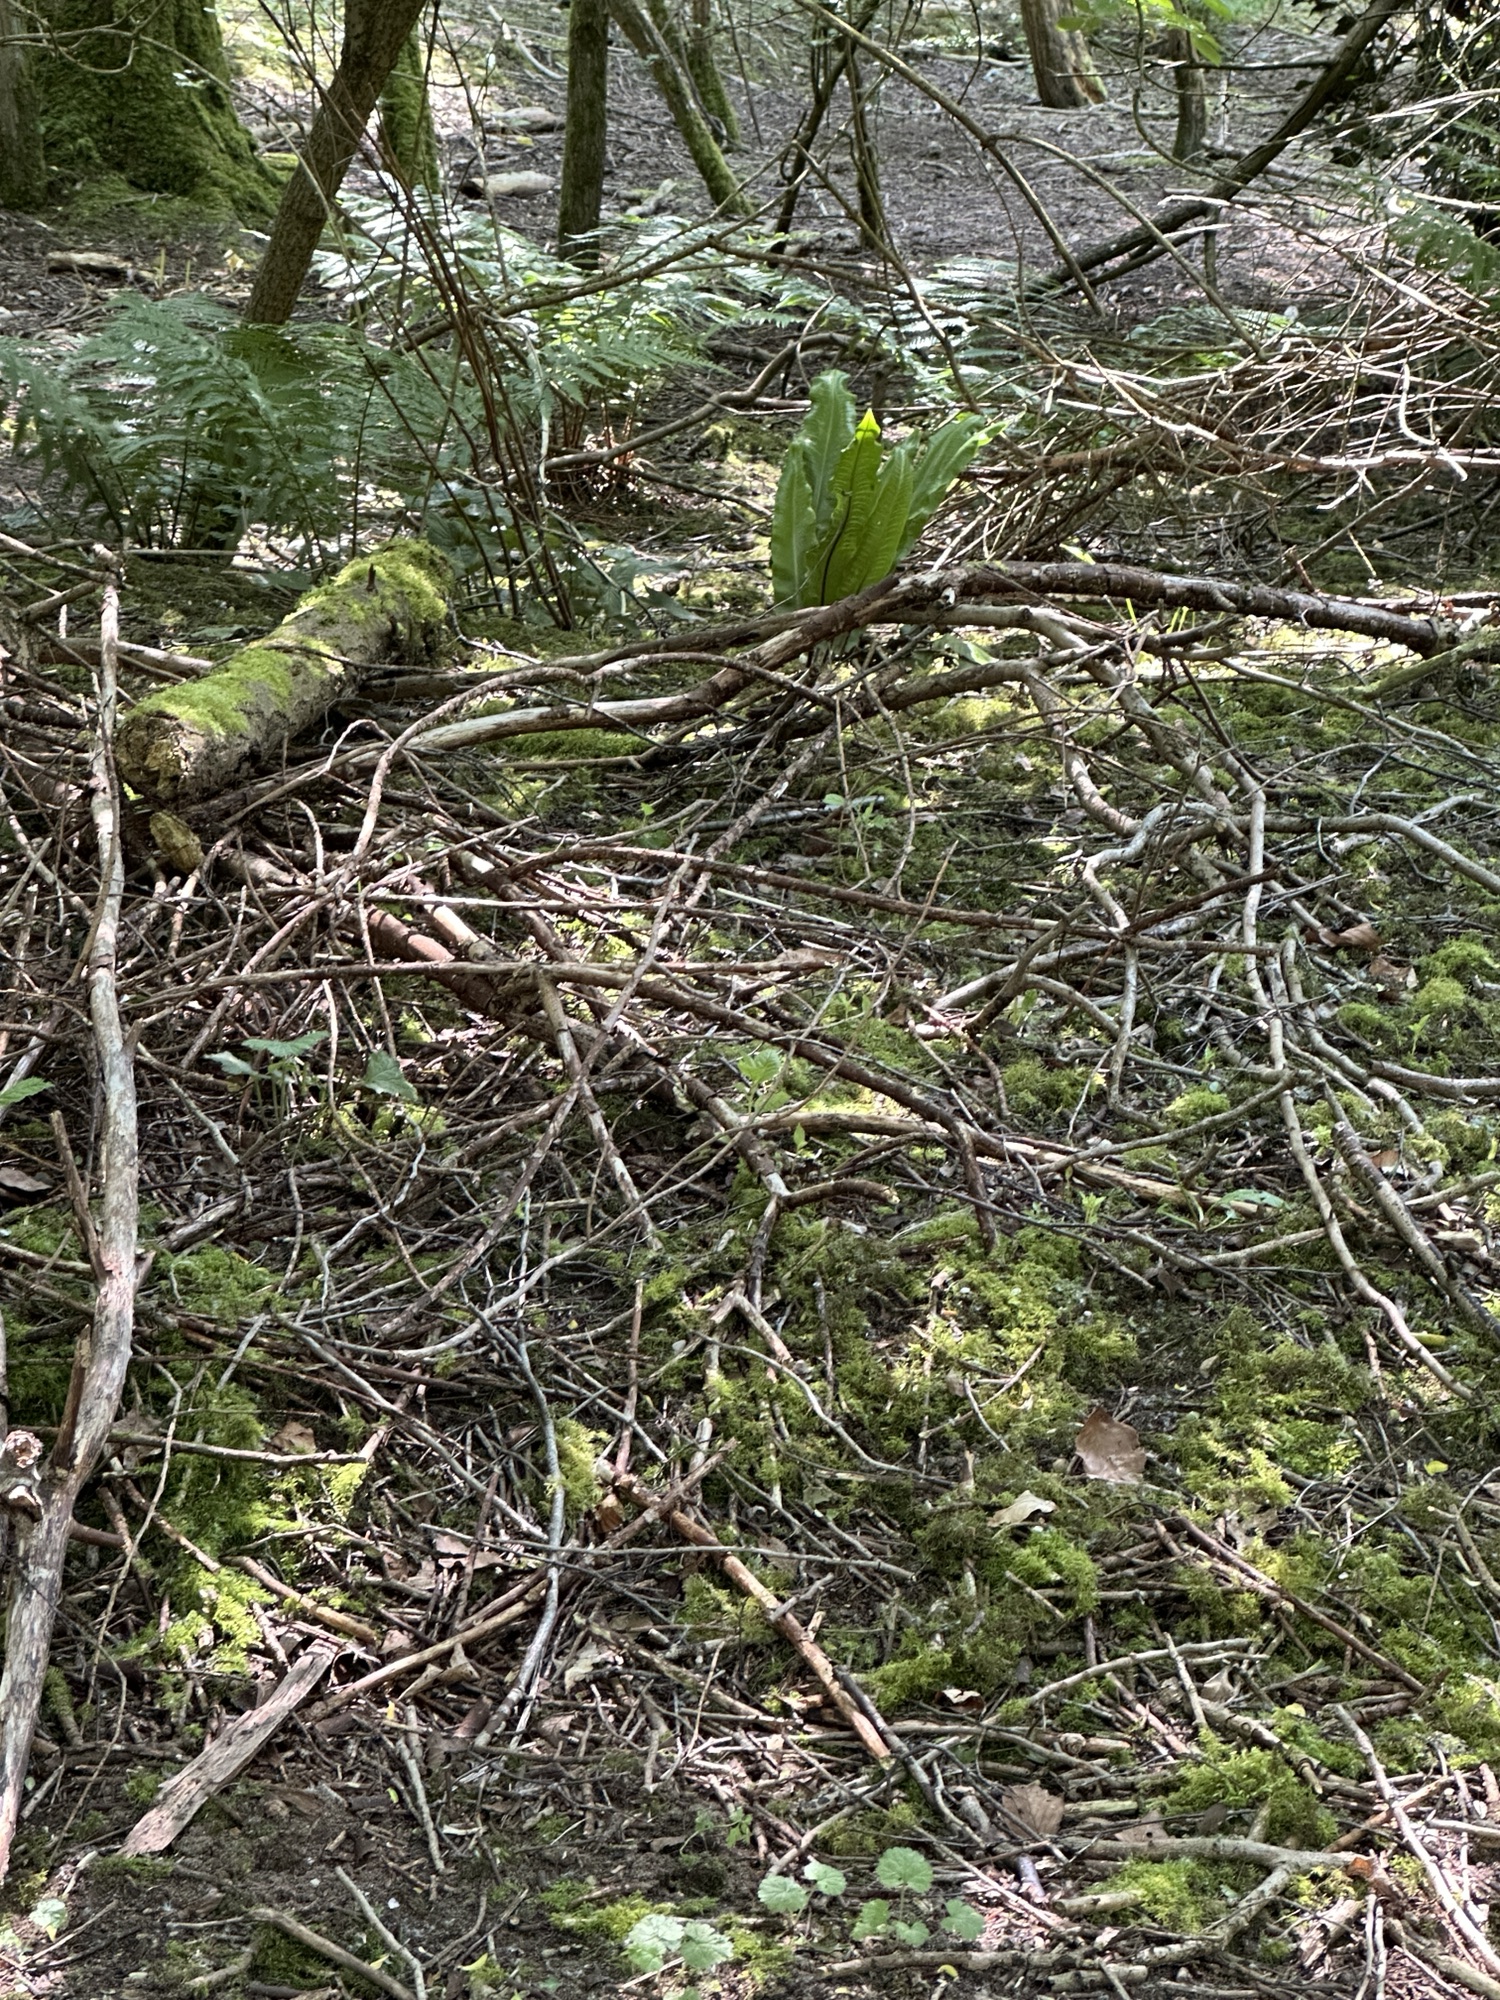
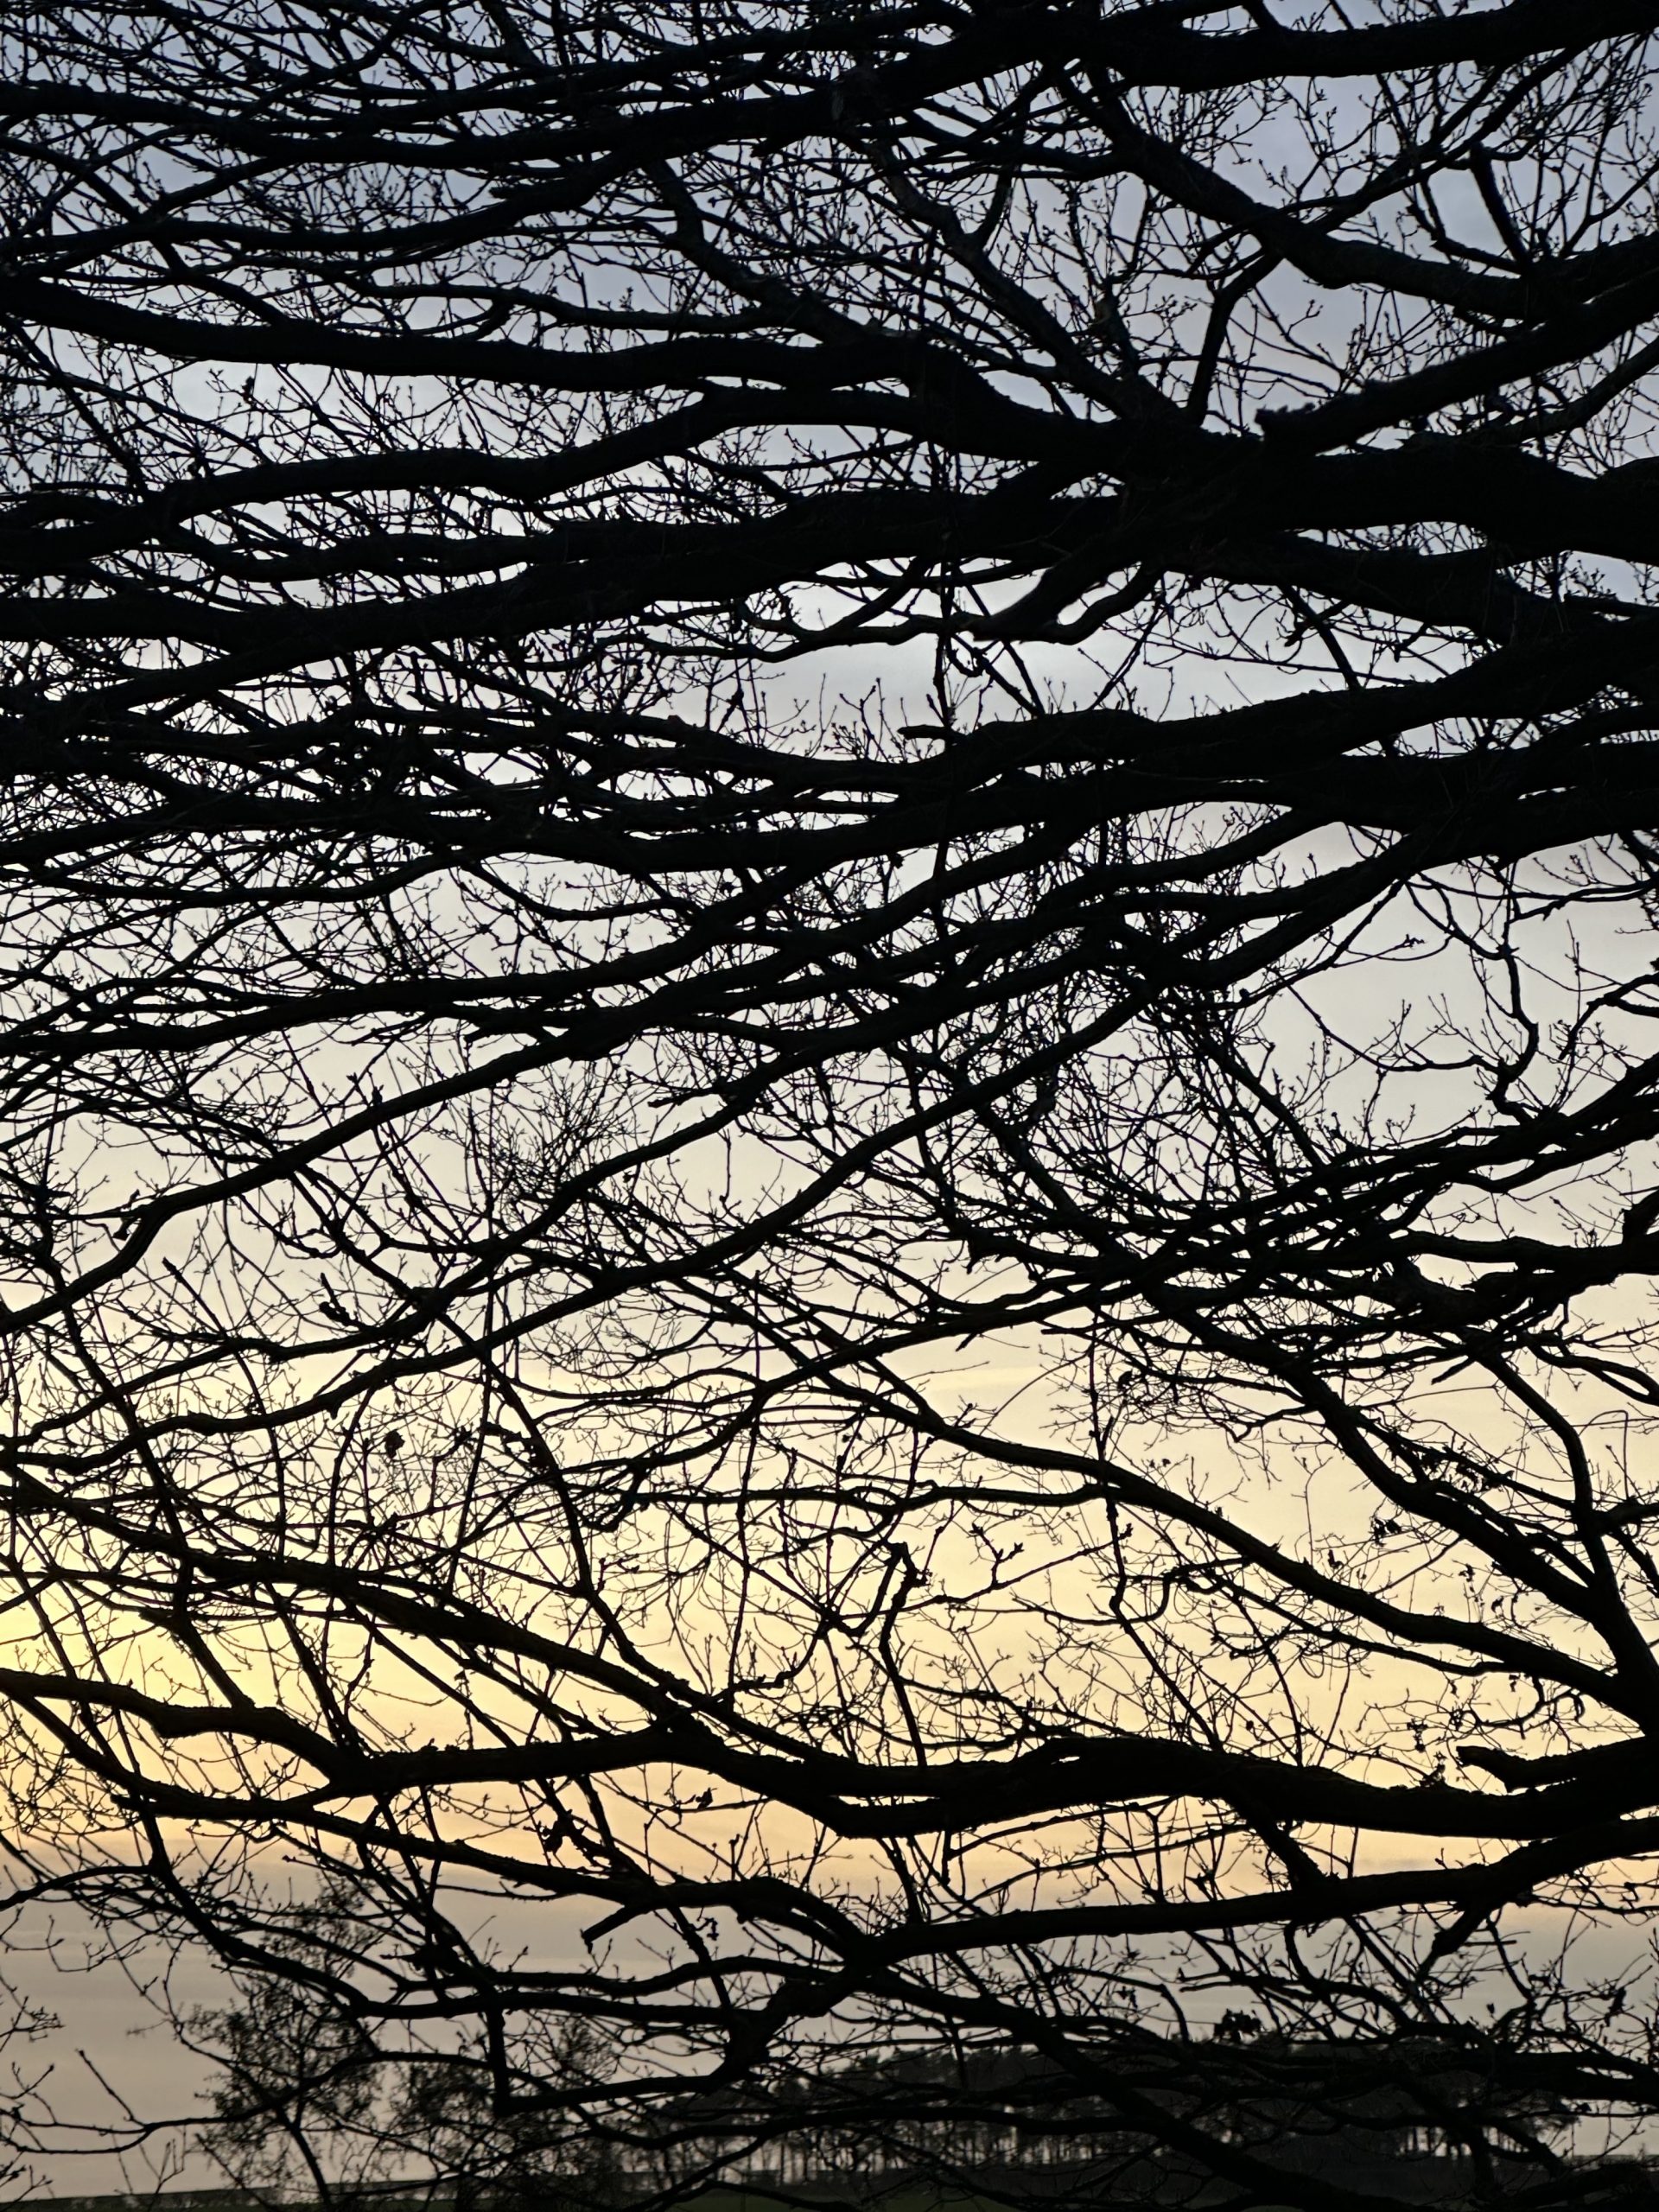
In this section, I put in some photos I usually take of some tangled forms. Most of them are about the lines and directions of the branches and their intersections, which I am interested in.
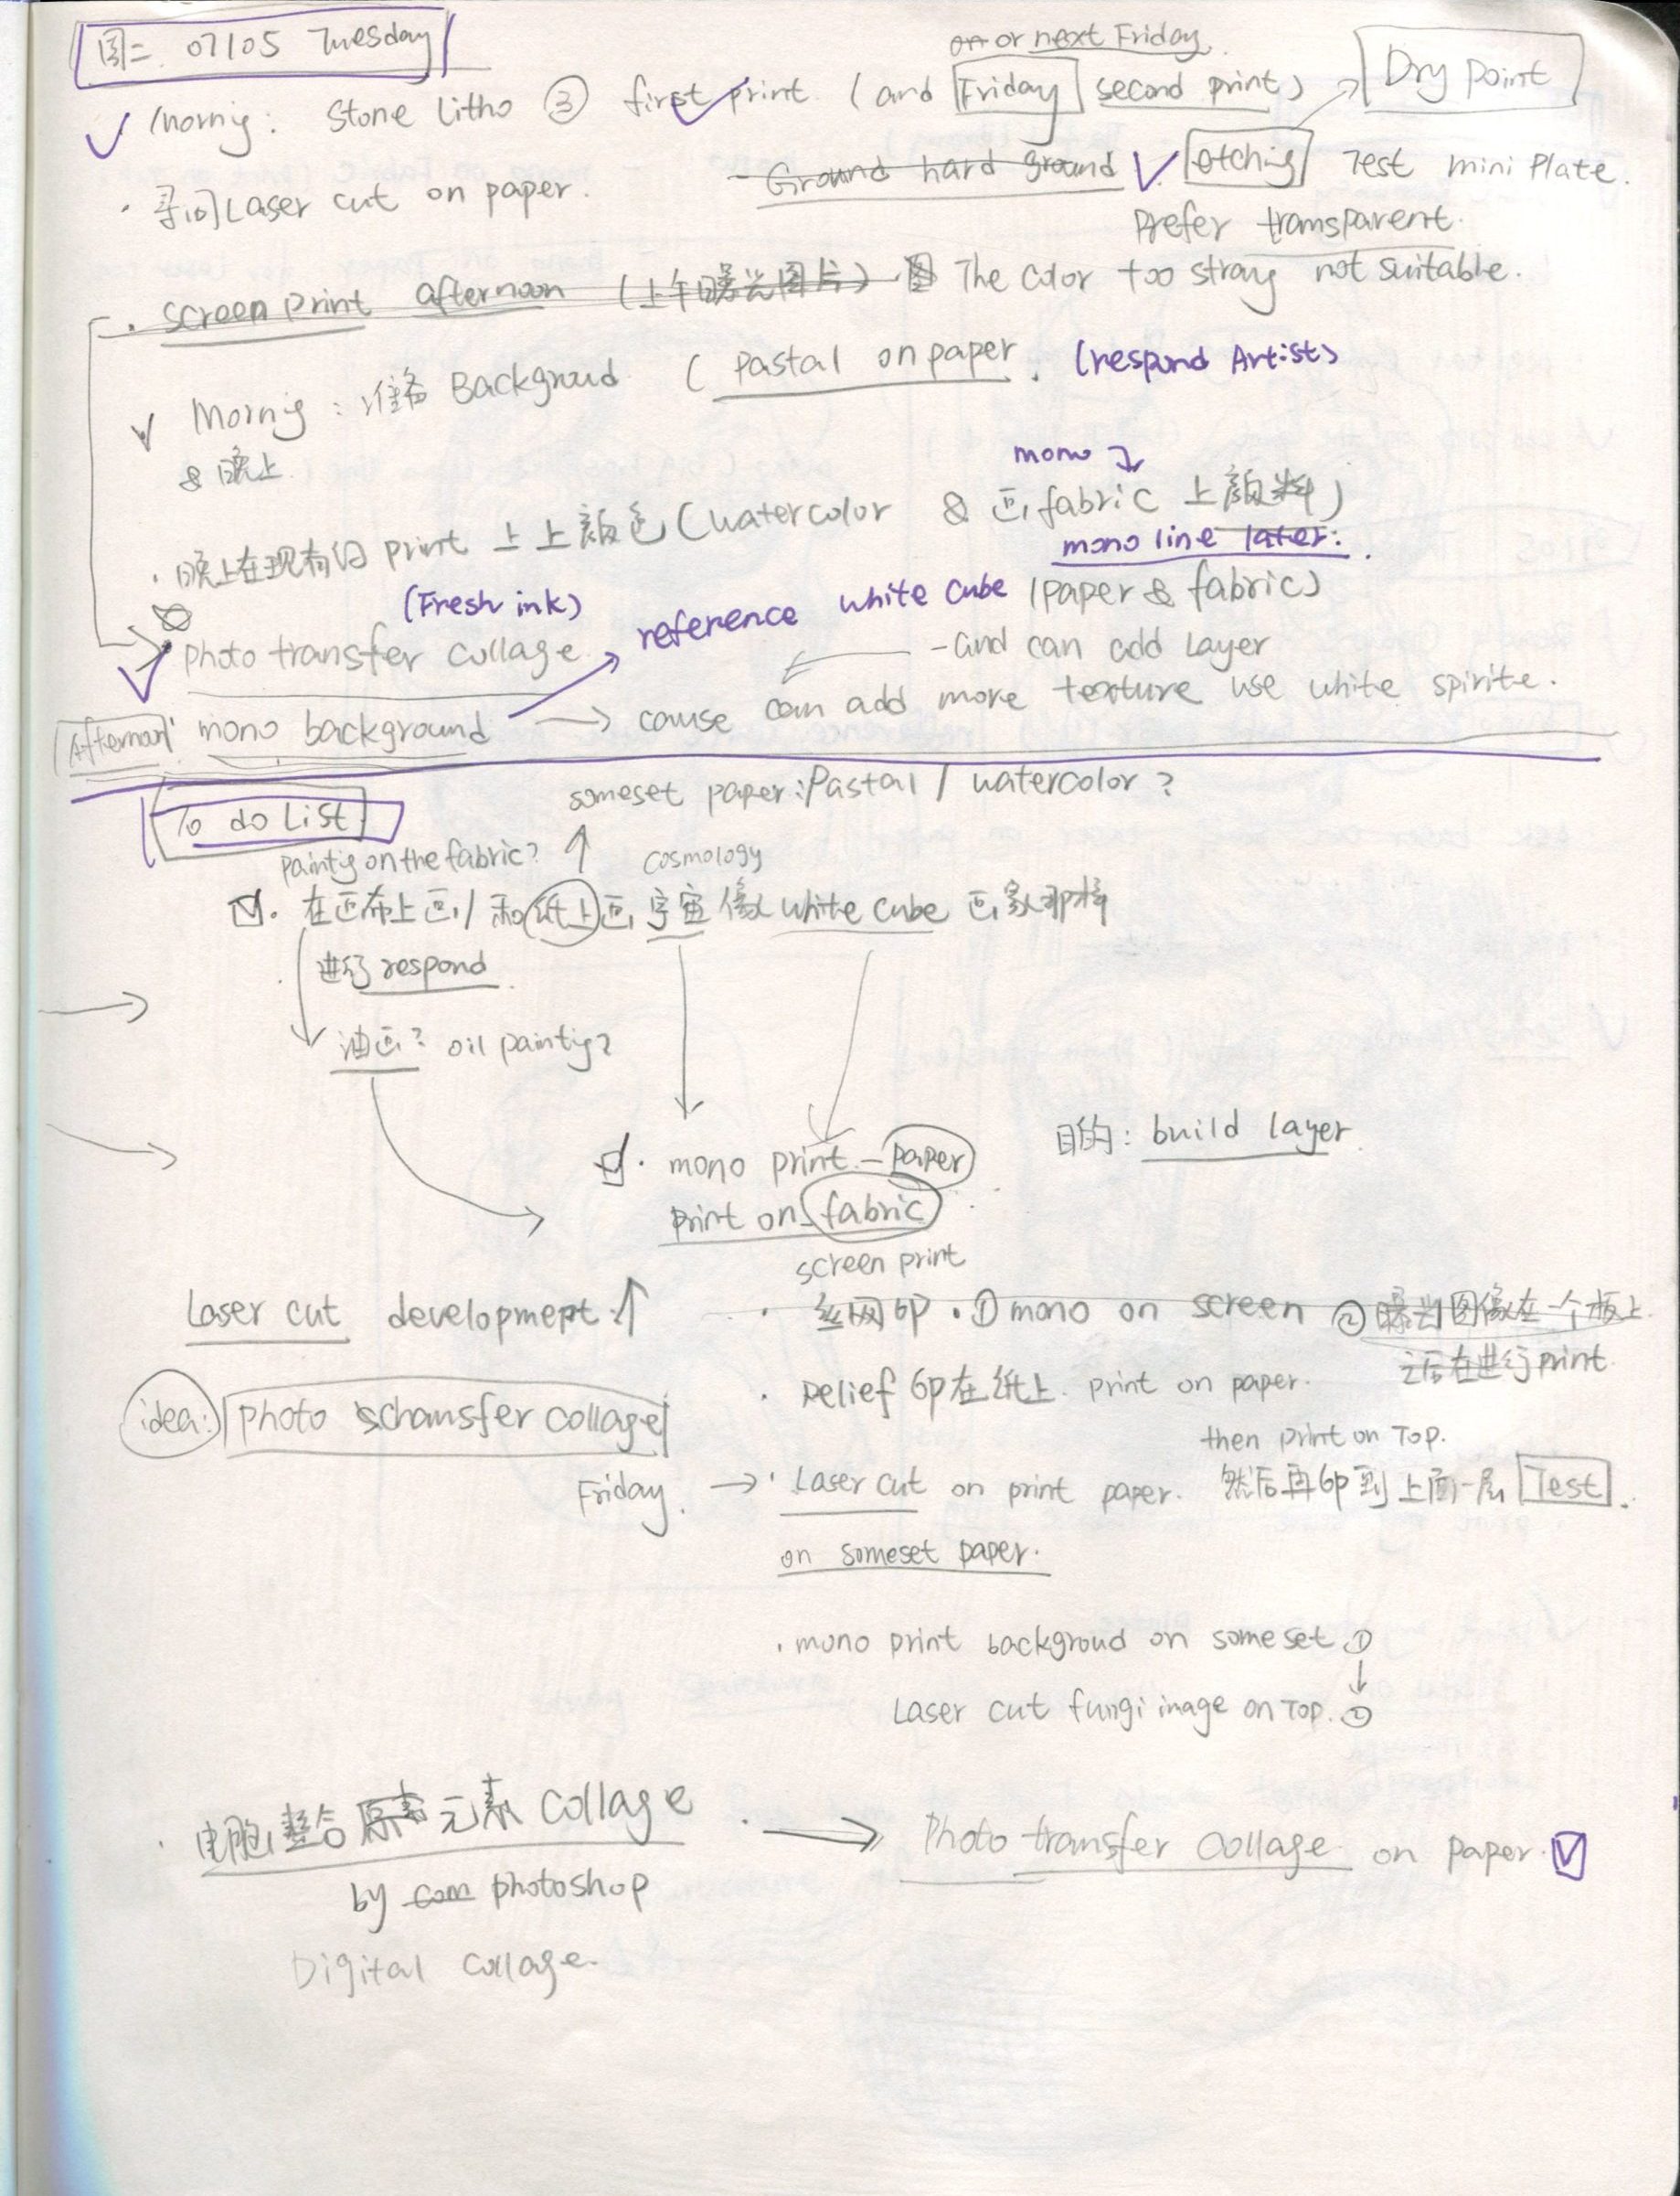
I put in two pages from my sketchbook. the two pages on the left are the plans I usually write in my sketchbook when I make a work.